TaskMapper Forms (Old)
Last updated February 4, 2025
TABLE OF CONTENTS
Introduction to Forms
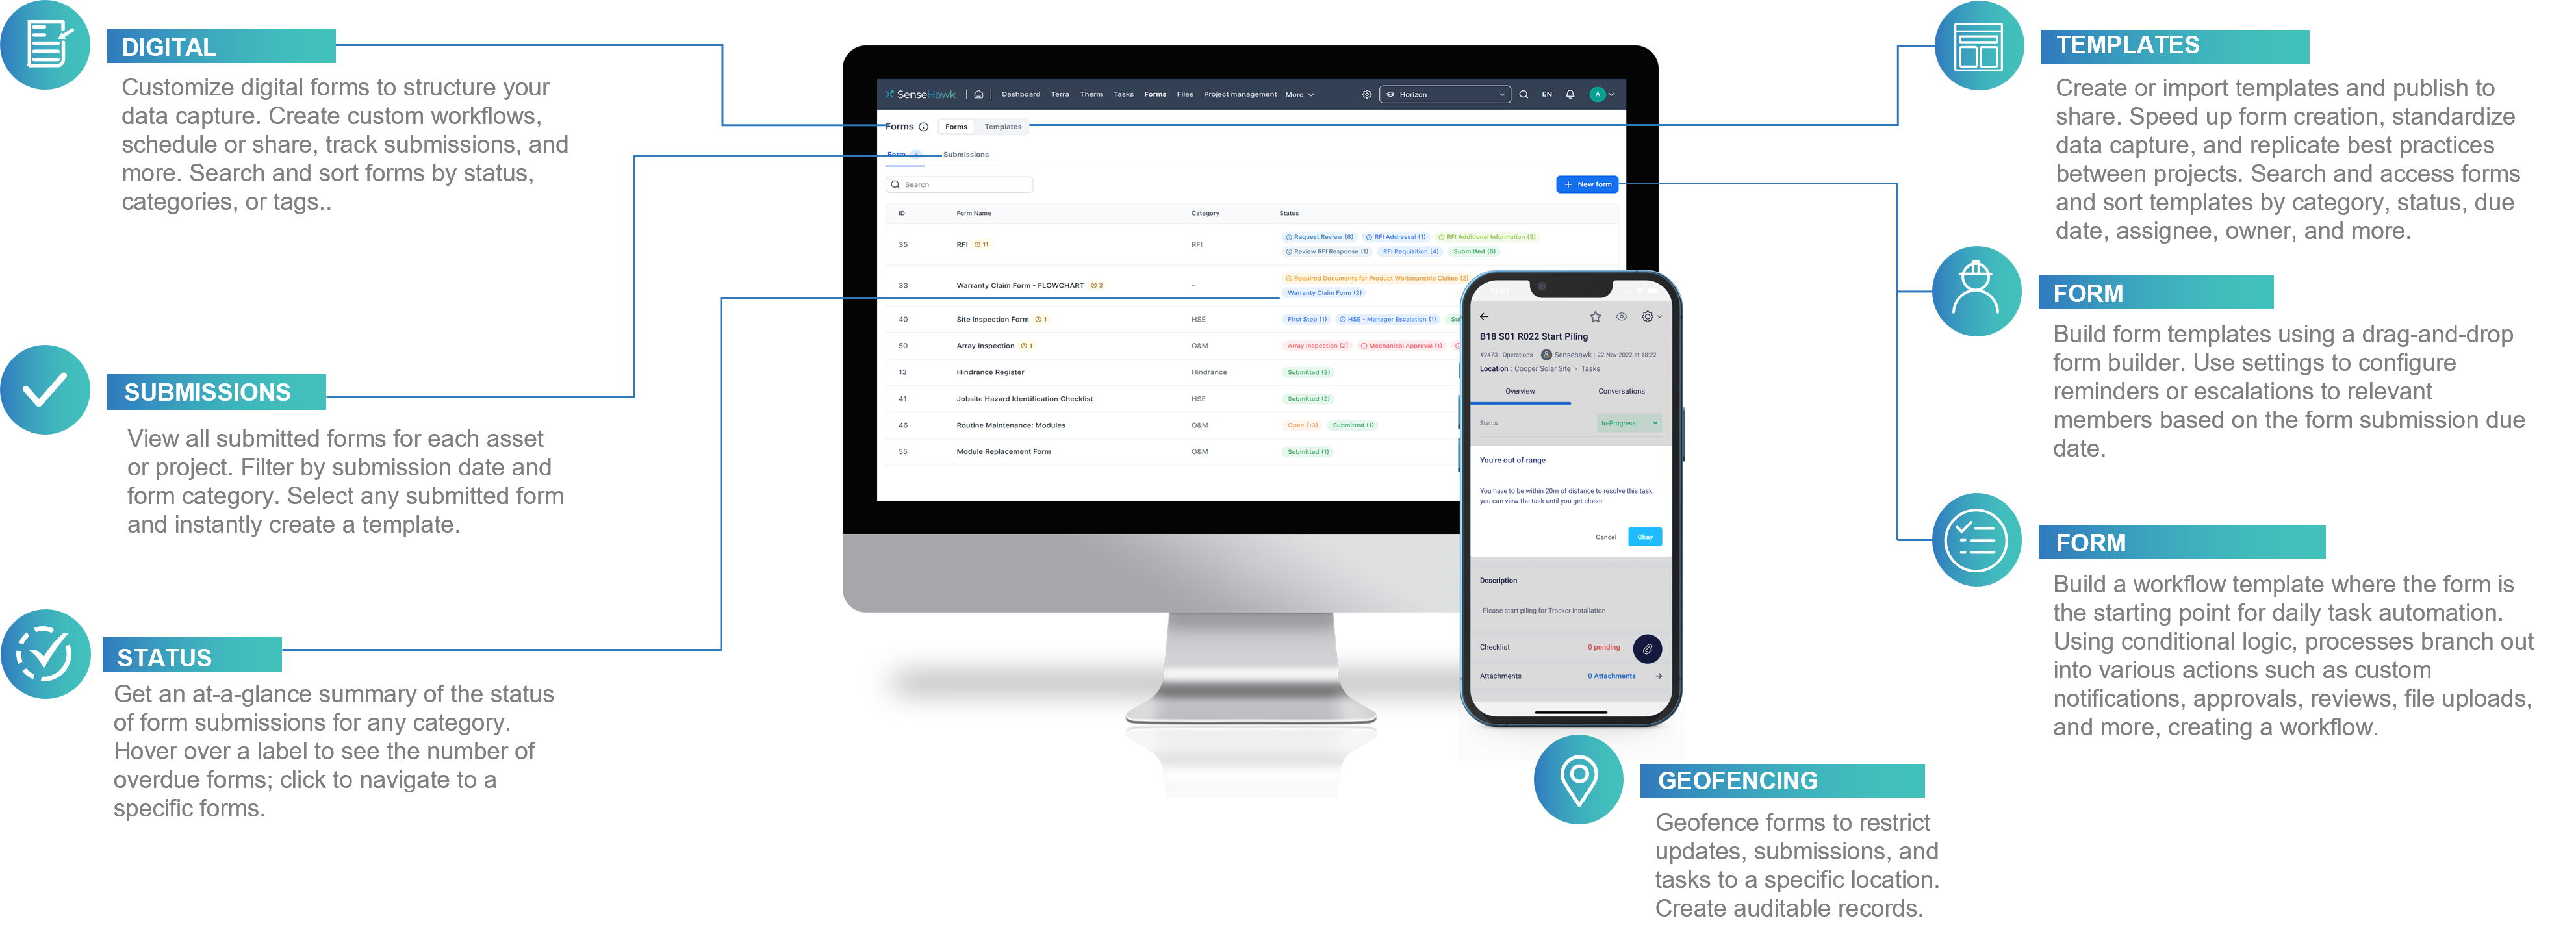
TaskMapper Forms simplifies onsite data capture with digital forms. Users can create forms with a drag-and-drop builder, choose from pre-defined templates, and define them as part of a larger workflow. Workflows support rules-based routing and conditional logic, helping teams replicate best practices and gain complete control of processes.
NOTE: This is especially useful in time-sensitive processes like RFIs, Change Requests, Submittals, and Transmittals.
Figure 1: Map and Mobile Interface for Tasks
Overview:
Form Templates
A template can be created from scratch or imported from other projects within an organisation.
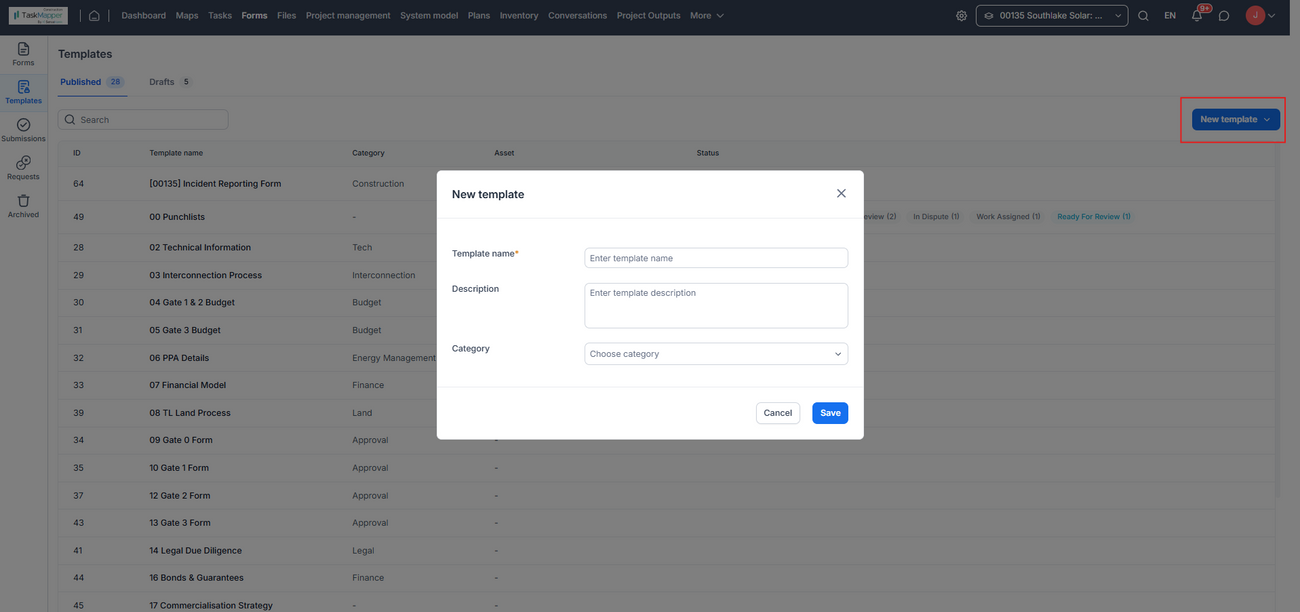
Figure 2: New workflow template
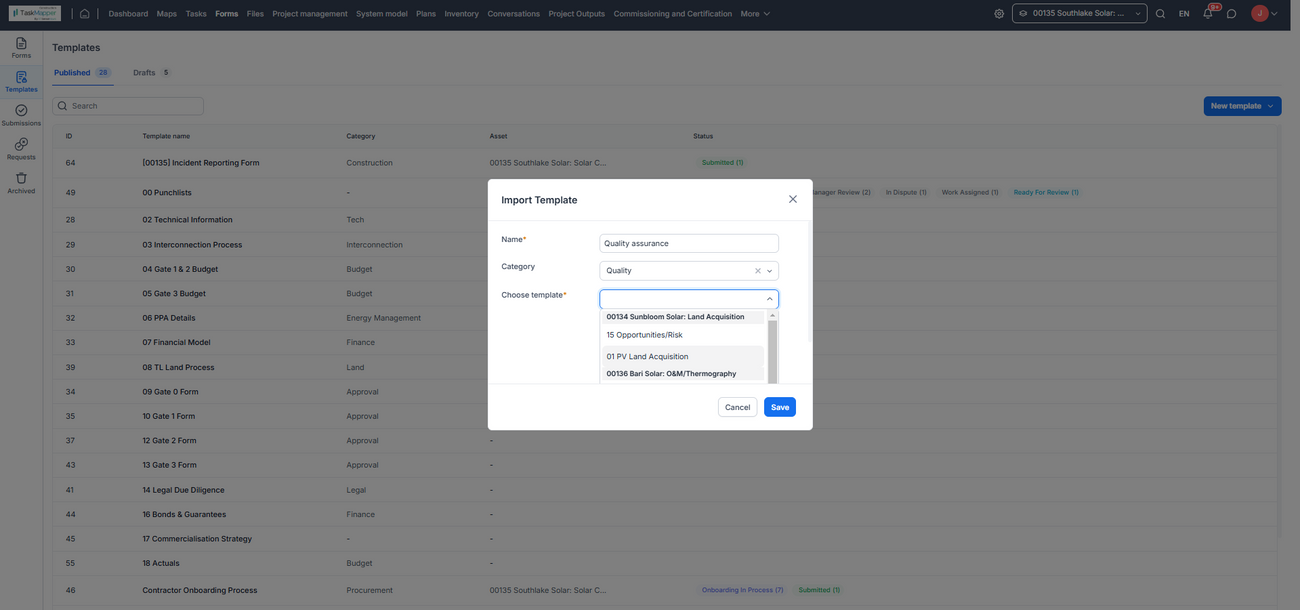
Figure 2a: Import template from other projects.
A form template helps you capture repetitive data easily by standardizing the fields and ensuring you include all the necessary details. Plus, with geofencing and timestamping, you can keep track of everything and ensure your records are accurate and reliable.
Form Builder
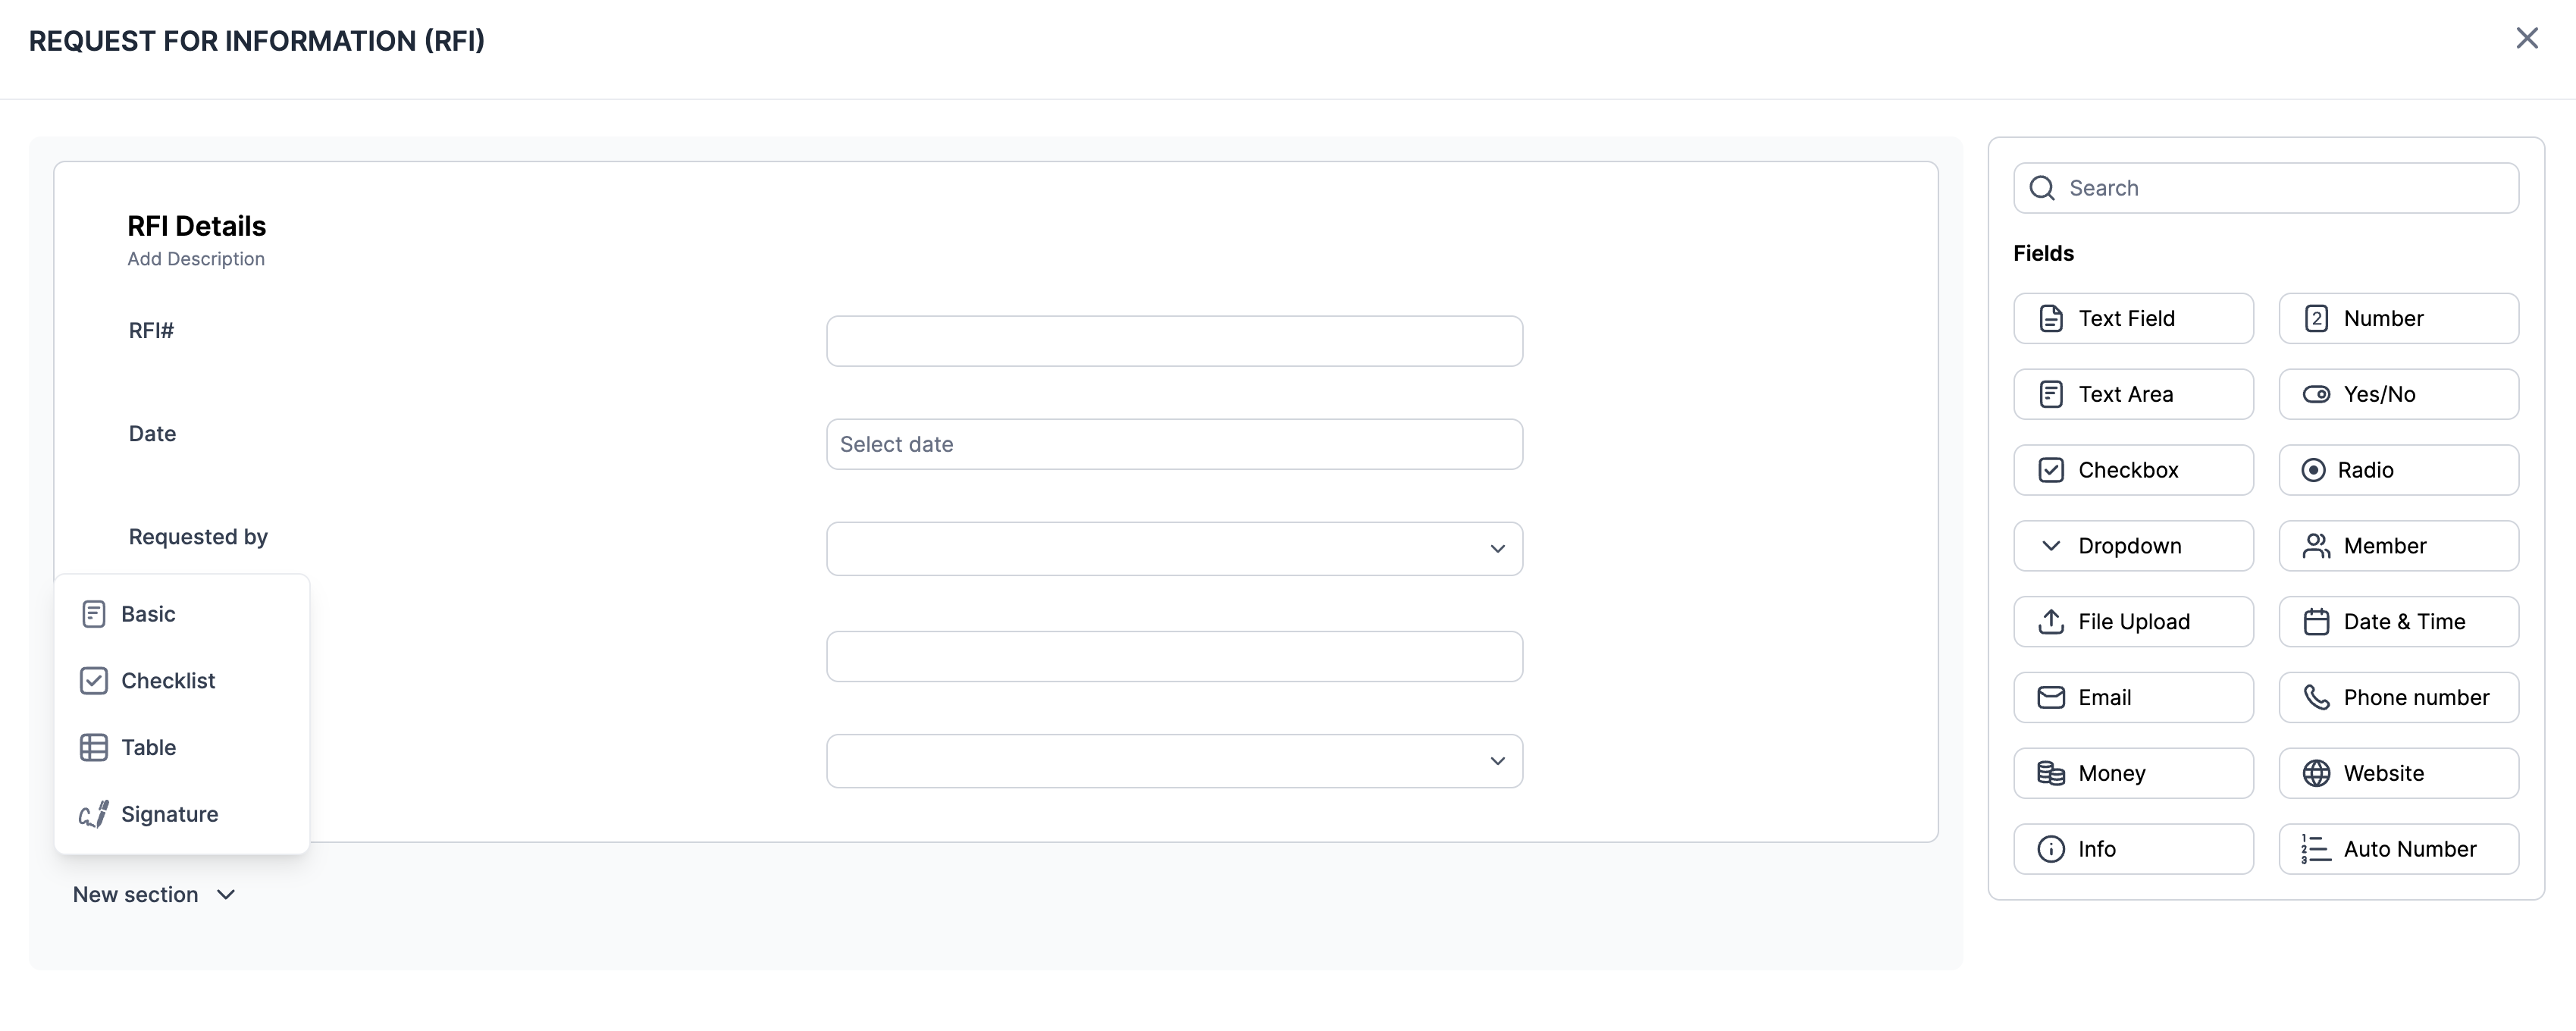
With our intuitive drag-and-drop builder, creating forms is easy. You can choose from various pre-defined formats and fields and customize specific fields in pre-existing templates to fit your needs. Plus, you can preview available templates before making your selection.
Figure 3: Form Builder
Form Builder Overview
A form builder comprises Sections and Fields.
Sections
A form can be divided into sections with headings for specific information. This arrangement makes it easier for users to fill in and for recipients to organize and analyze the data.
Under sections, we have Basic, Checklist, and Table.
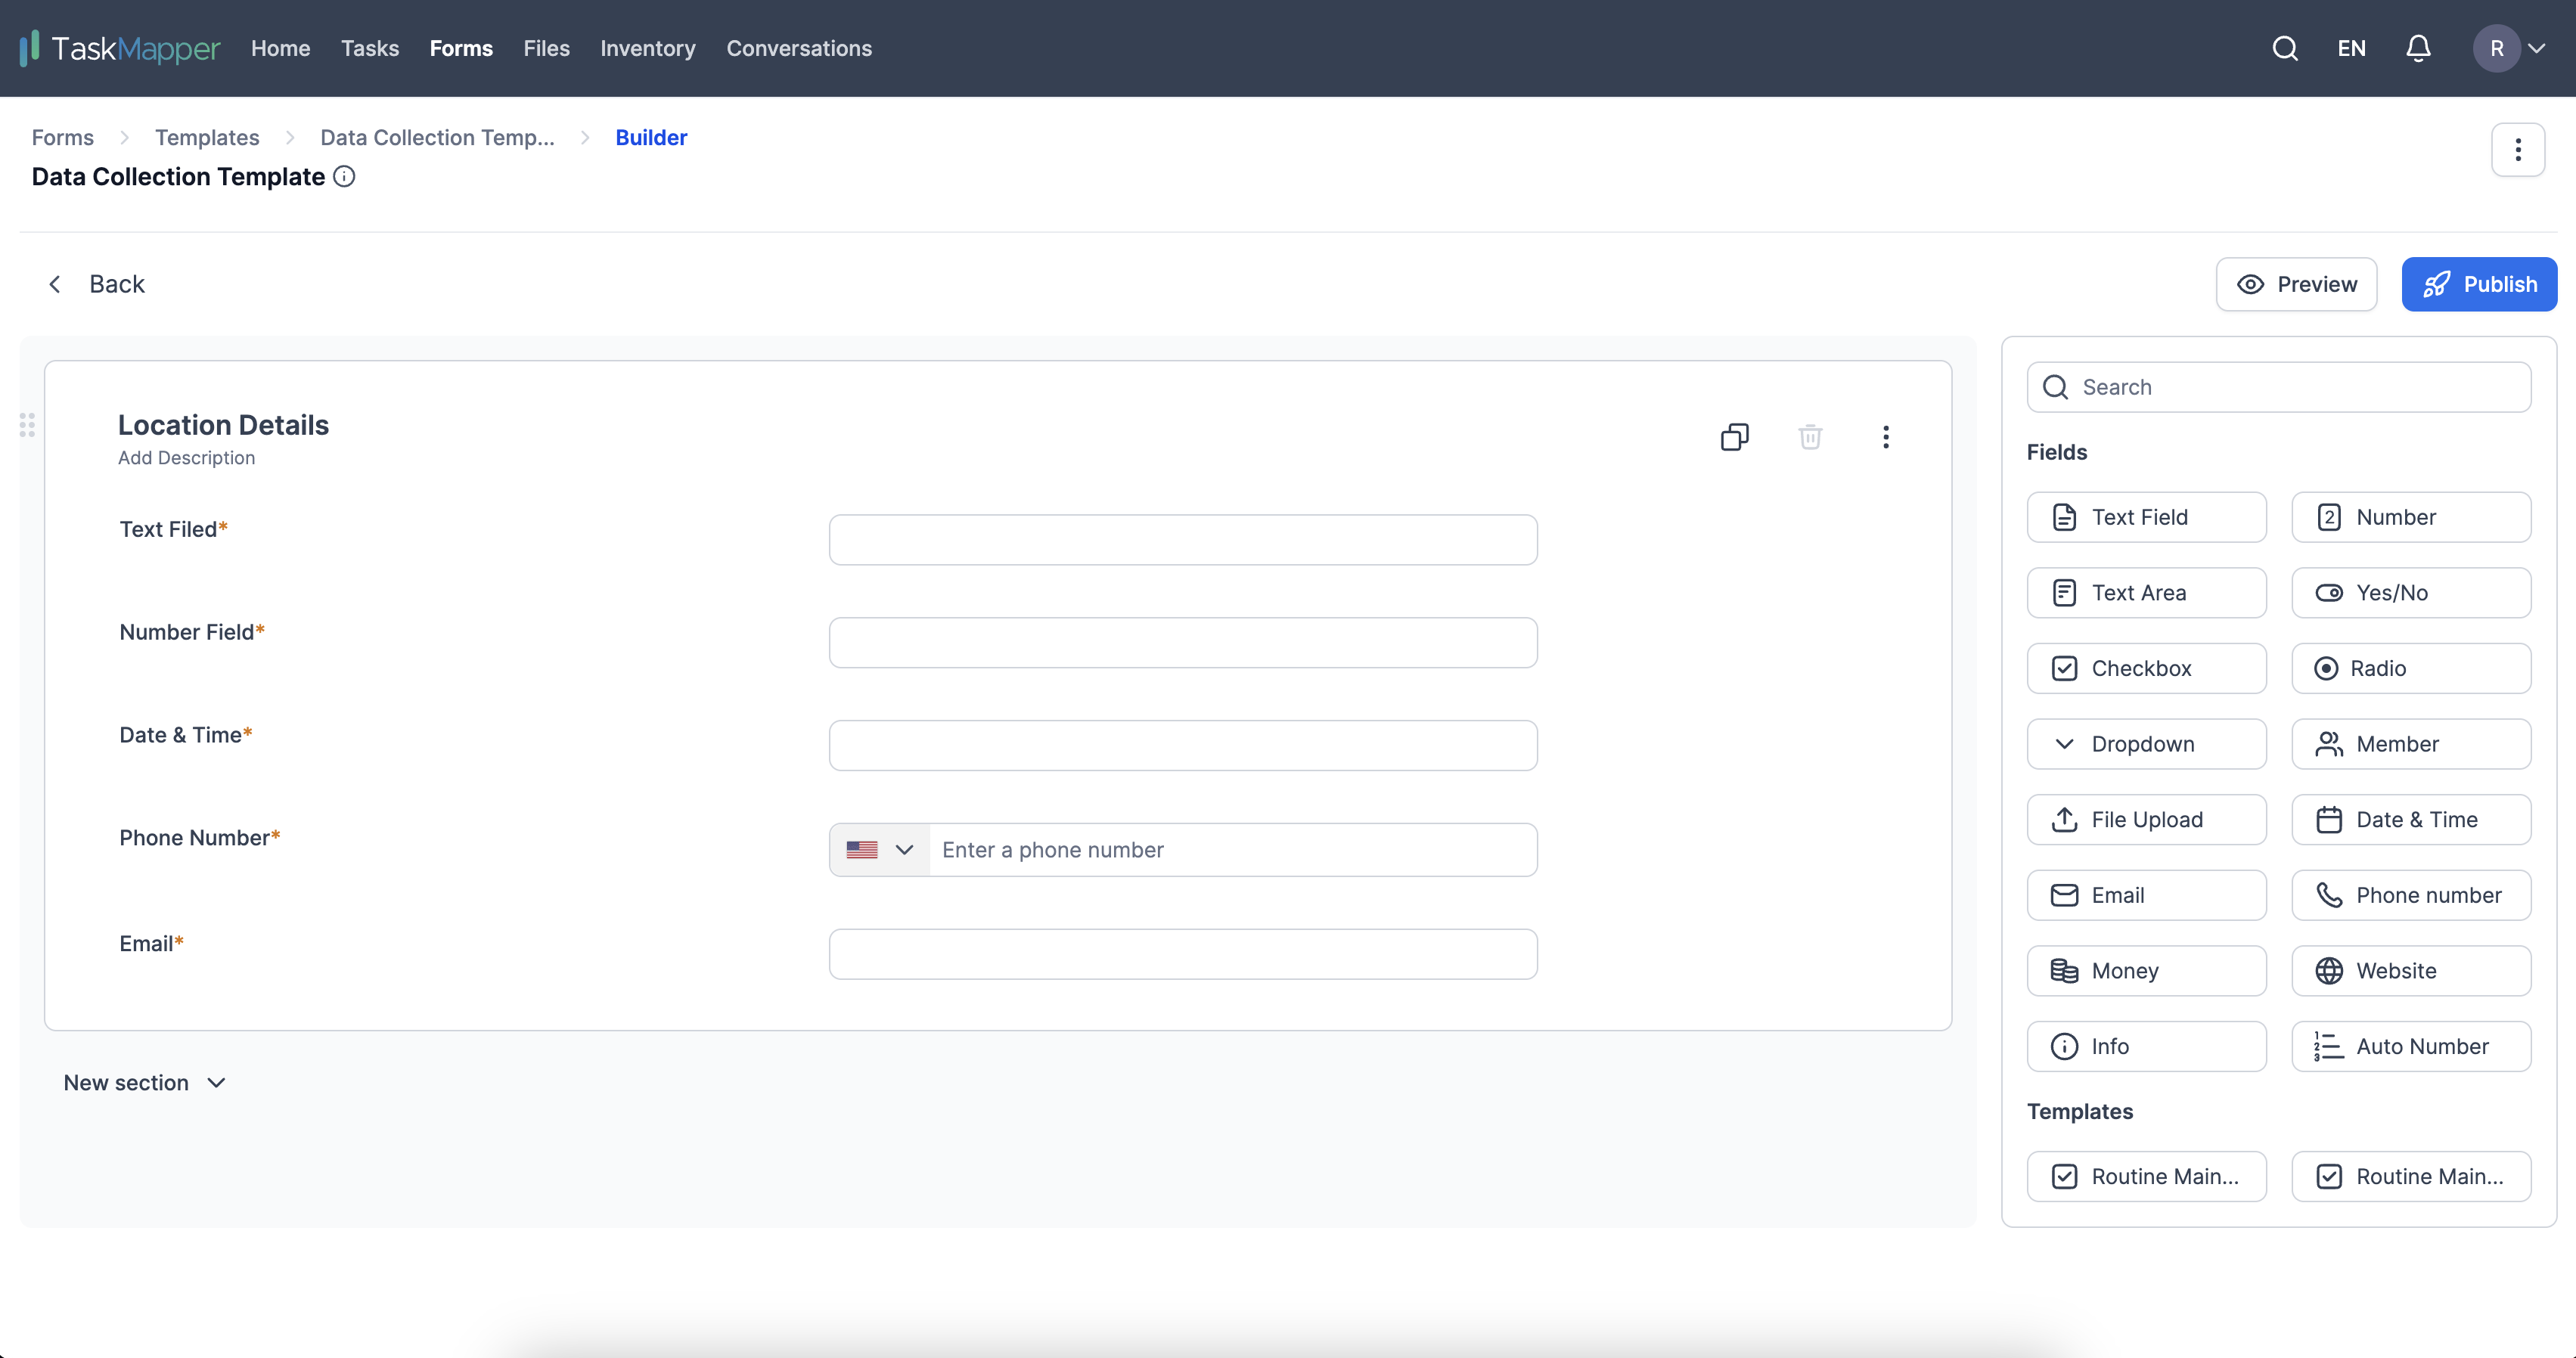
1) Basic adds a blank section in which all the field items, such as the Text Field, Number, Date & Time, etc., can be dragged and dropped.
Figure 5: Basic section and fields
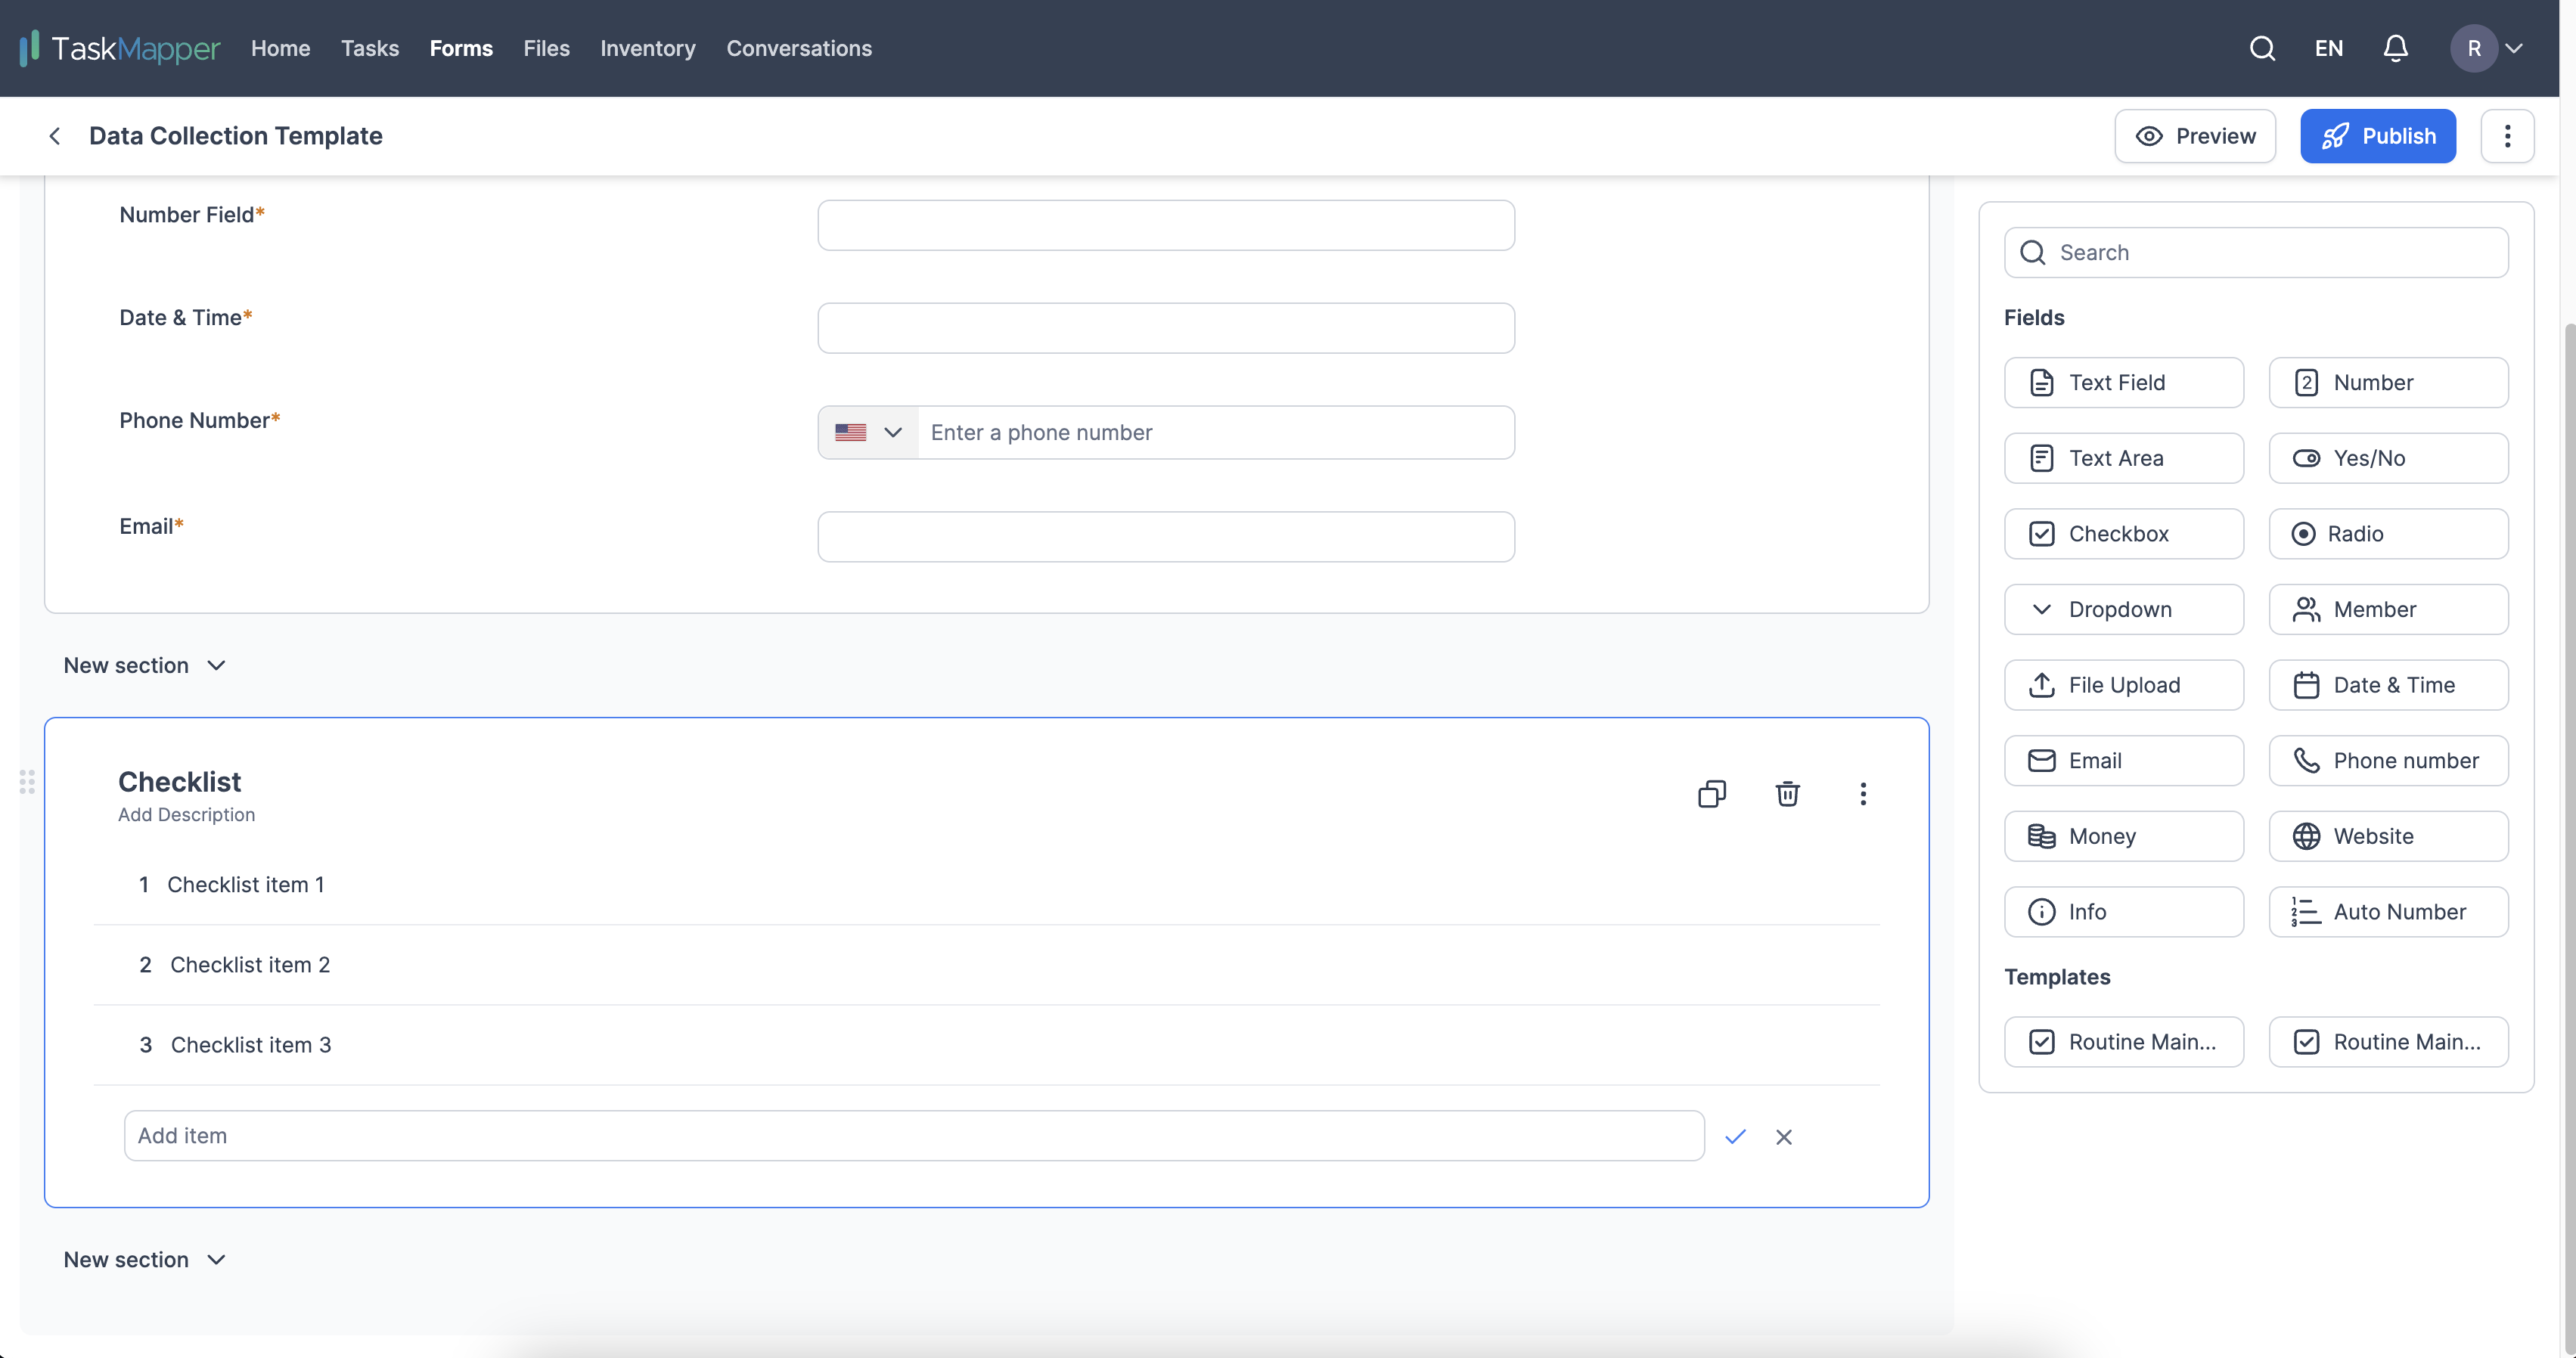
2) A Checklist lists items or actions to be checked or performed.
A checklist section can only include a list of items. Fields cannot be part of a checklist section.
Figure 6: Checklist section
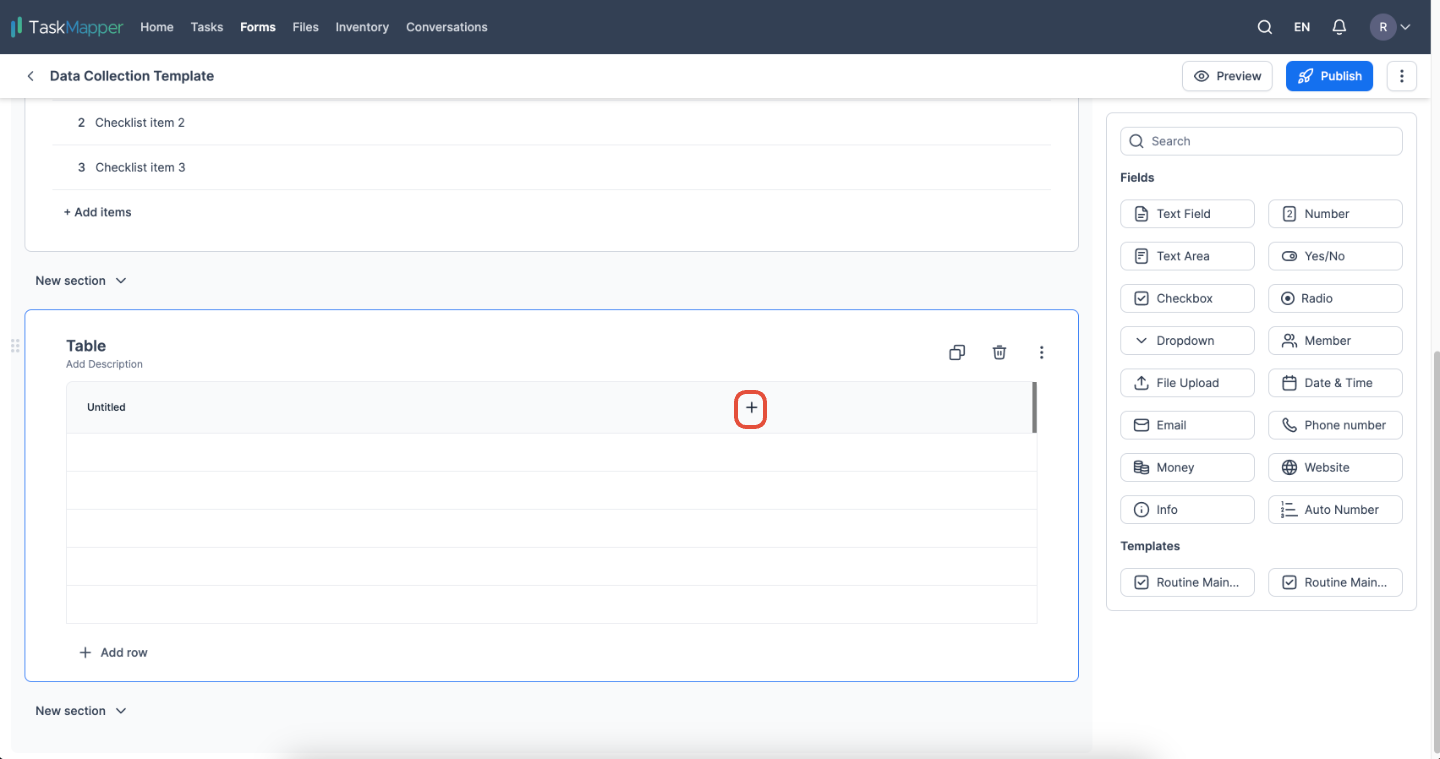
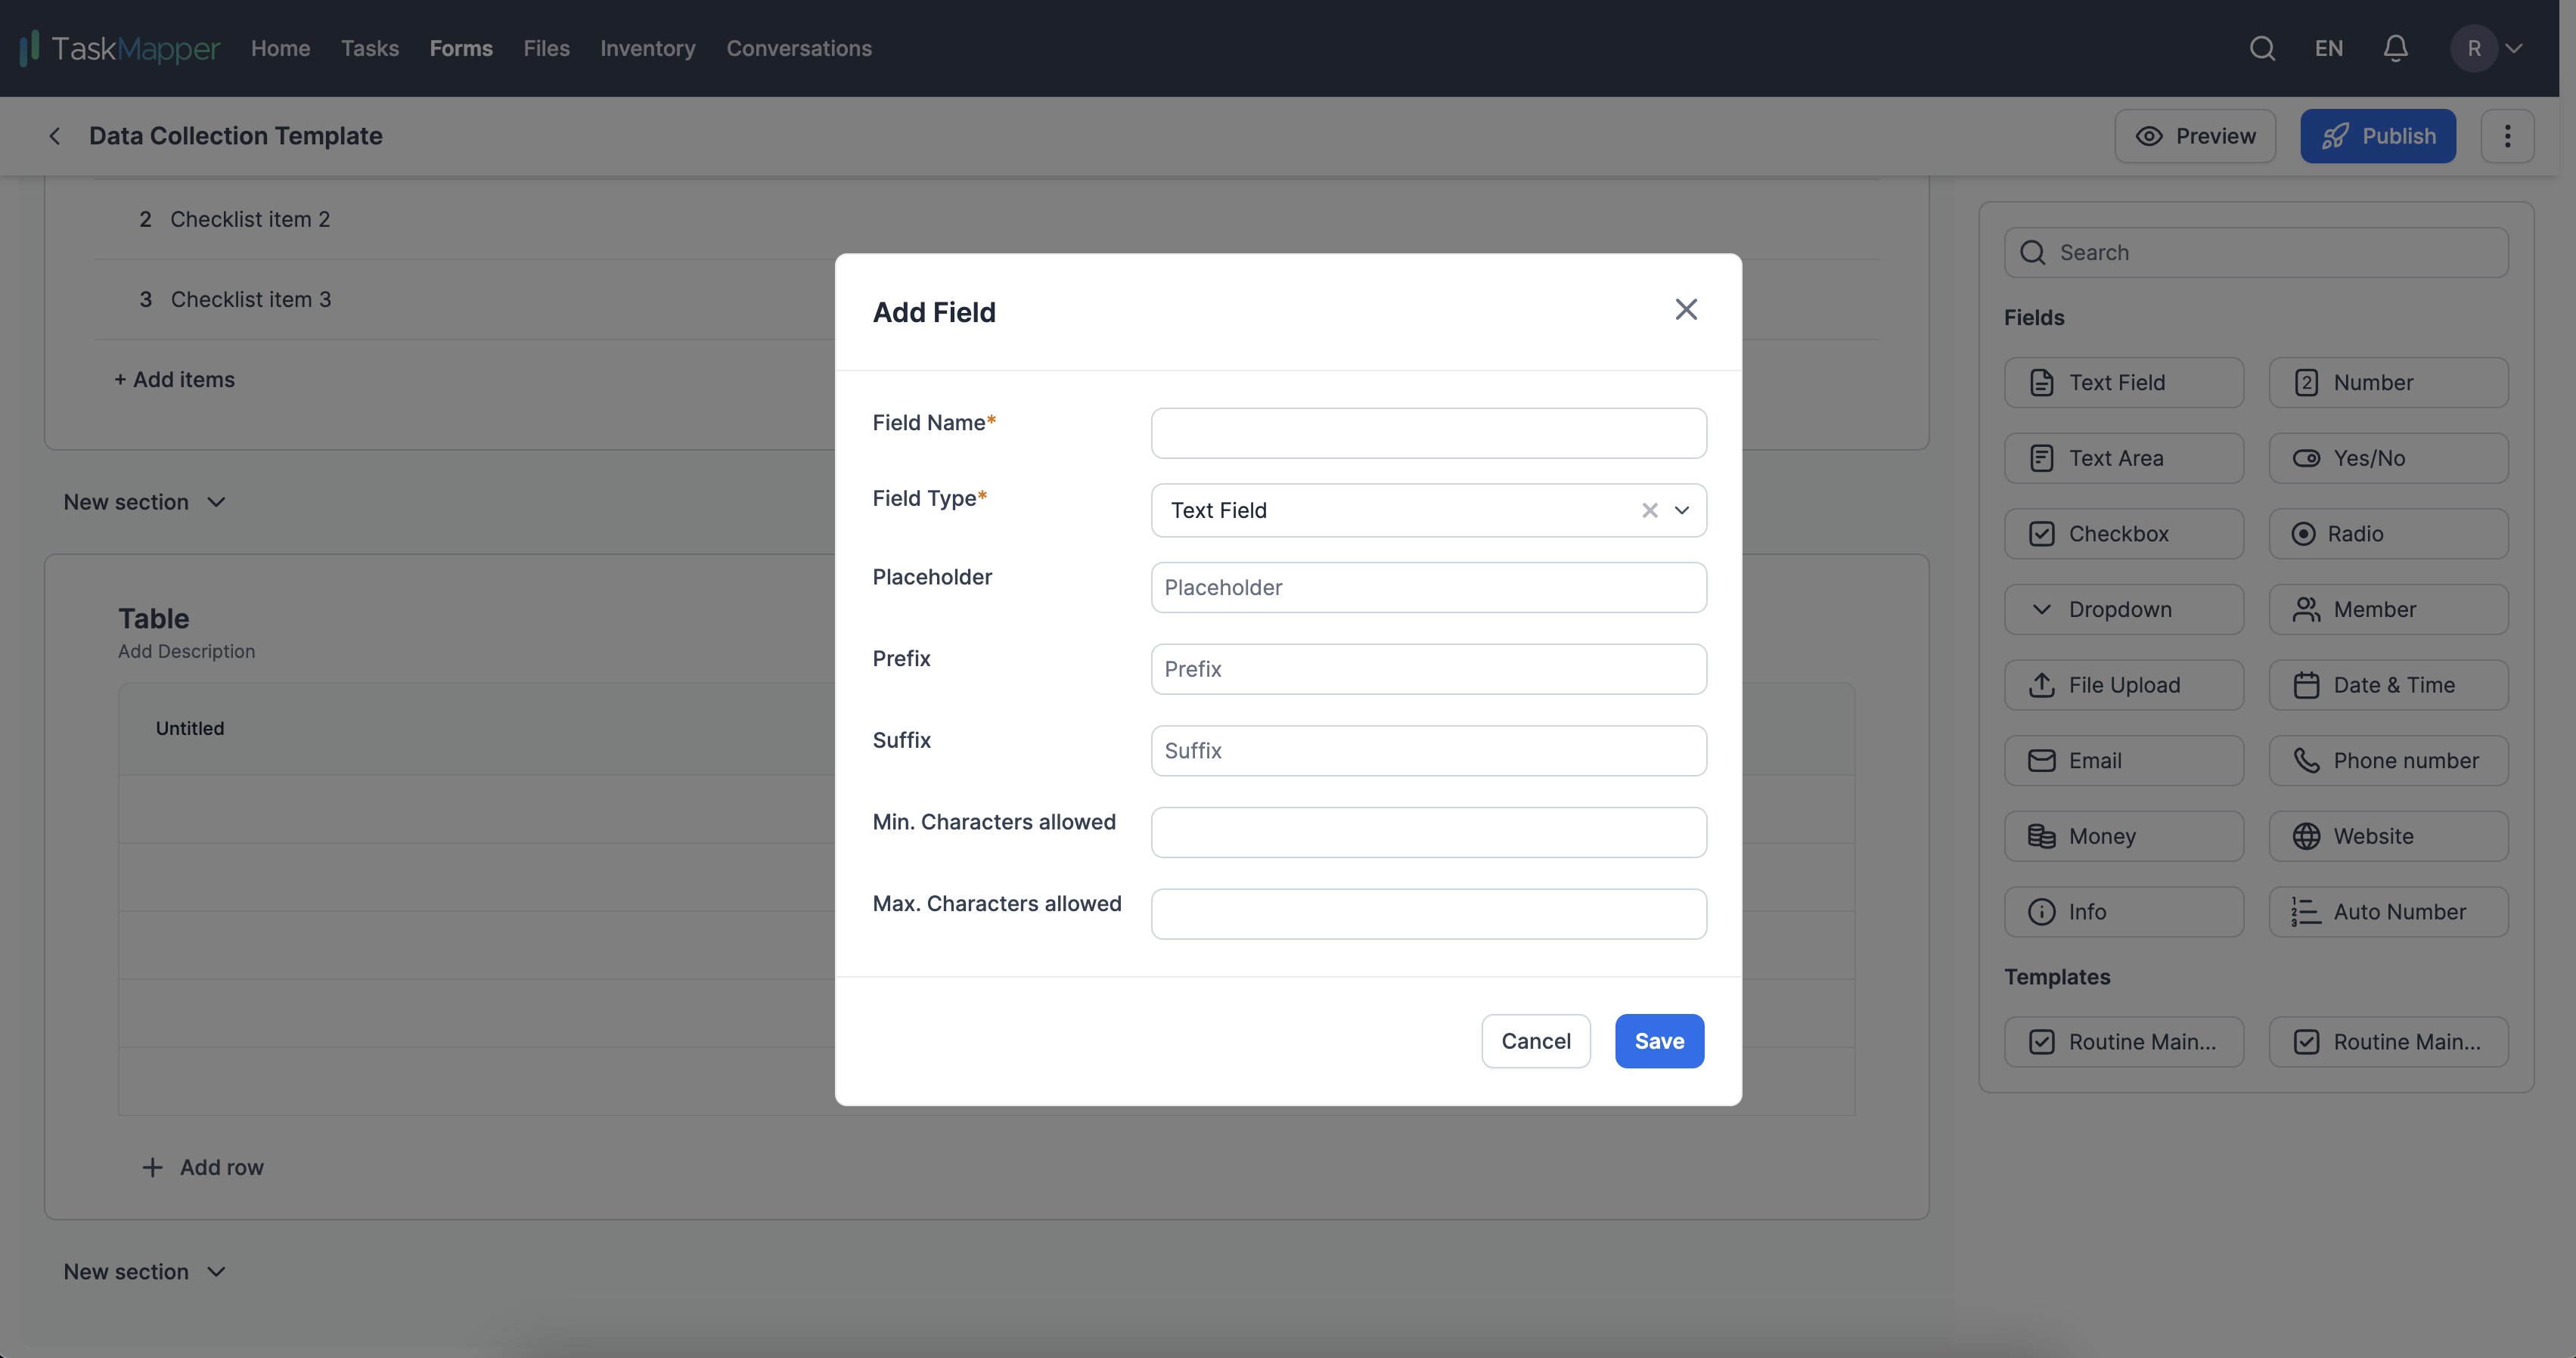
3) The table allows column-wise inputs. Field types such as Text Field, Yes / No, Dropdown, Number, Date, Money or Formula can be selected.
Figure 7: Table section
3A) Defining the column with field type
Figure 8: Defining columns in the Table section
How to Design and Customize a Form with Sections & Fields
This guide will walk you through creating and customising a form using various fields and sections.
Step 1: Create a New Template [00:07 - 00:25]
- Click on the New Template button.
- Select the New Template option from the drop-down menu.
- Enter the template name in the Template Name field.
- Click on the Save button to save the new template.
Step 2: Build the Form [00:26 - 00:31]
- Click the Build Form button to access the form builder options.
- By default, a basic section is created. Click Save to save the section details.
Step 3: Add Sections [00:32-01:18]
- Checklist Section: Add items as a separate section. Only a list of items to be checked is allowed.
- Table Section: Create a tabular input section with different field types.
Step 4: Add Fields to the Form [01:19 - 04:29]
Drag and drop each field to the section. Here are the available fields:
- Text Field: Allows users to enter text or alphanumeric values.
- Number Field: Allows users to enter only numeric values.
- Text Area Field: This field allows users to enter and format text with bold, italic, and underlined options. A rich text field also enables users to insert images, links, and multimedia elements.
- Yes/No Field: Allows selection from Yes, No, or N/A.
- Checkbox Field: Enables selection of one or more choices by checking boxes.
- Radio Field: Allows selection of only one option at a time.
- Dropdown Field: Offers a list of choices in a dropdown menu.
- File Upload Field: Allows users to upload files from their devices.
- Date and Time Field: Enables input and storage of specific dates and times.
- Email Field: Allows input of email addresses.
- Phone Number Field: Allows input of phone numbers.
- Money Field: Allows input and storage of monetary values.
- Signature Field: Allows users to sign or draw a signature.
- Info Field: Enables saving of pre-filled data, including text, images, and attachments.
Step 5: Save and Preview the Form [04:30 - 04:51]
- Save the form by clicking on the Save button.
- Utilize the preview option to display the included fields and see the form output.
Step 6: Set Escalation and Reminders [04:52 - 05:35]
- Click on the form block and select the Advanced tab.
- Enable the Escalate option and choose users from the dropdown.
- Select a field to pick members listed in the Members section of the form.
- Choose escalation days to trigger an escalation if the form is not submitted.
- Create a custom escalation email by clicking the Add button.
Following these steps, you can create and customize a form with various fields and sections.
Workflows
The workflow can assign specific sections or blocks to different teams for further review or to provide additional information. Workflows are beneficial for expediting processes that involve multiple teams. They can send notifications and escalate issues for quicker response times and process adherence. Additionally, workflows support rules-based routing and conditional logic.
Workflow Blocks
The workflow can be designed to achieve various processes. Several blocks are available. Below is a list of blocks that can be used.
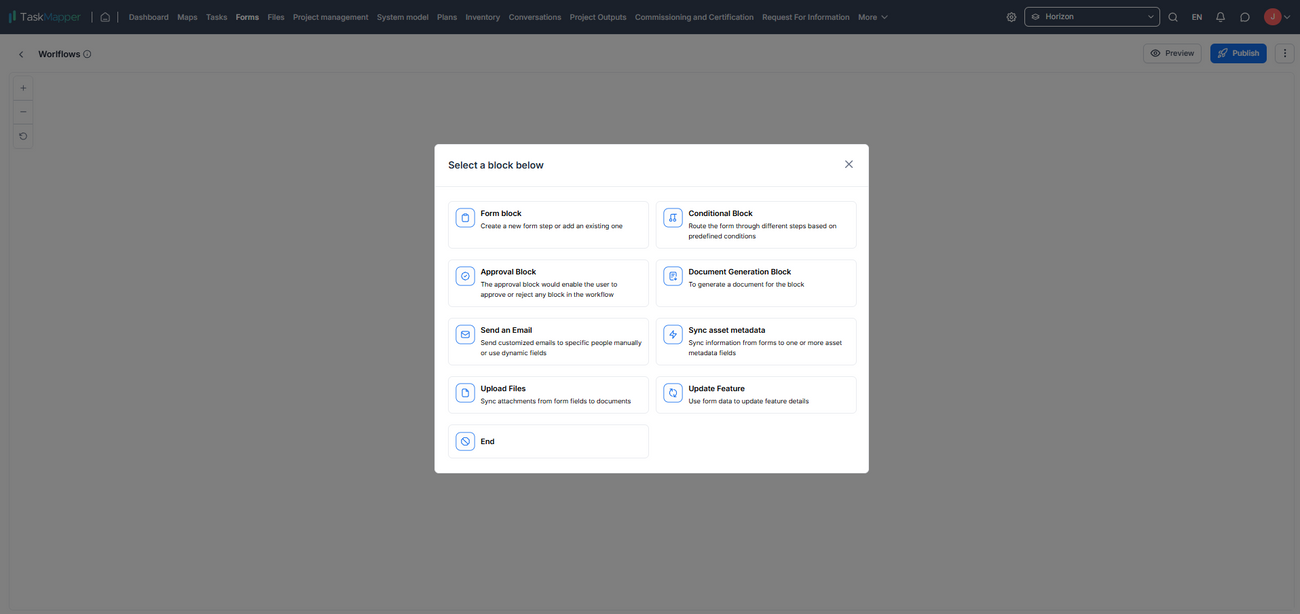
Figure 8: Blocks
- Form Block: A form block can contain sections and fields. This is the initial step where sections and fields are defined. Other blocks can be utilised based on the field items within a form block, such as the 'Conditional Block' and others, as shown in the example below. Let's define a form block.
- Conditional Block: This allows users to define specific workflow steps and additional information requests based on earlier responses in a form block.
- Approval Block: Including an approval block ensures submitted forms are reviewed by the designated approver for approval or rejection.
- Document Generation Block: Each form can be exported as a PDF report in our standard format. If you need to generate a report based on your custom template, you can accomplish this using the document generation block. These outputs can be automated to save in a designated folder within the Files application using the 'Upload files' block. The Files application also supports integration with SharePoint. Click here to learn more about the Files application.
- Send an email: This block is designed to send custom notifications to specific users or teams and to receive email notifications for form submissions when the form is submitted. Additionally, these notifications can be sent to external users not part of TaskMapper.
- Sync asset metadata: Each asset or project in TaskMapper includes properties or metadata information. This block can automatically update the asset properties or metadata based on form submissions.
- Upload files: Attachments added through the 'File Upload' field can be moved to a specific folder in the Files application. Additionally, the 'Upload files' option can be combined with the 'Document Generation Block' to automate the generation of reports or submissions, which will be stored in the designated folder within the Files application.
- Update feature: Each component on the map will include features that define the component or its status during the construction phase. Forms associated with the component can automatically update its features upon submission. This association will update the feature types, the component's color, and the property values for each feature type.


