Plans
Last updated October 7, 2024
TABLE OF CONTENTS
What are Drawings and Plans?
Drawings are digital containers or directories used to organize plans. They help keep related plans together and make locating and accessing them easier.
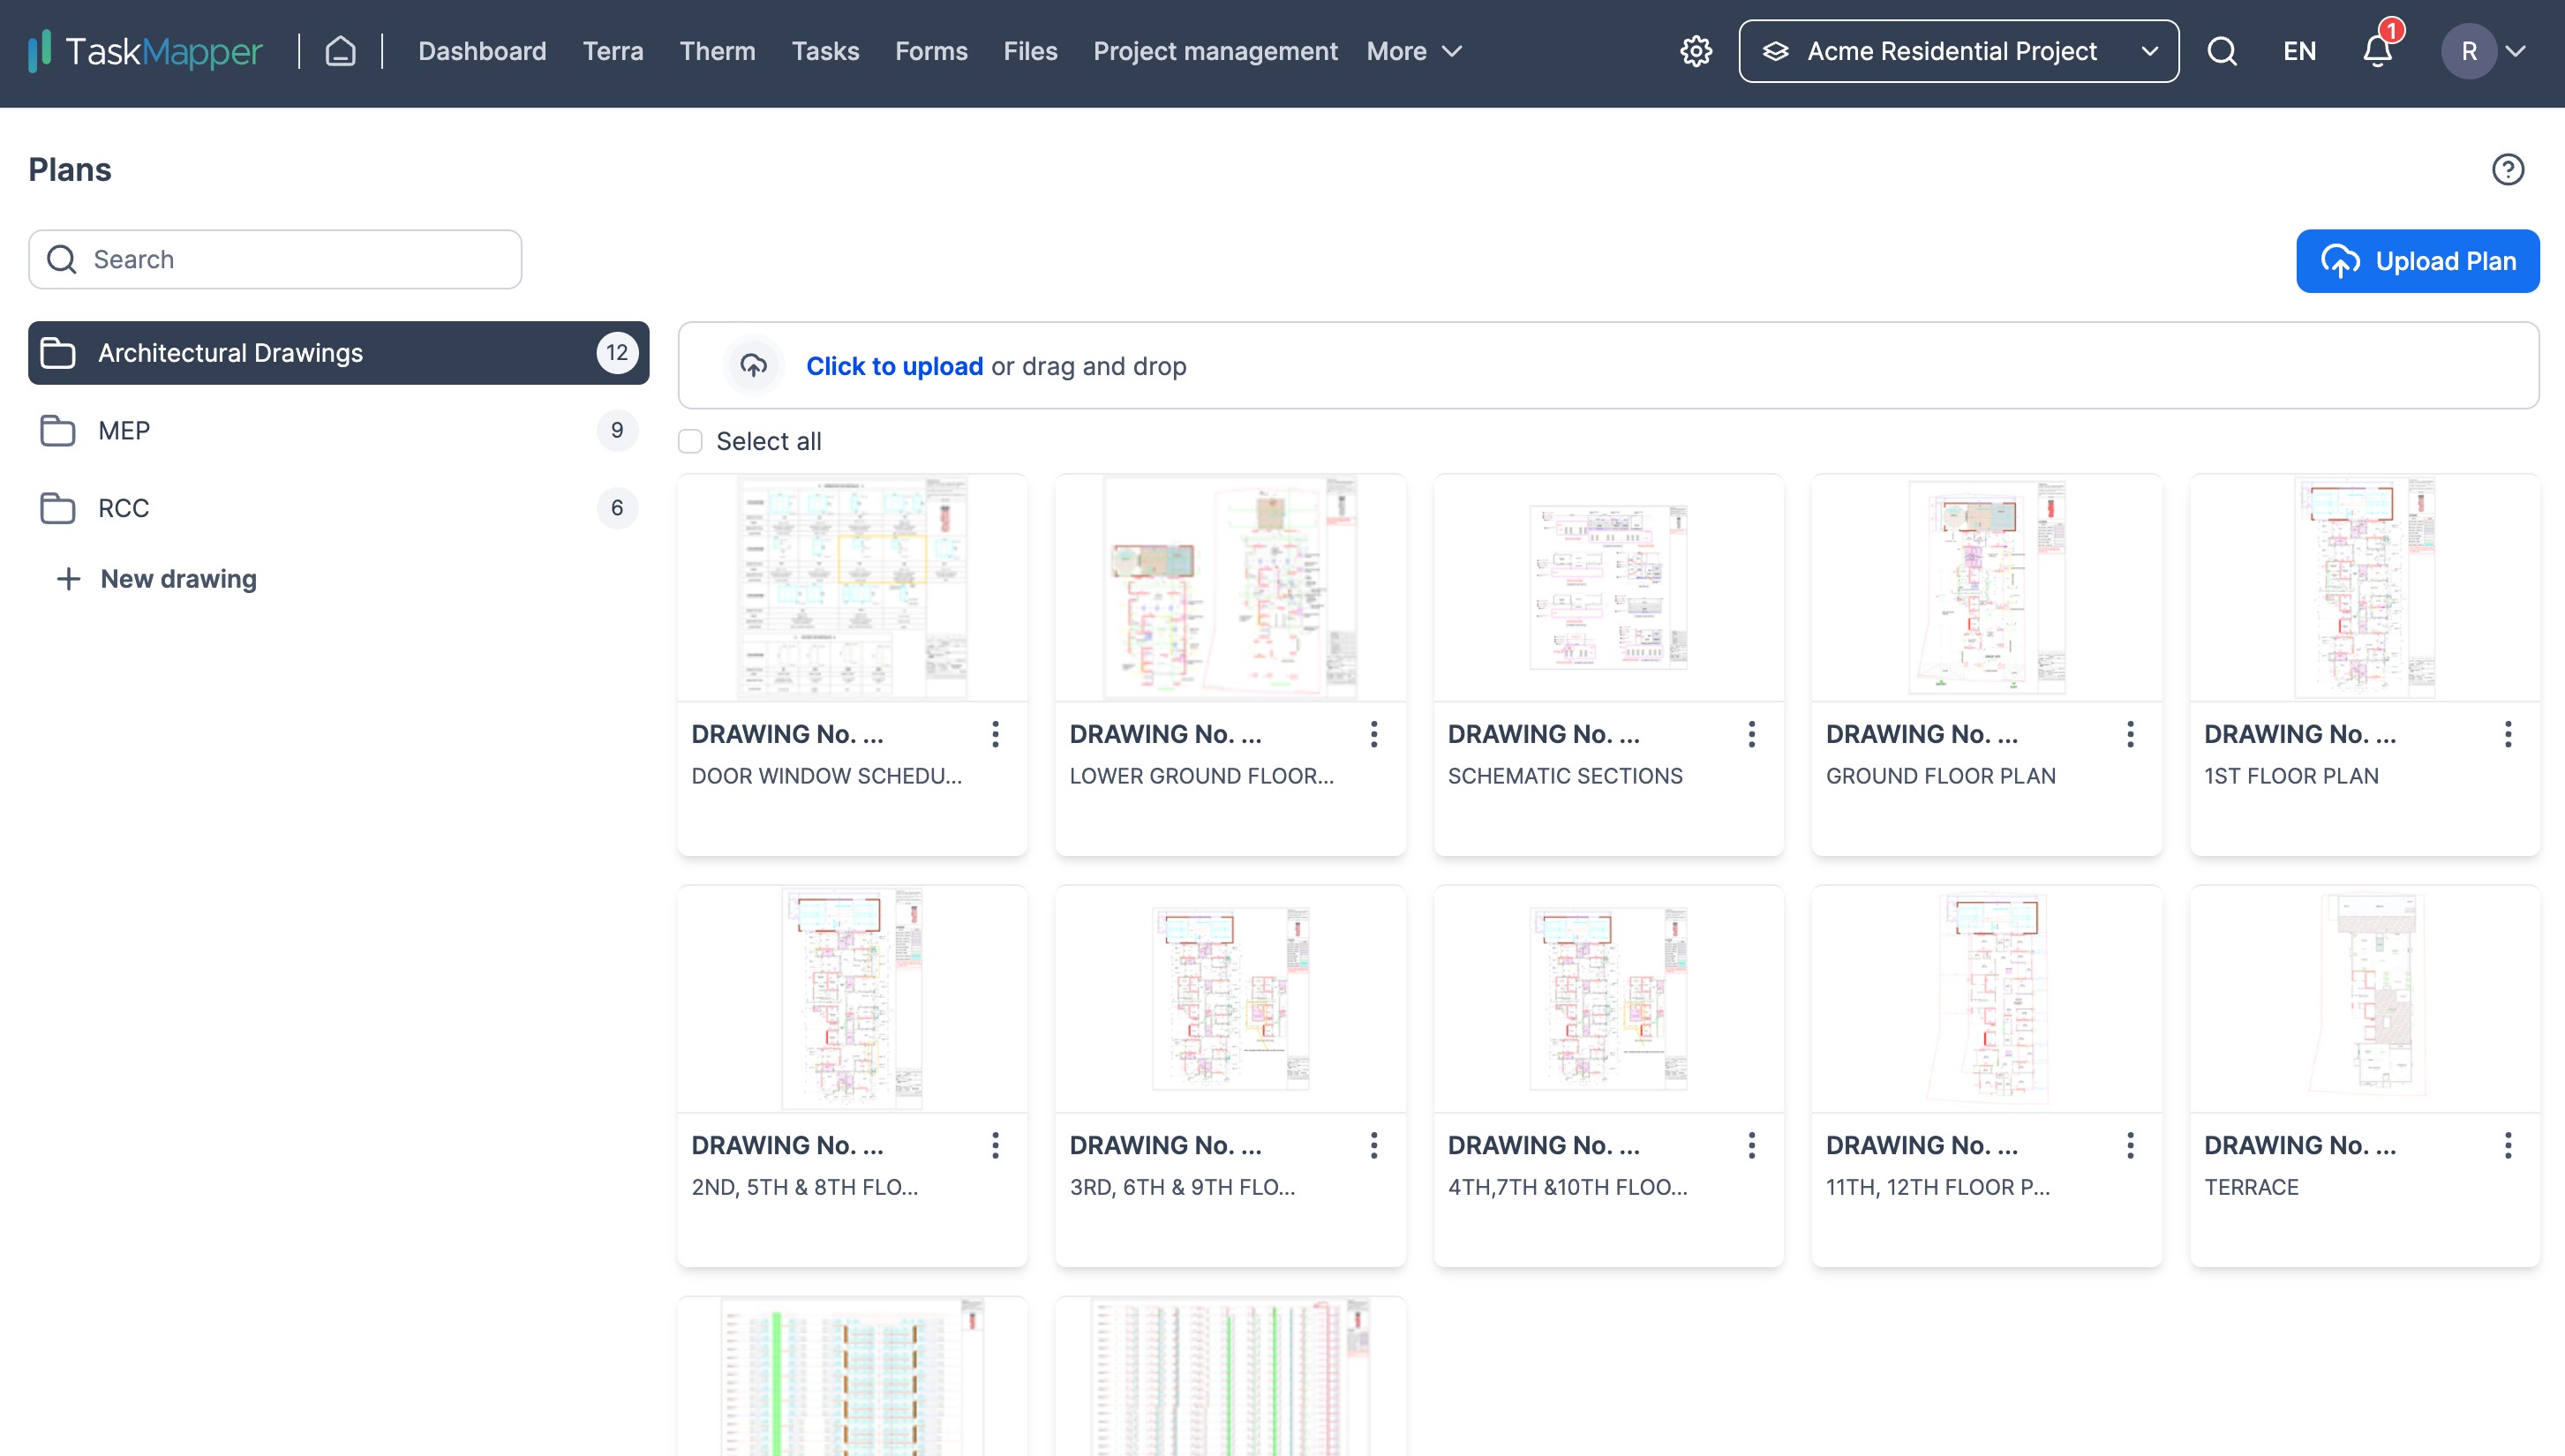
Figure 5: Drawings and plans
How to upload plans?
1) Click on 'Plans' in the asset view
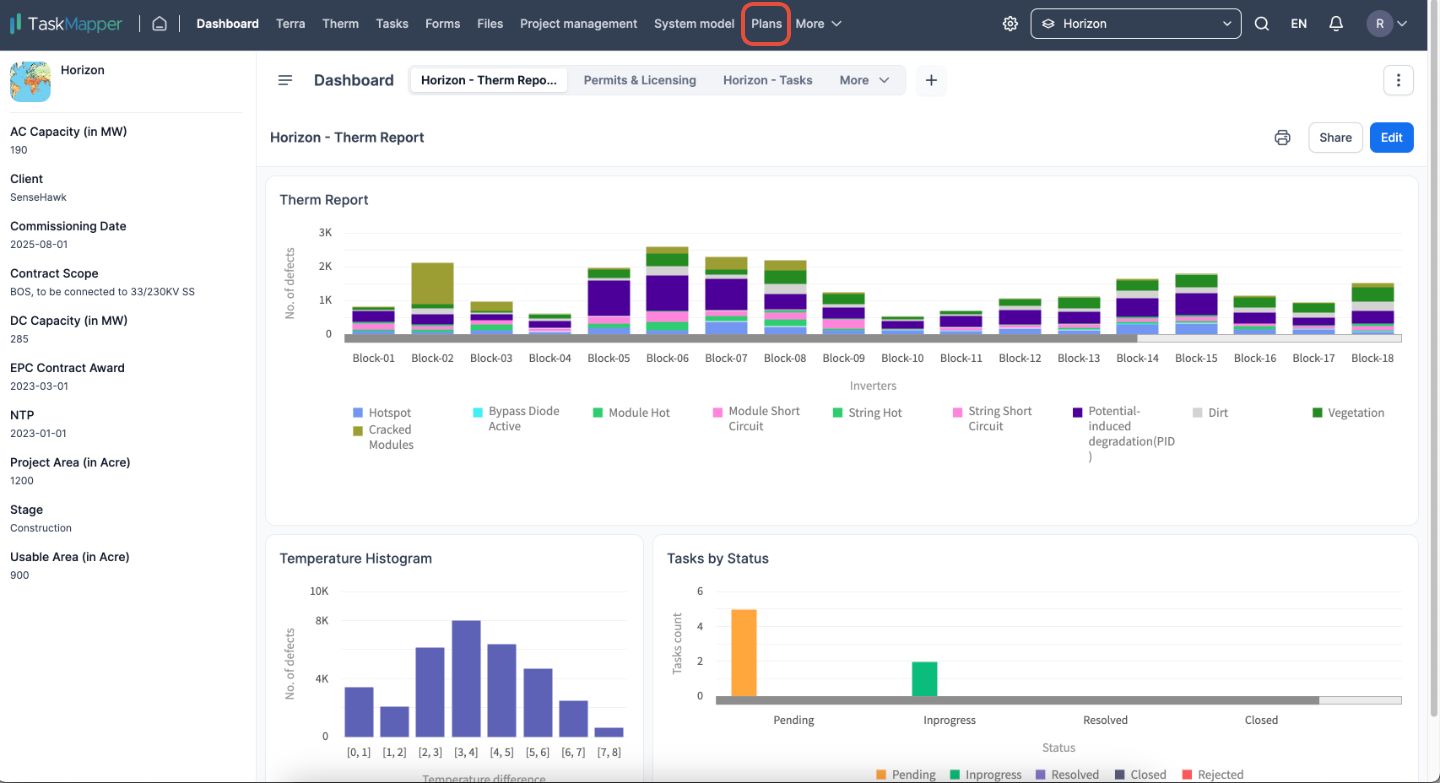
Figure 6: Plans feature
2) Click on 'New Drawing' to organise documents by folders and click 'Upload Plan' to upload the drawings.
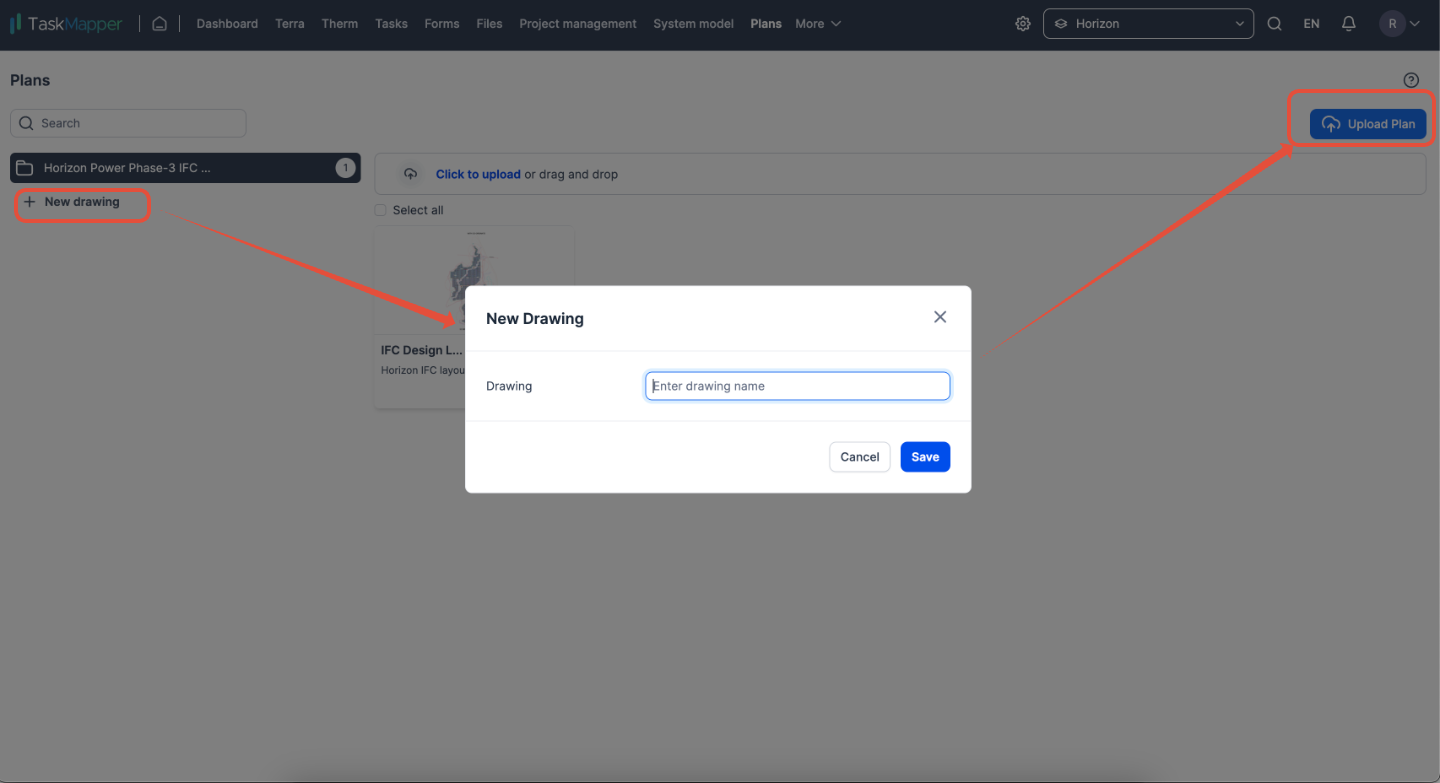
Figure 7: Drawings to organize plans
3) The plan gets uploaded. Then,
- Use the blue highlighter to choose the sheet number on the first sheet.
- Similarly, use the pink highlighter to select the sheet description once.
- Click on 'Next'.
- The sheet number and description will be extracted and updated for all the sheets.
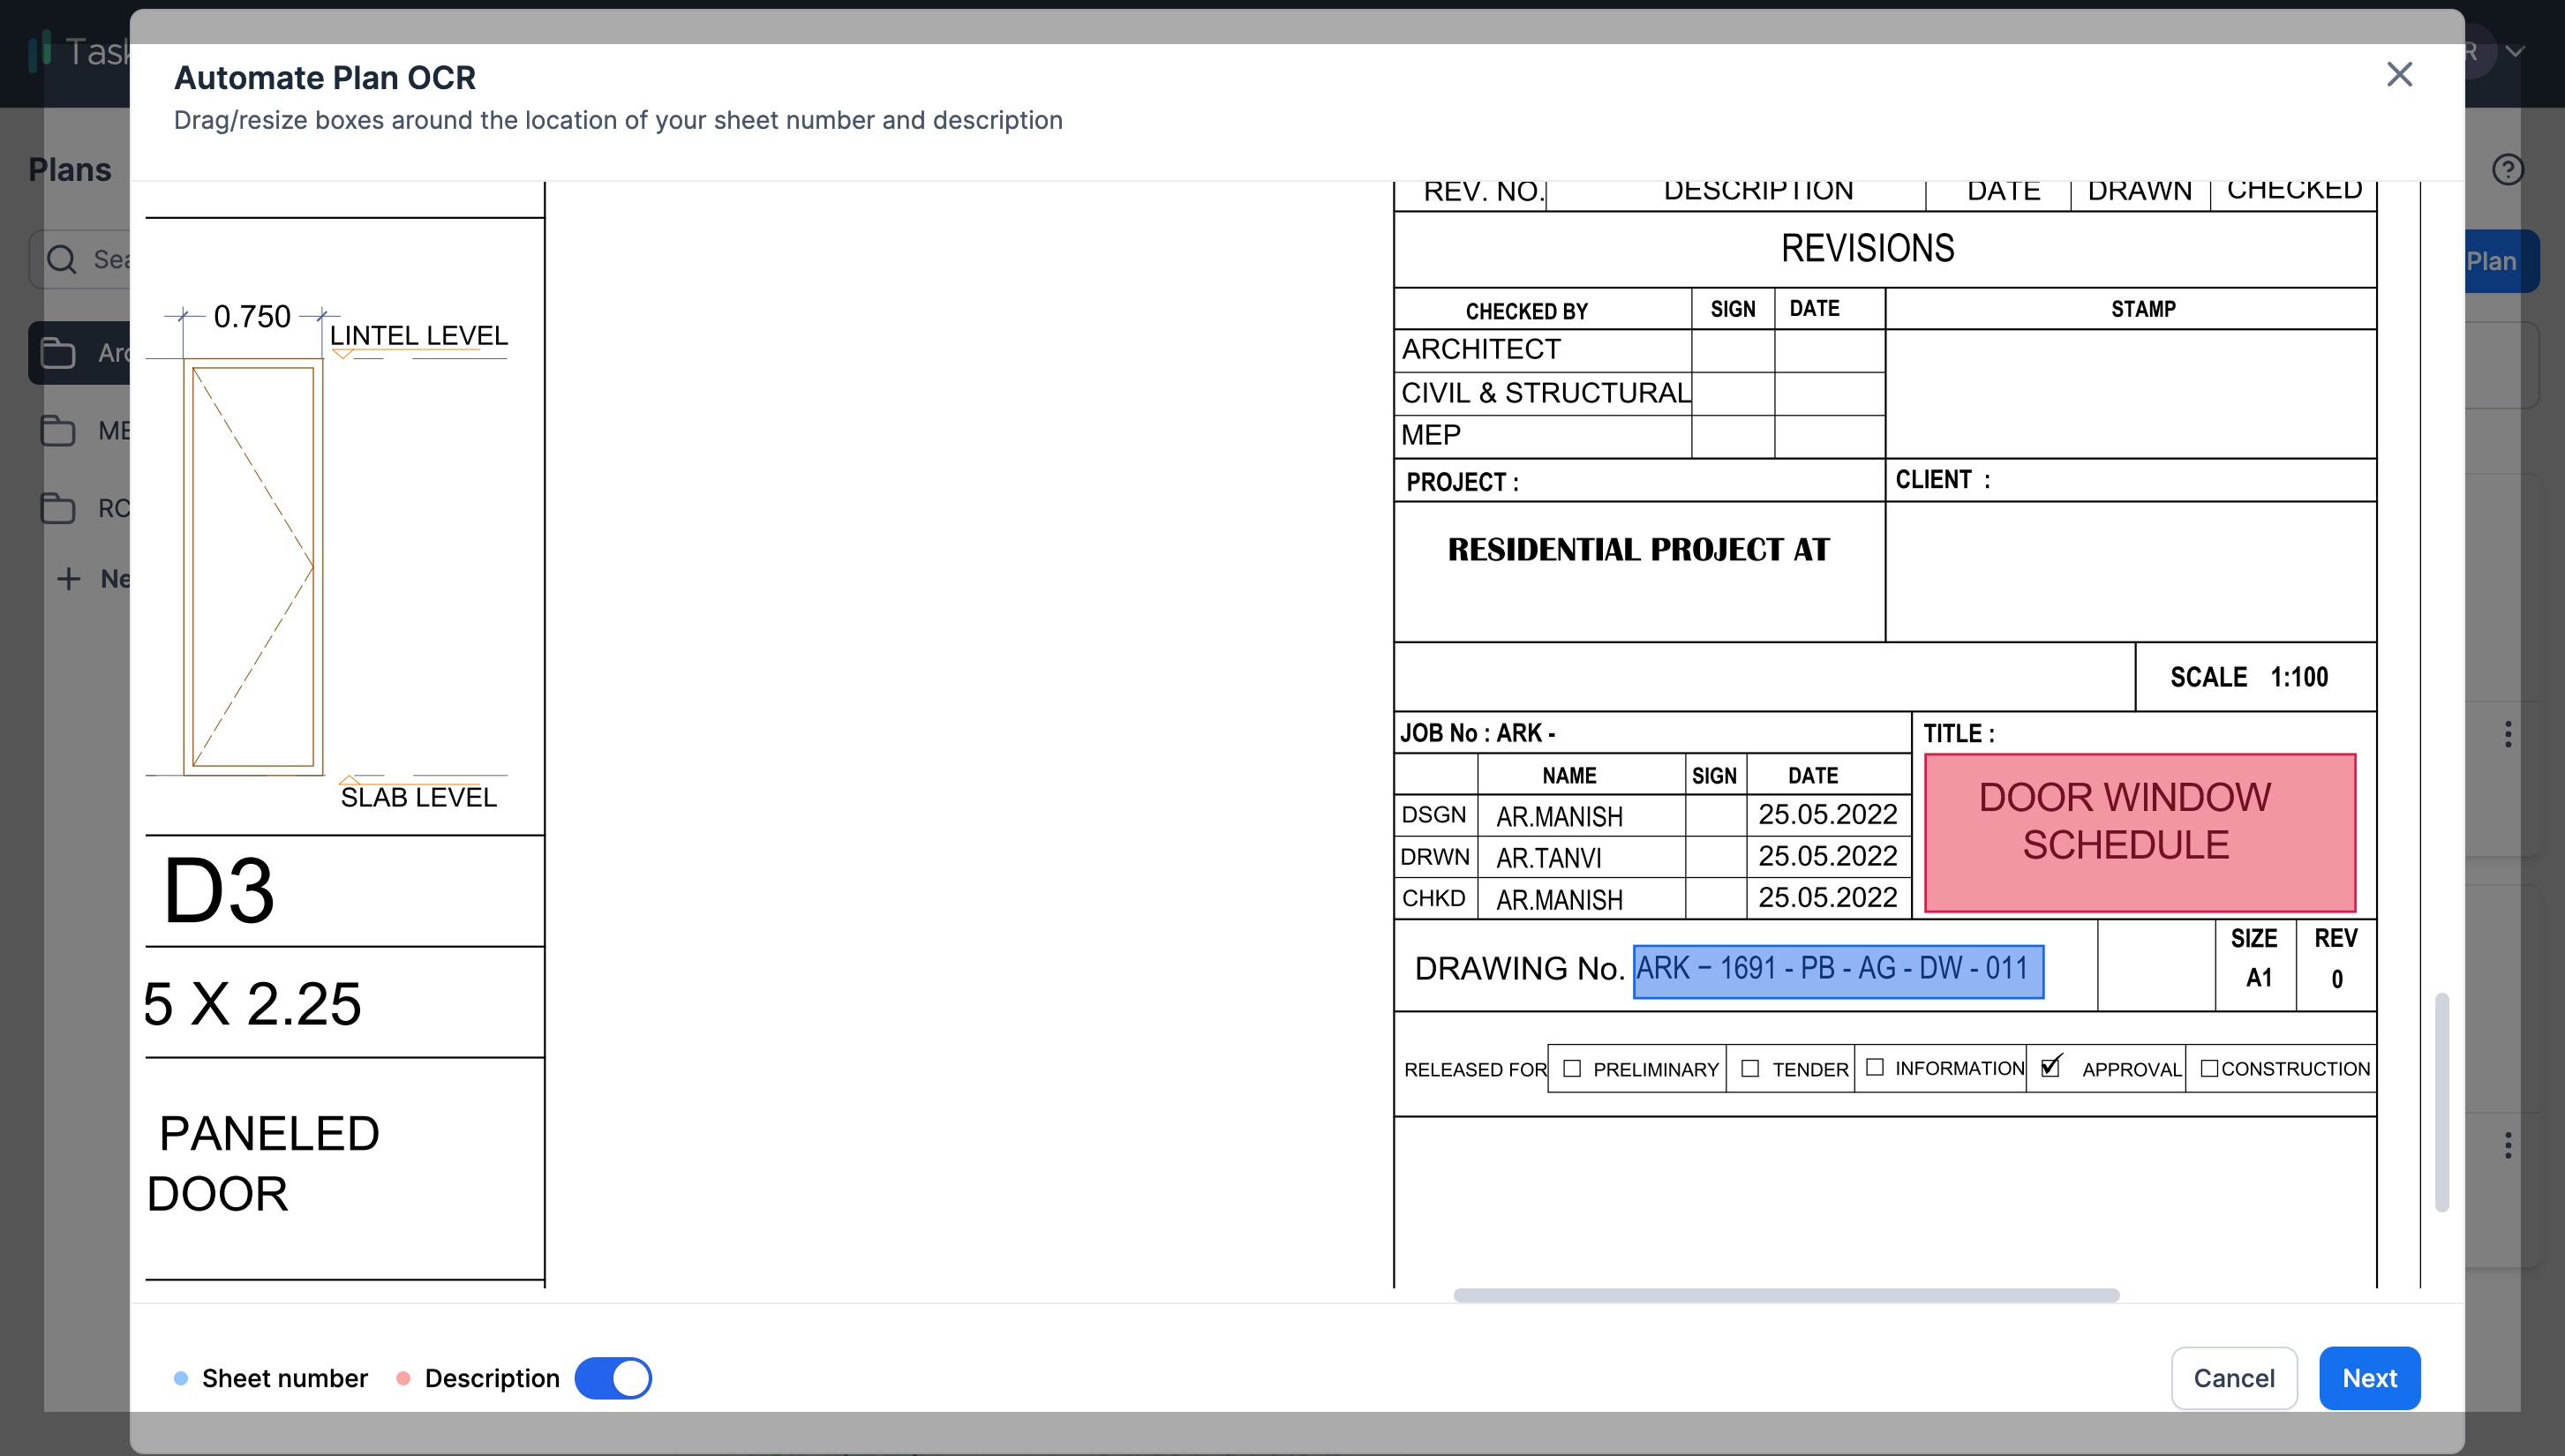
Figure 8: Capture sheet number and sheet description
Review sheet number and description. Edit if required and hit enter to save.
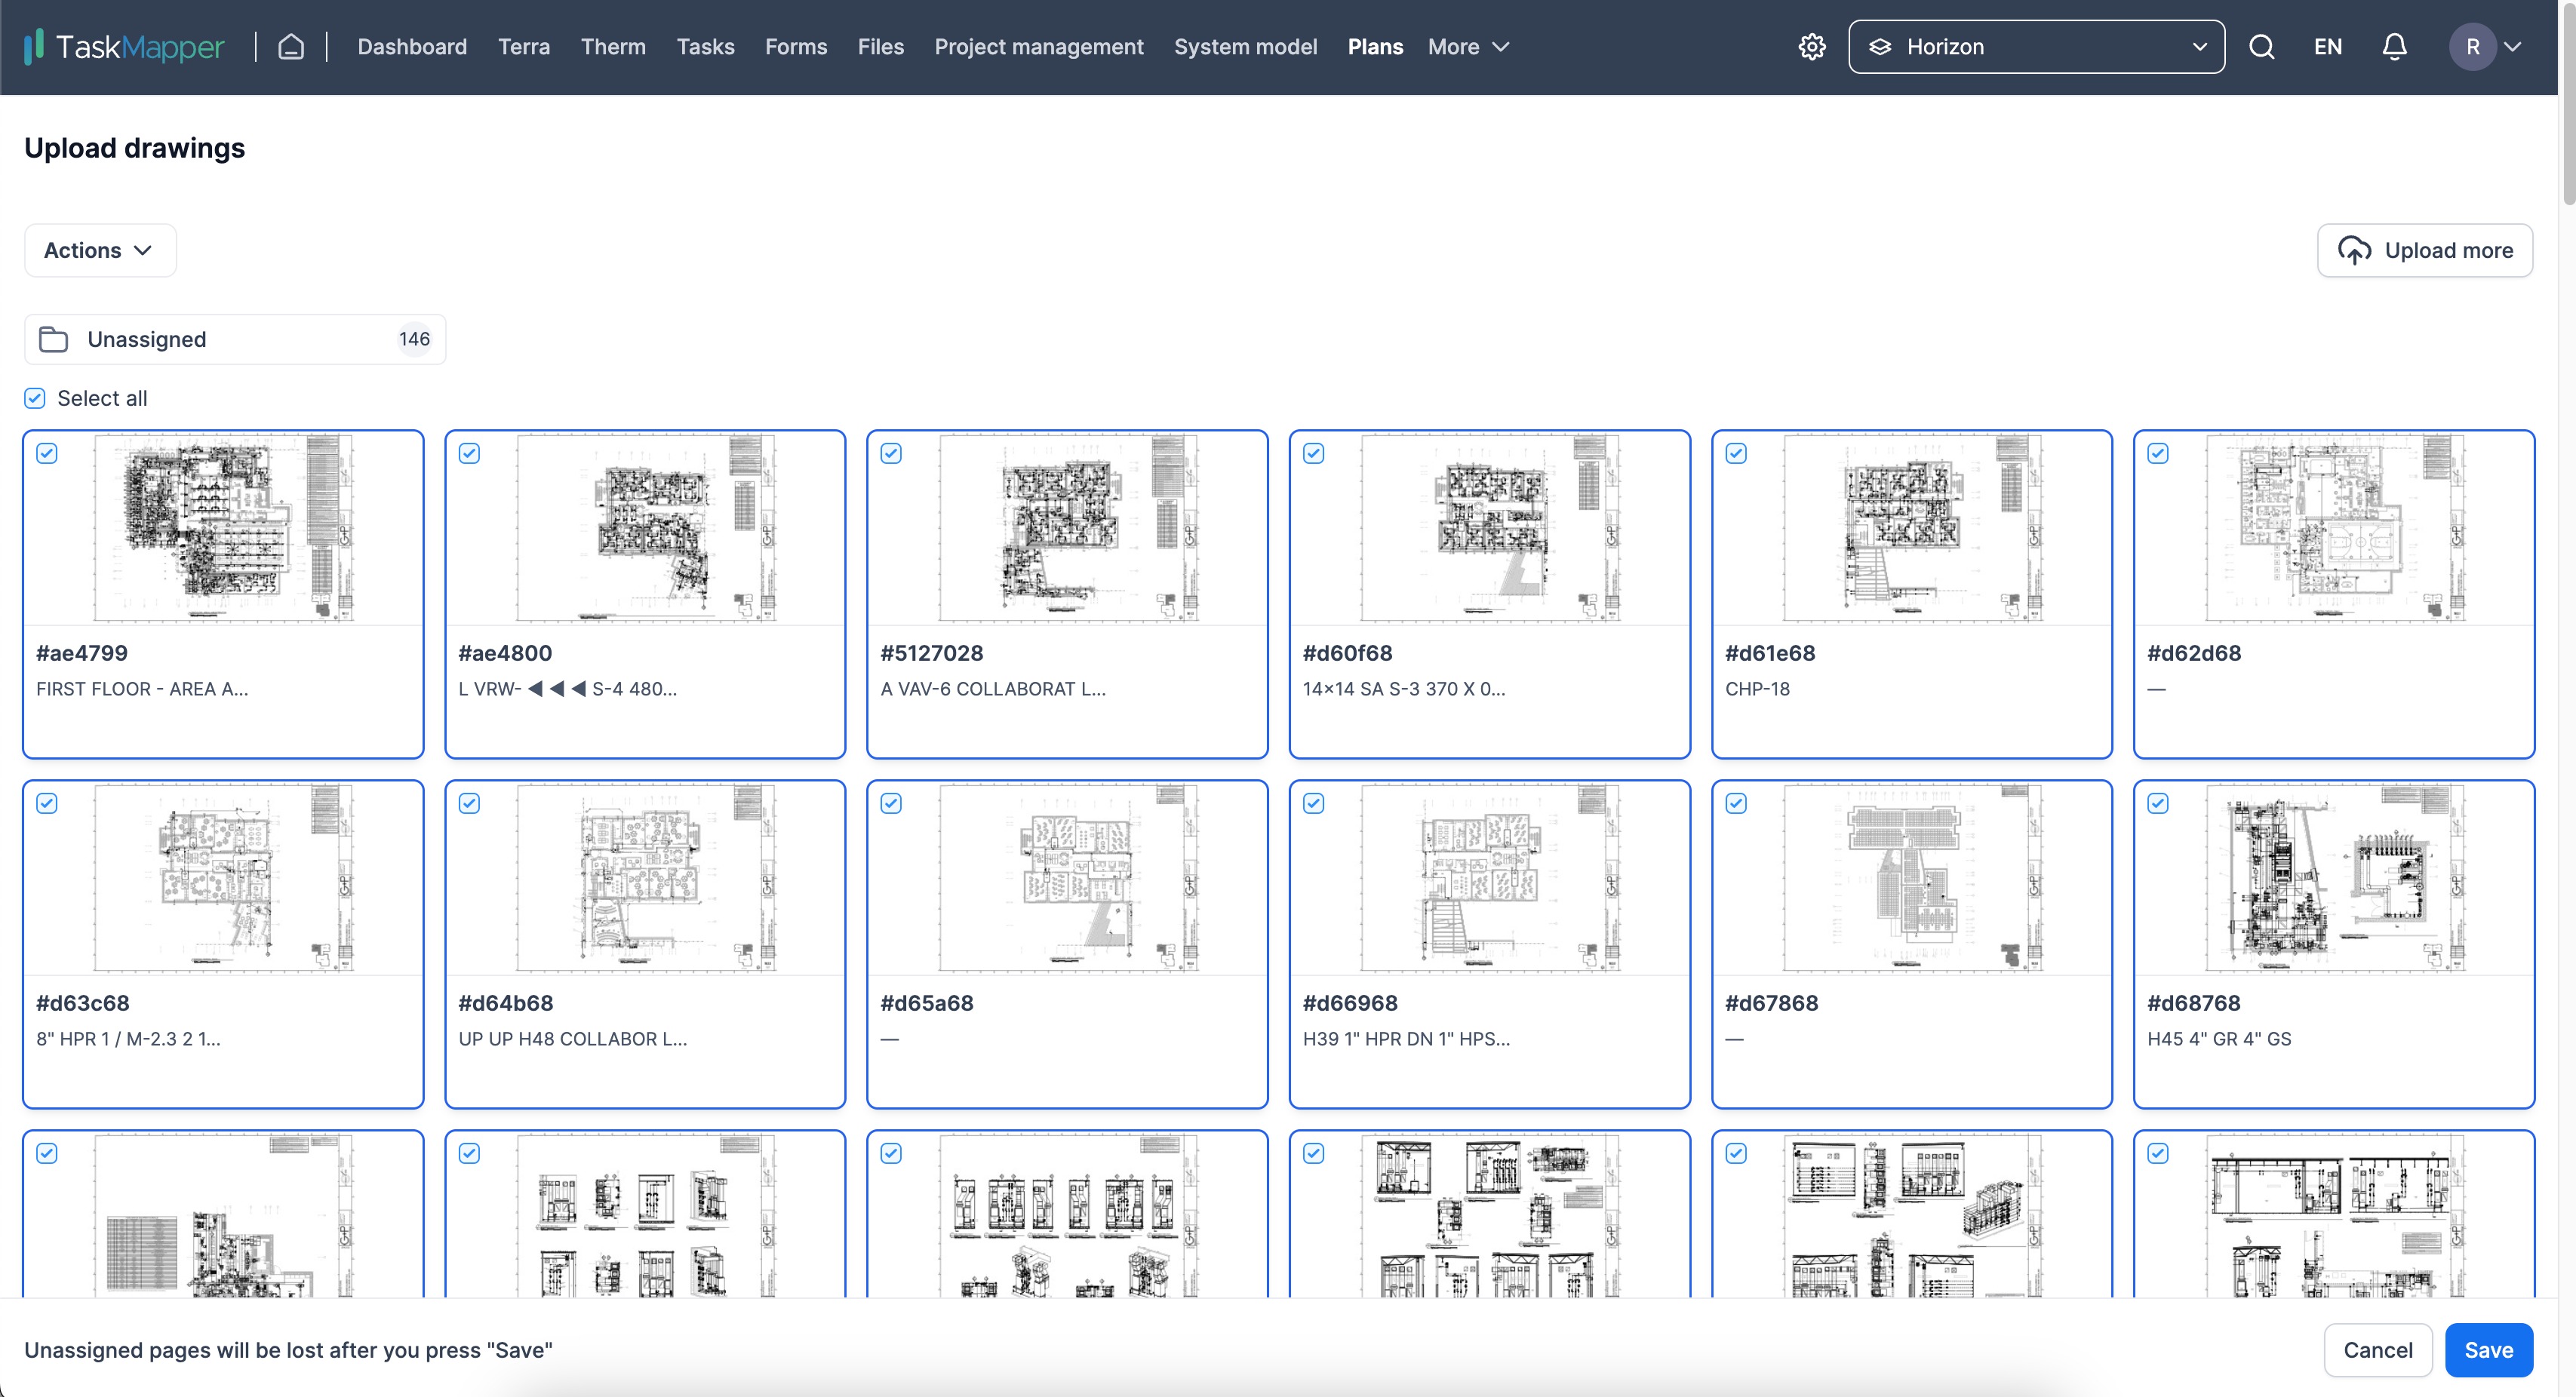
Figure 9: Uploaded plans view
4) The uploaded files will default to the 'Unassigned' folder. Select the plans to organize them by drawings, and click 'Actions'.
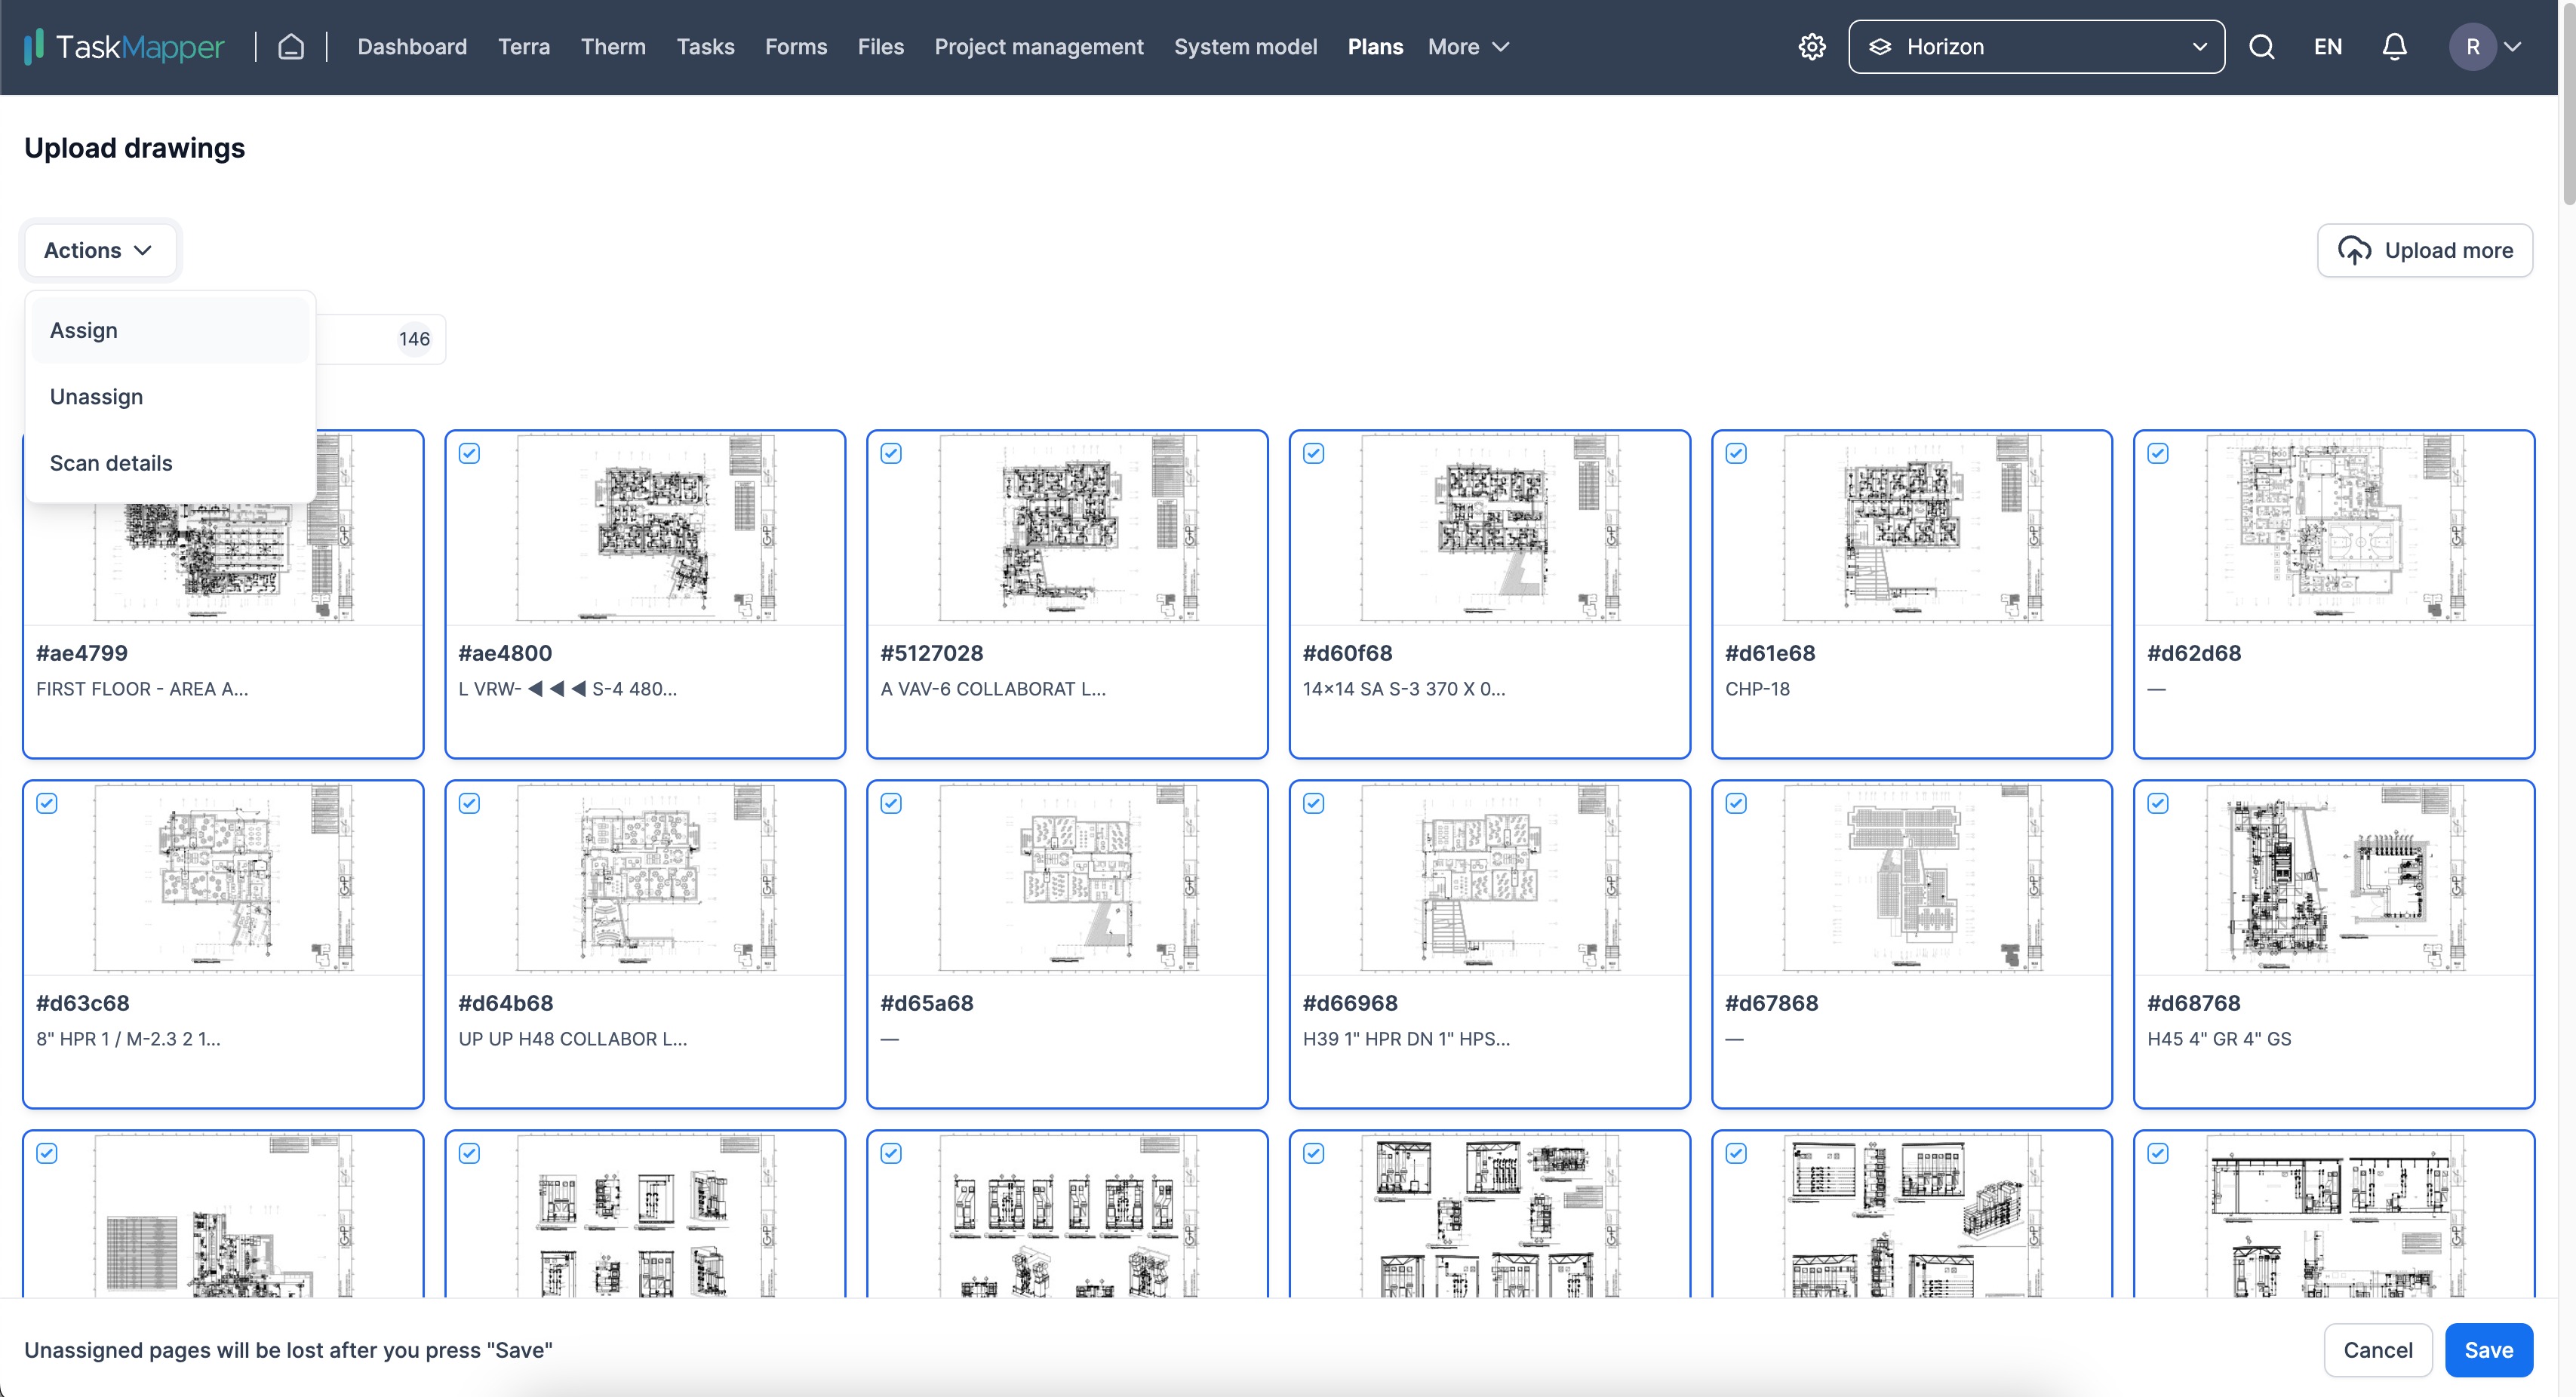
Figure 10: Organize plans
5) From the drop-down, choose 'Assign'.
Select a drawing or create a new one by clicking on 'New drawing'. Then click on 'Assign' and 'Save' the changes.
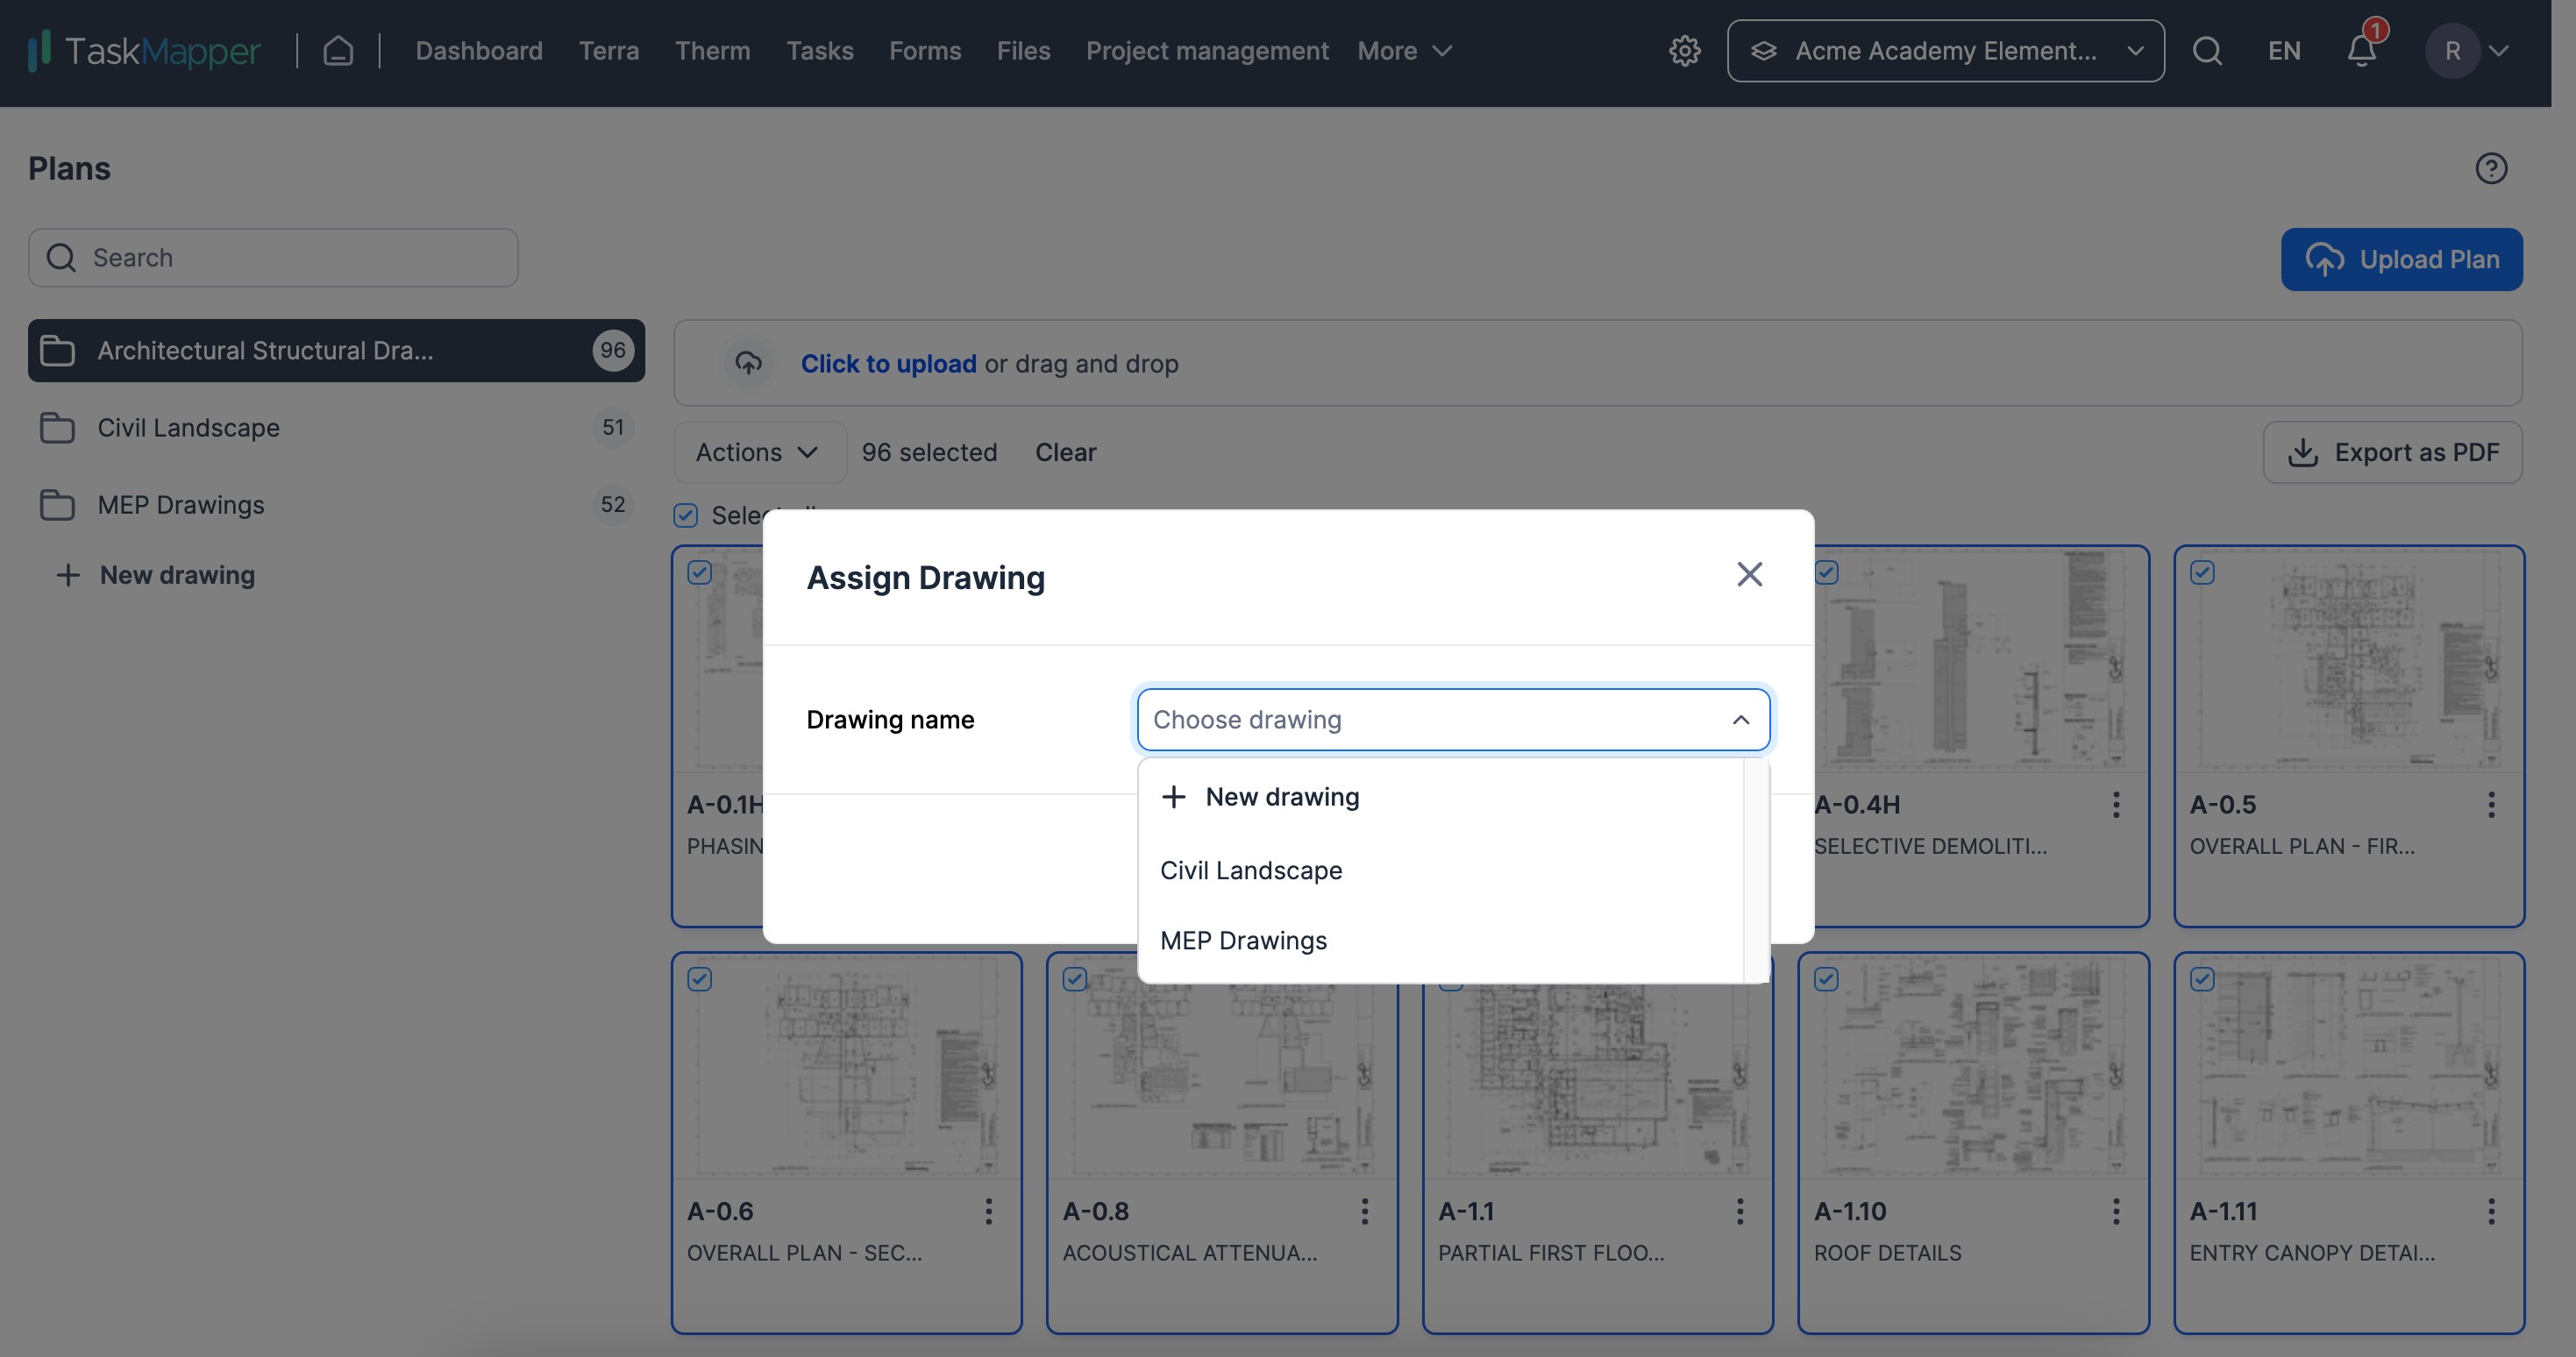
Figure 11(a): Create new drawings
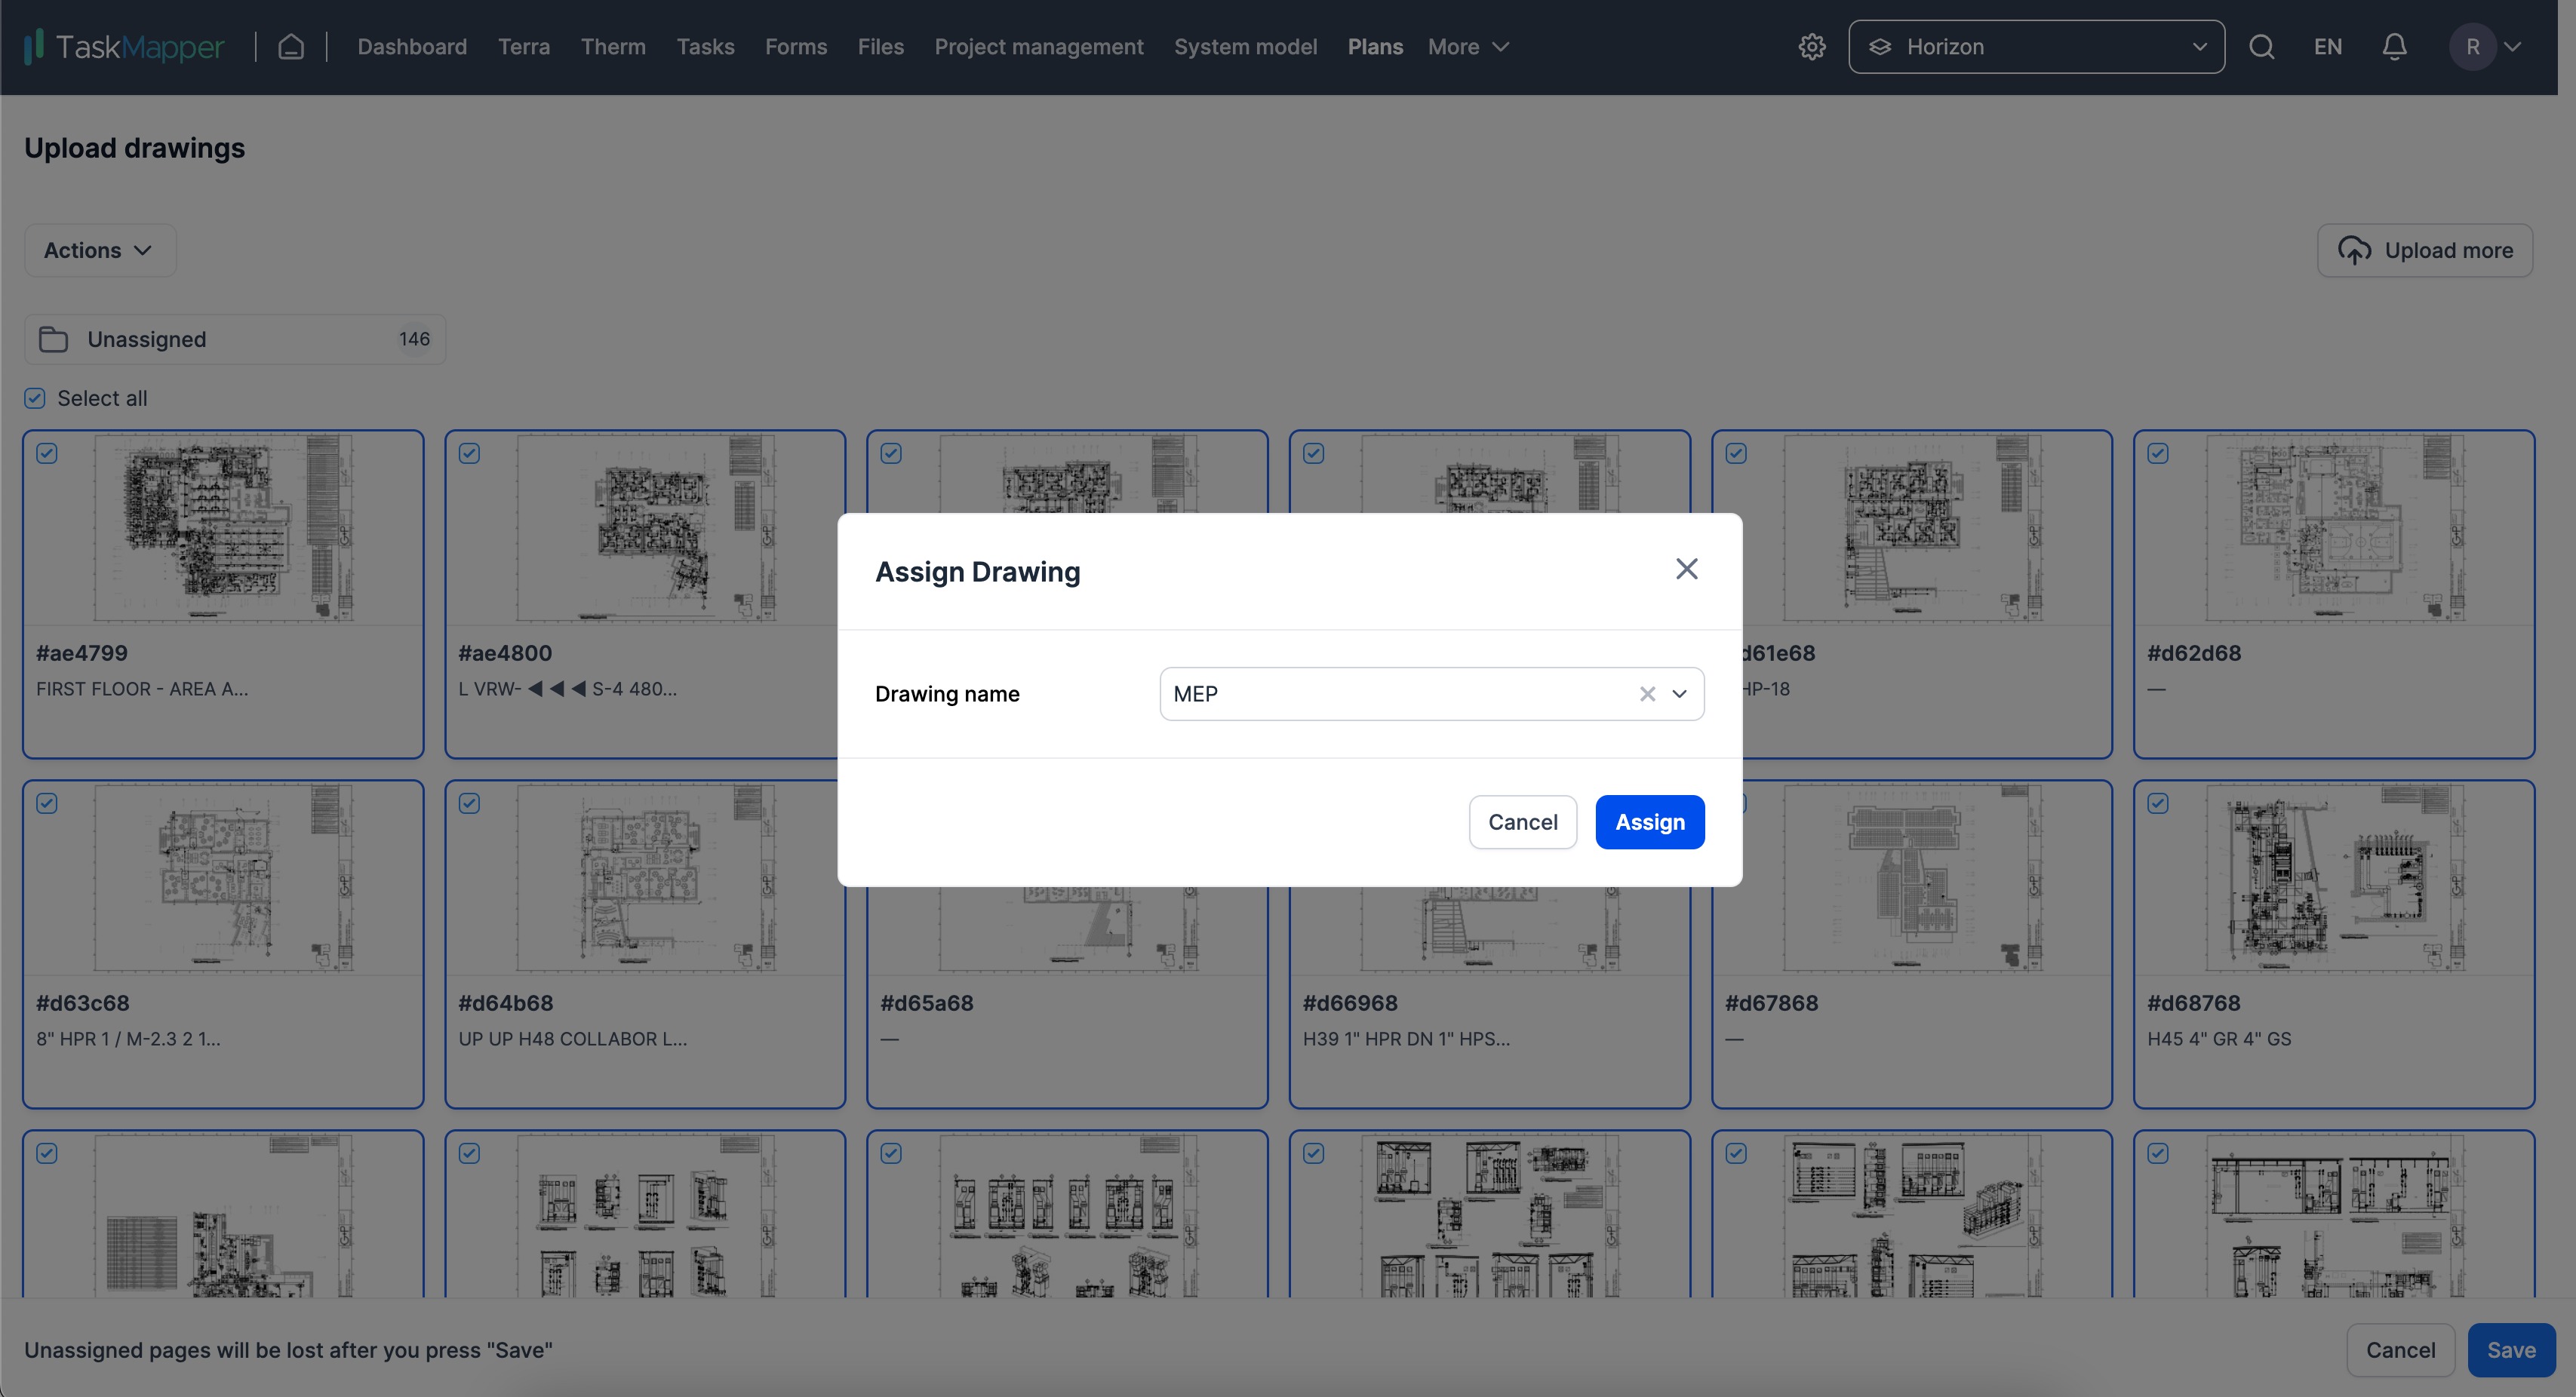
Figure 11(b): Assign plans to drawings
The files are in the assigned folder. Repeat the process to organise all the unassigned files.
How to upload new versions?
Method1: Automated versioning
The Plans feature is designed to automatically detect the latest versions of files by analyzing their file names. When you assign files to a drawing, the application reviews the file names to verify that they are being uploaded as a new version. You can easily identify the new version of a file by looking for a specific icon

that appears on the uploaded file. Click 'Save' to save the plans as a new version.
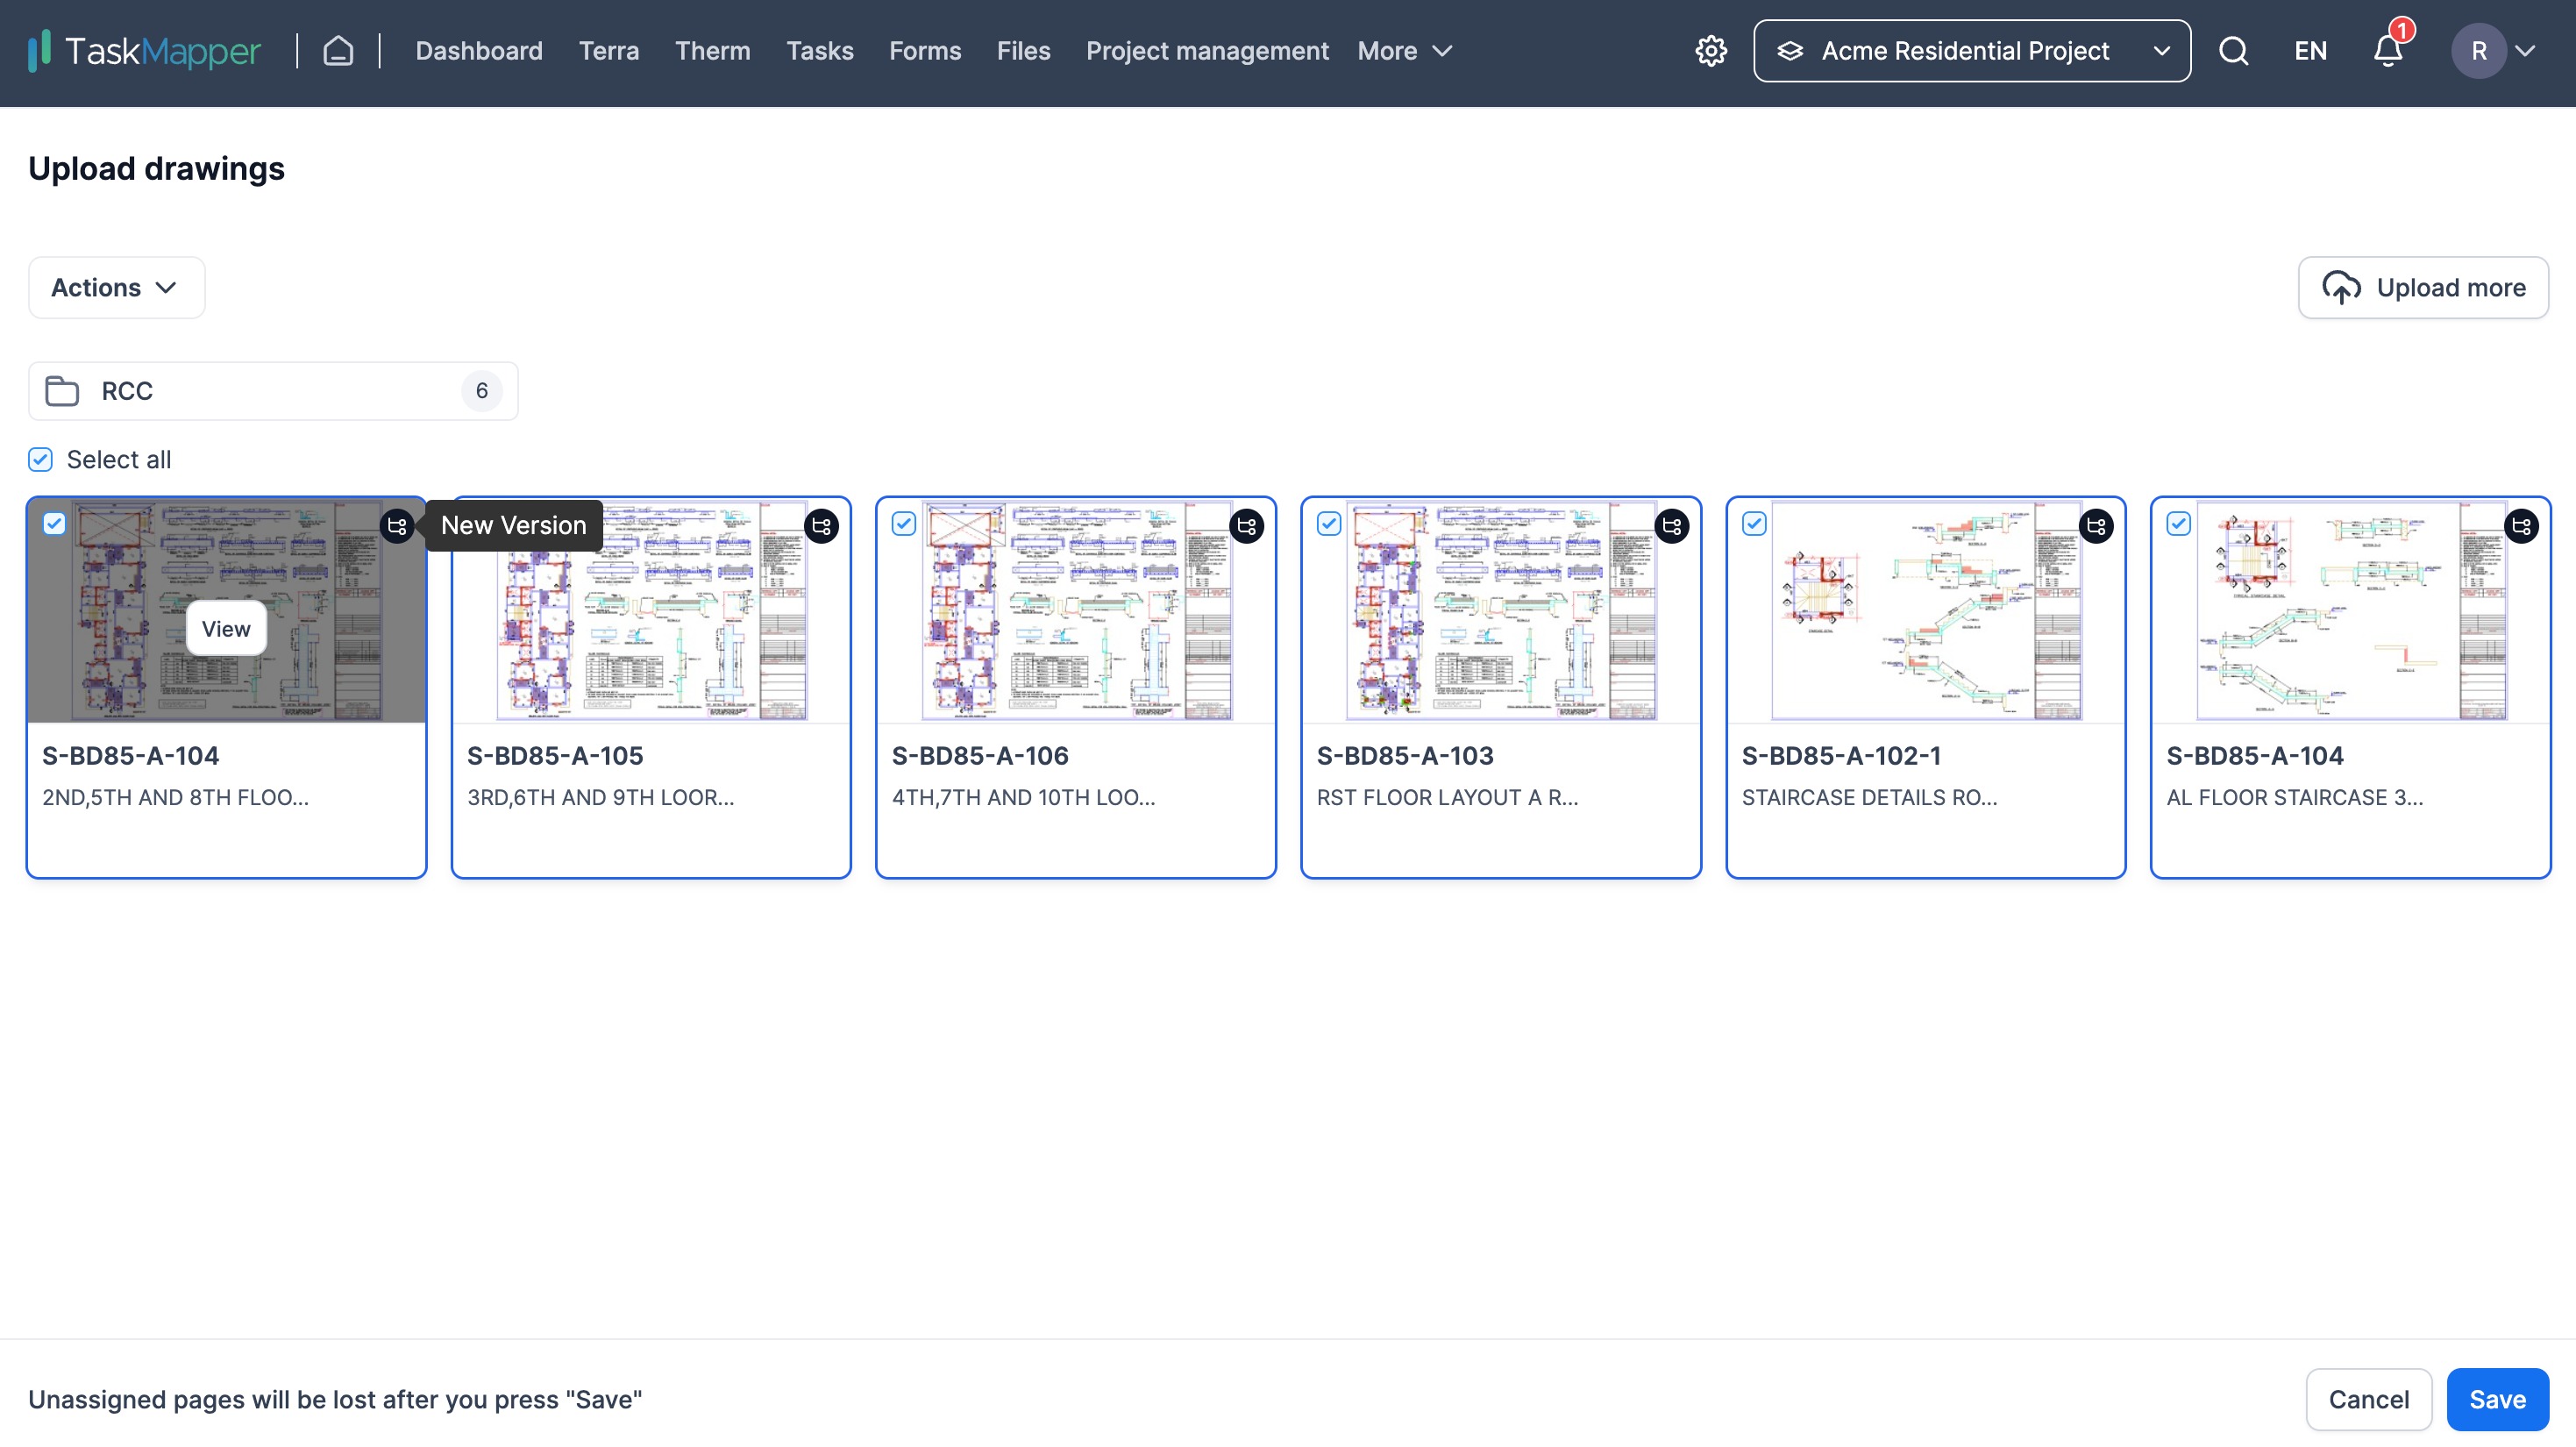
Figure 12: Automatic versioning of plans
Method 2: Manual version upload
Newer versions can be directly uploaded by clicking on 'Upload new version' in the Plan view.
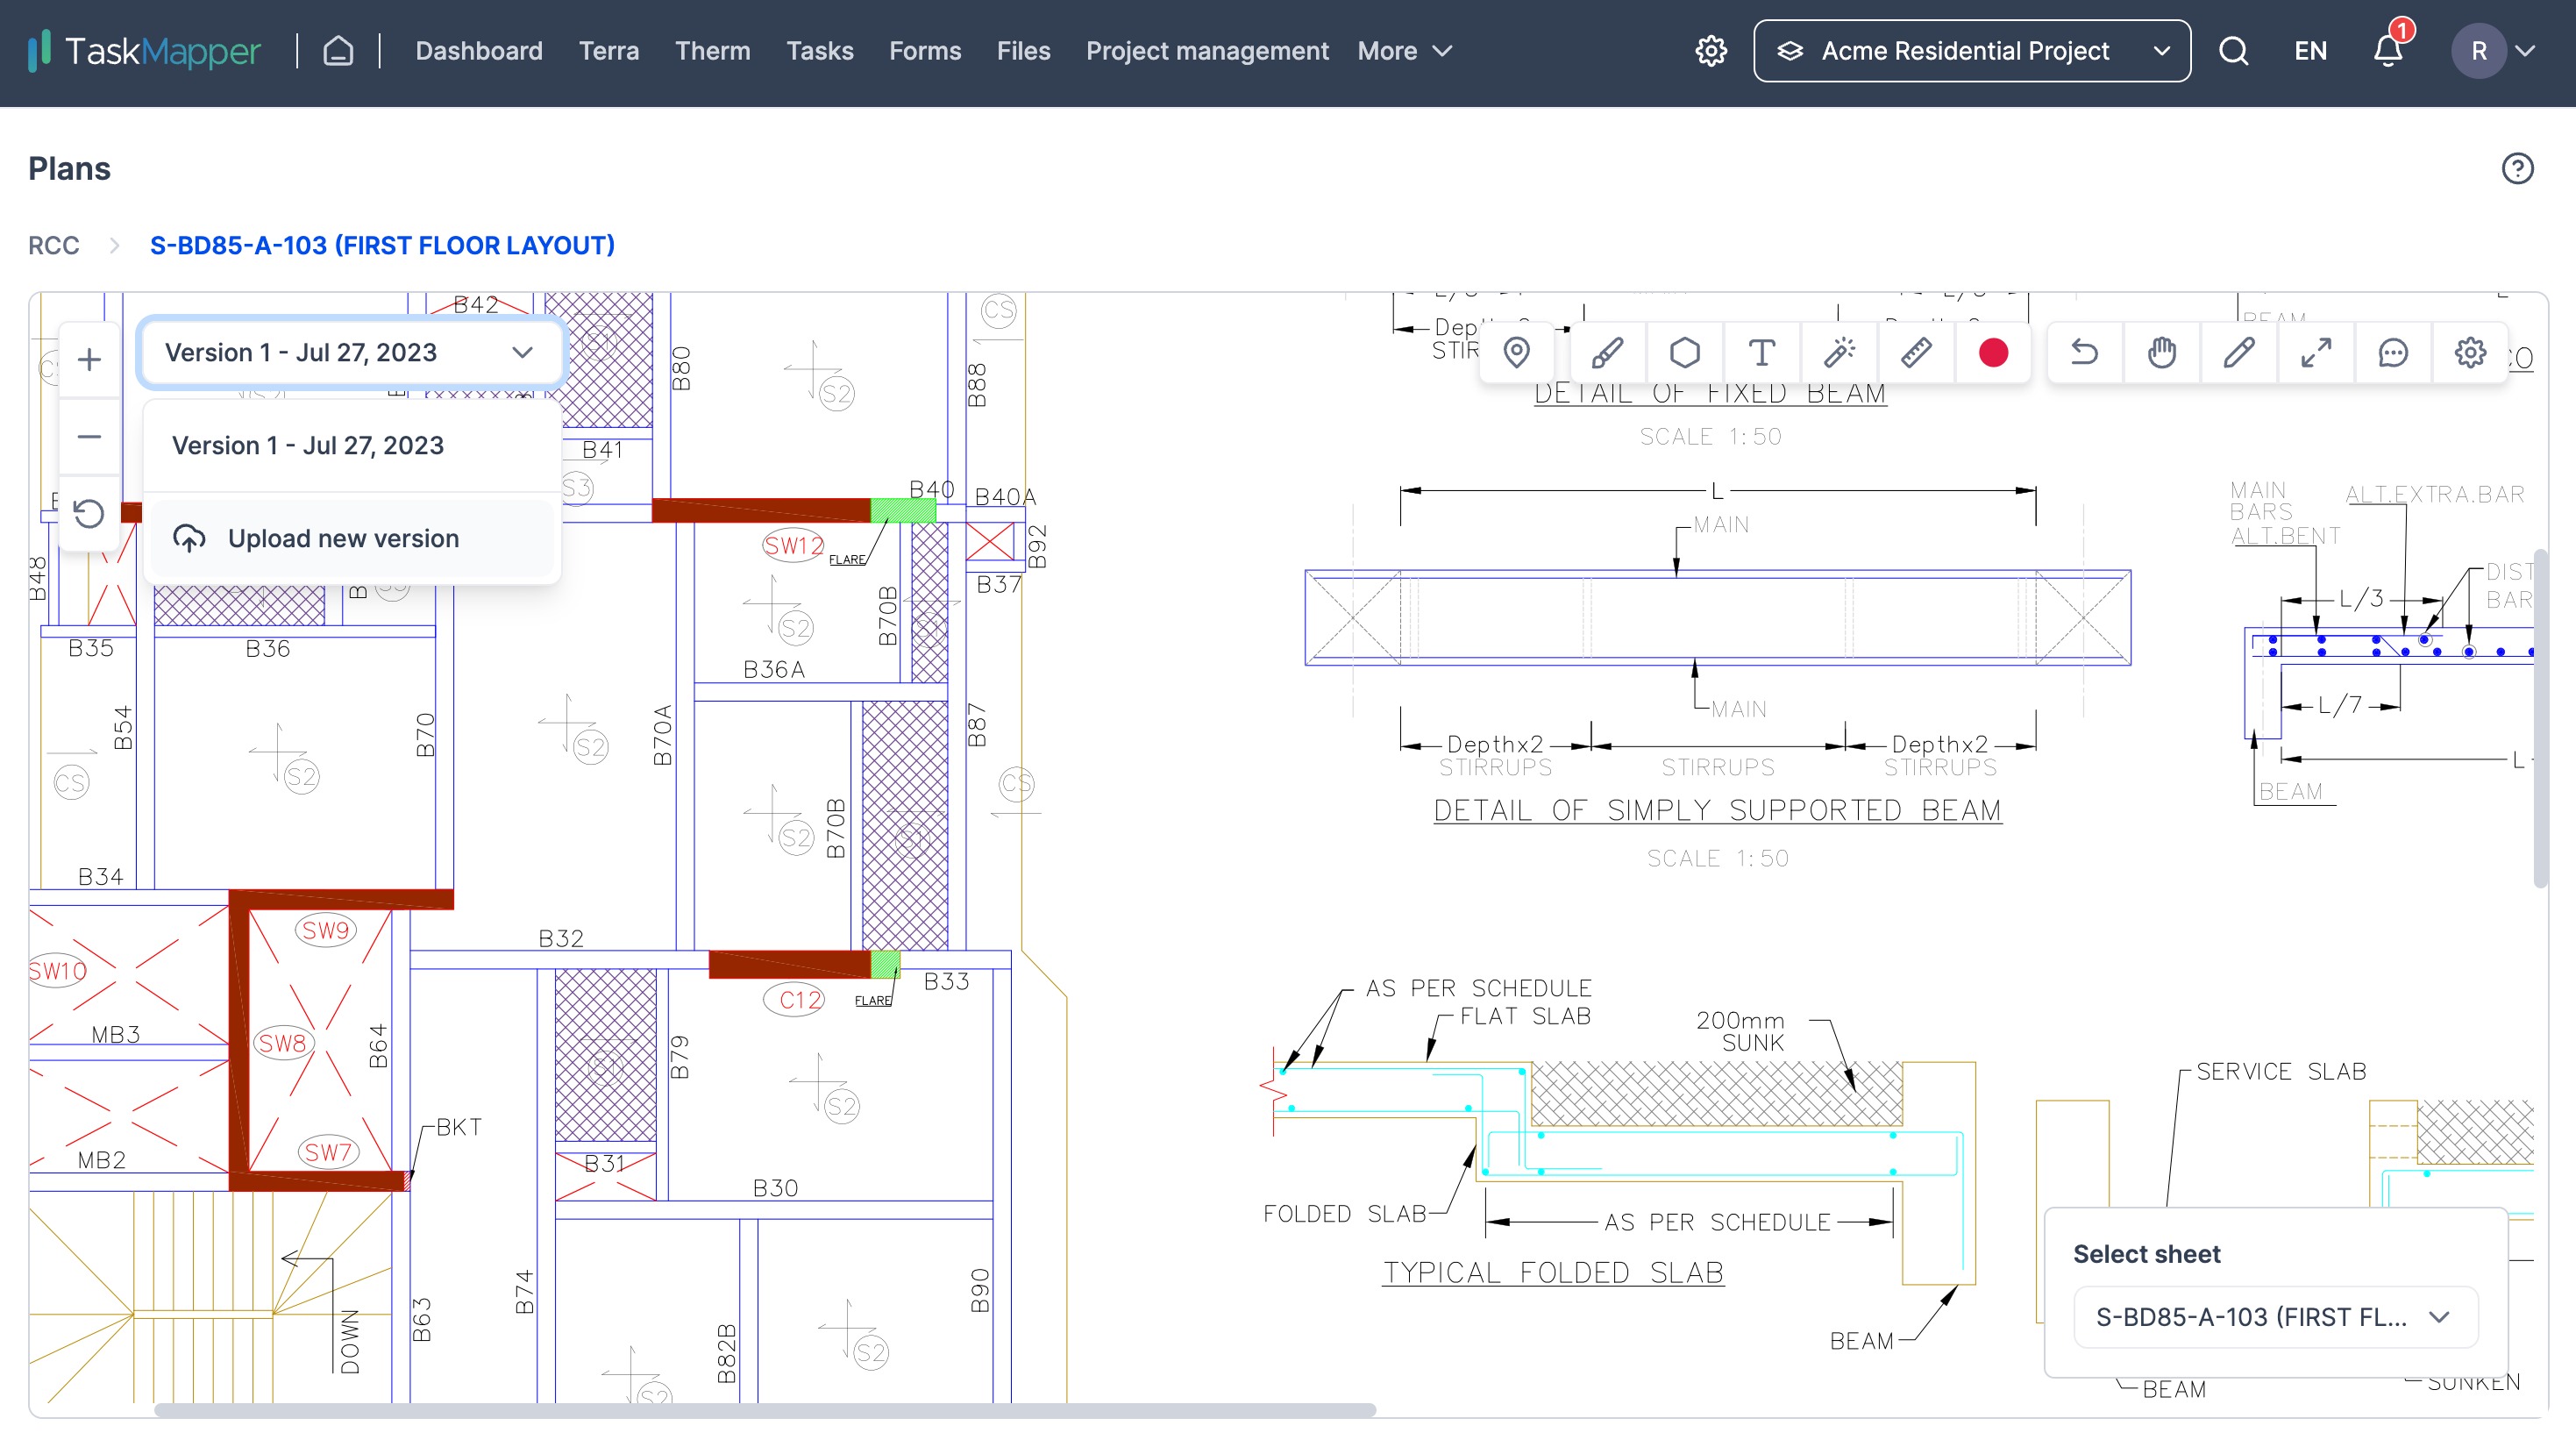
Figure 13: Manual version upload
How to move plans from one drawing to another?
Plans from a source drawing can be moved by assigning them to the destination drawing. To move, select the plans, and choose 'Assign' from actions.
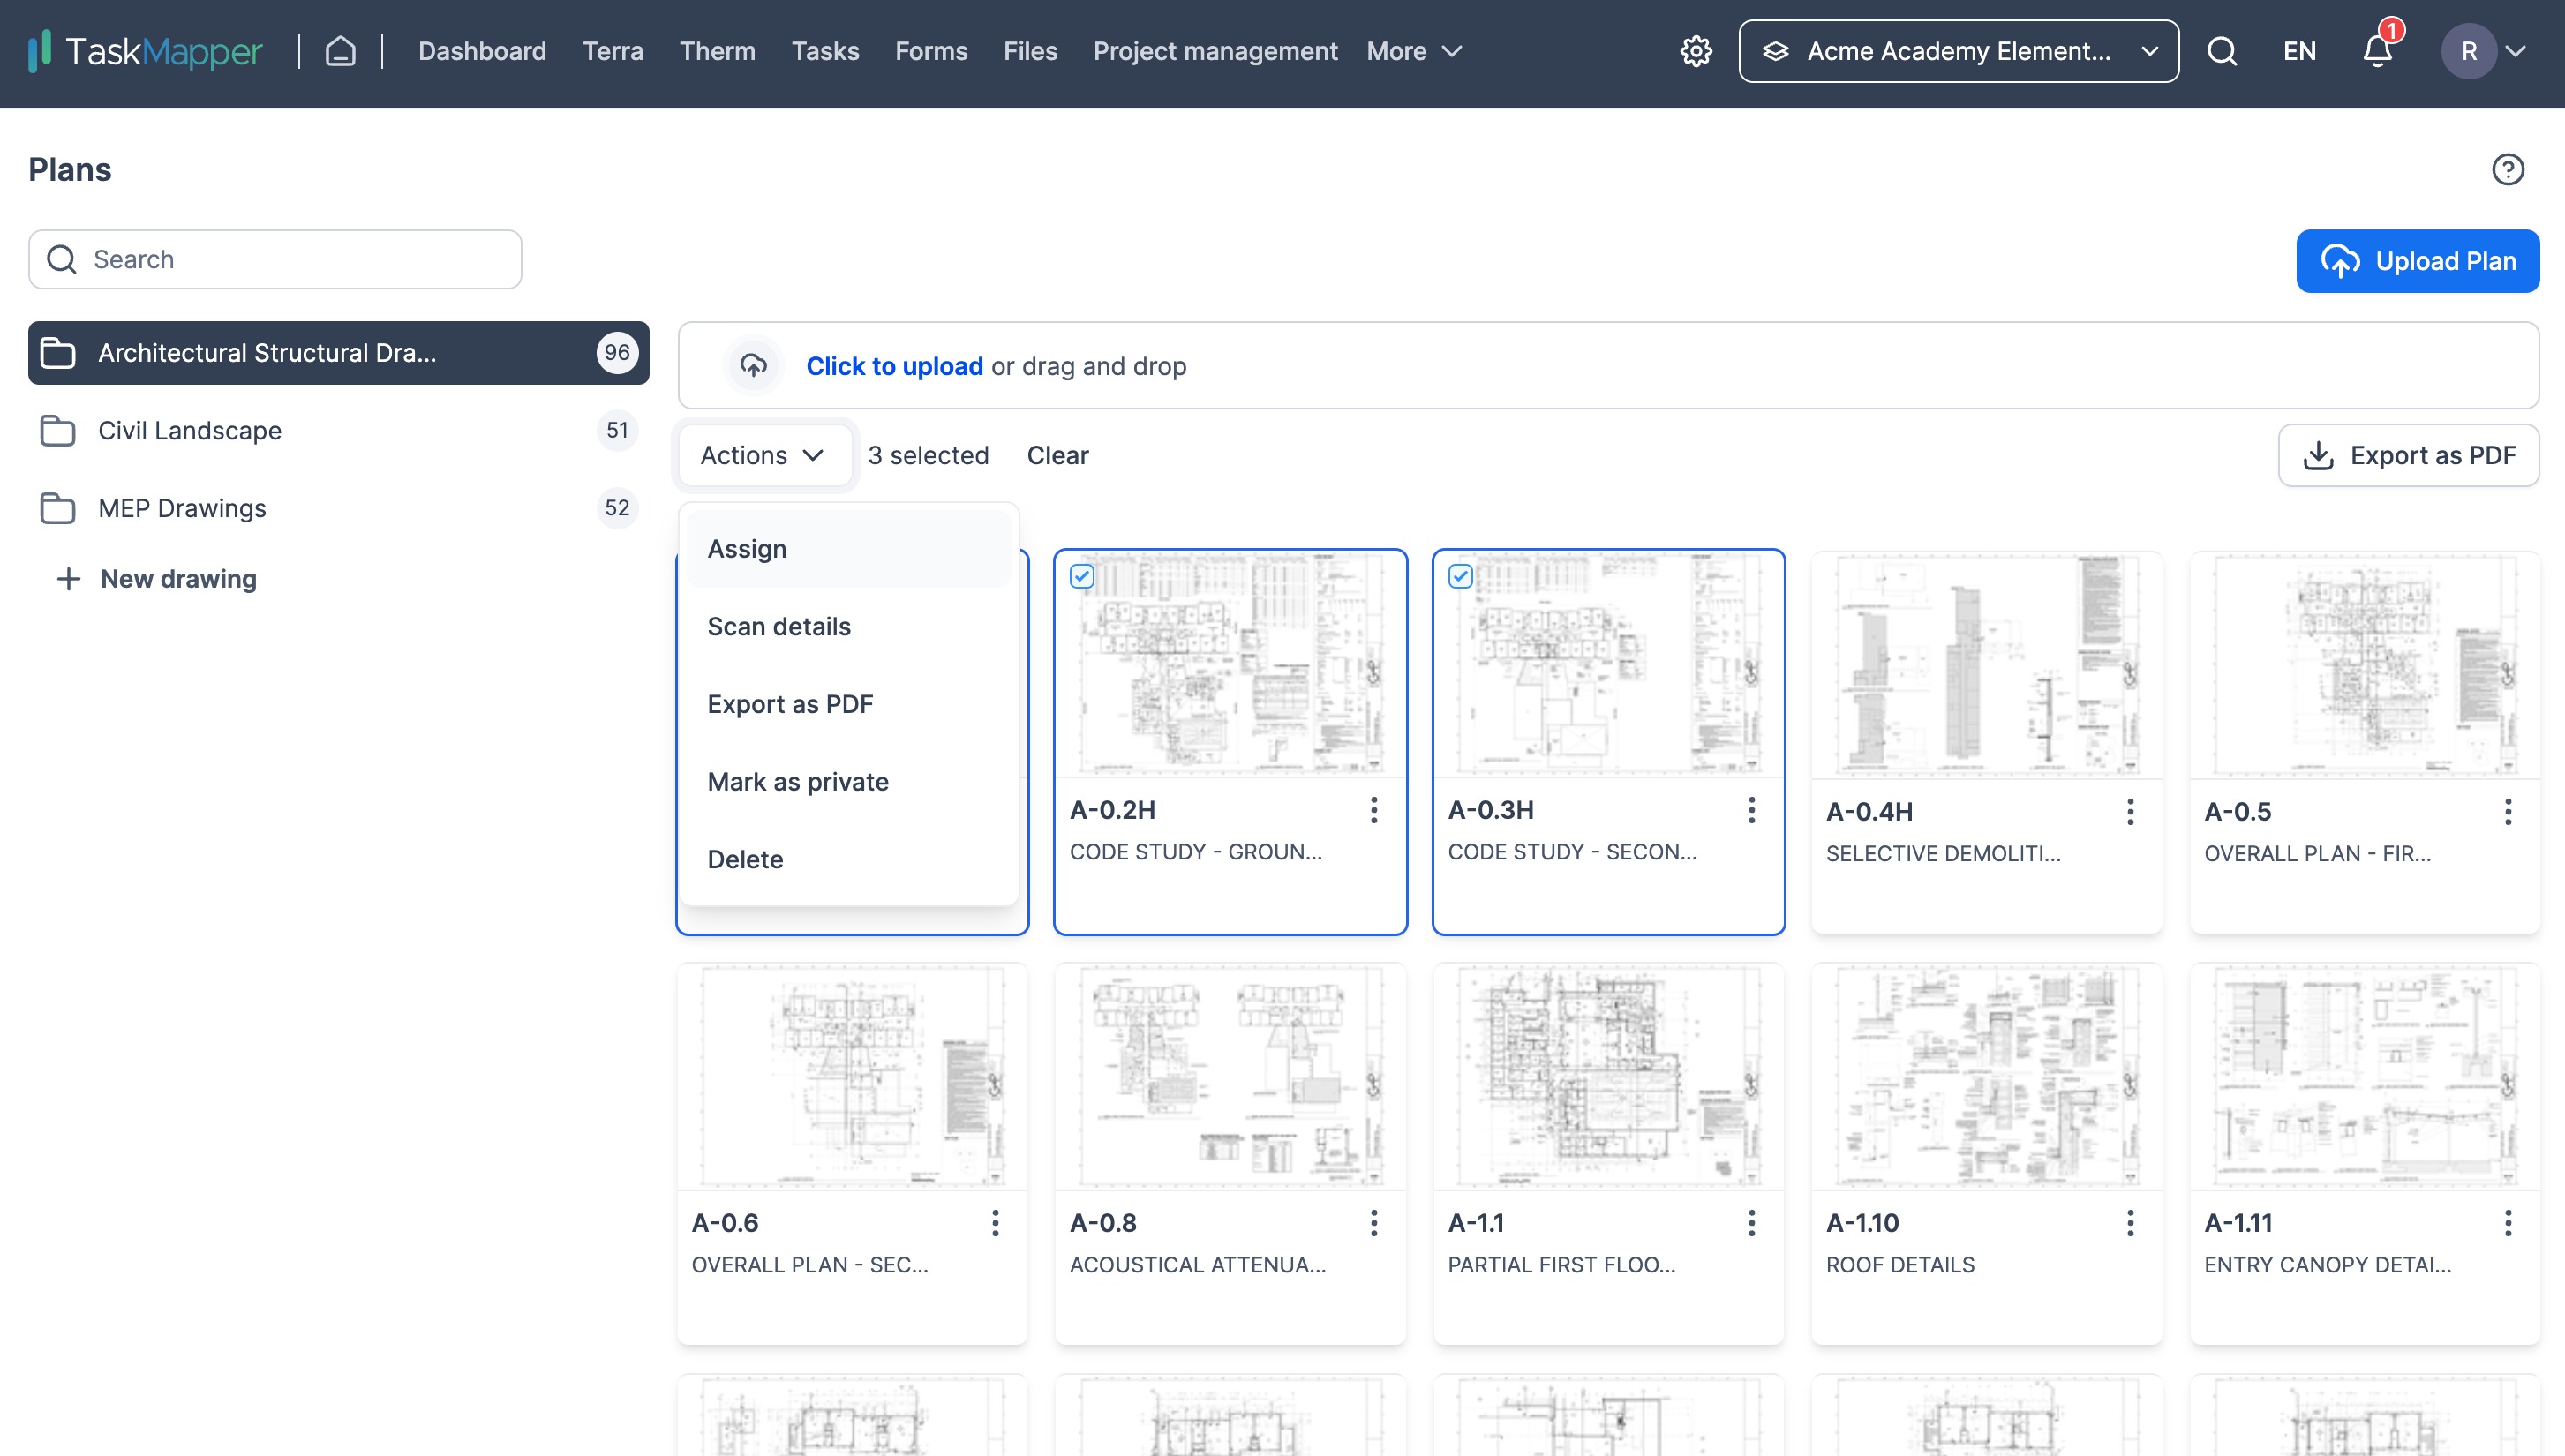
Figure 14(a): Move plans
Then, select the destination drawing and click 'Assign' to move plans.
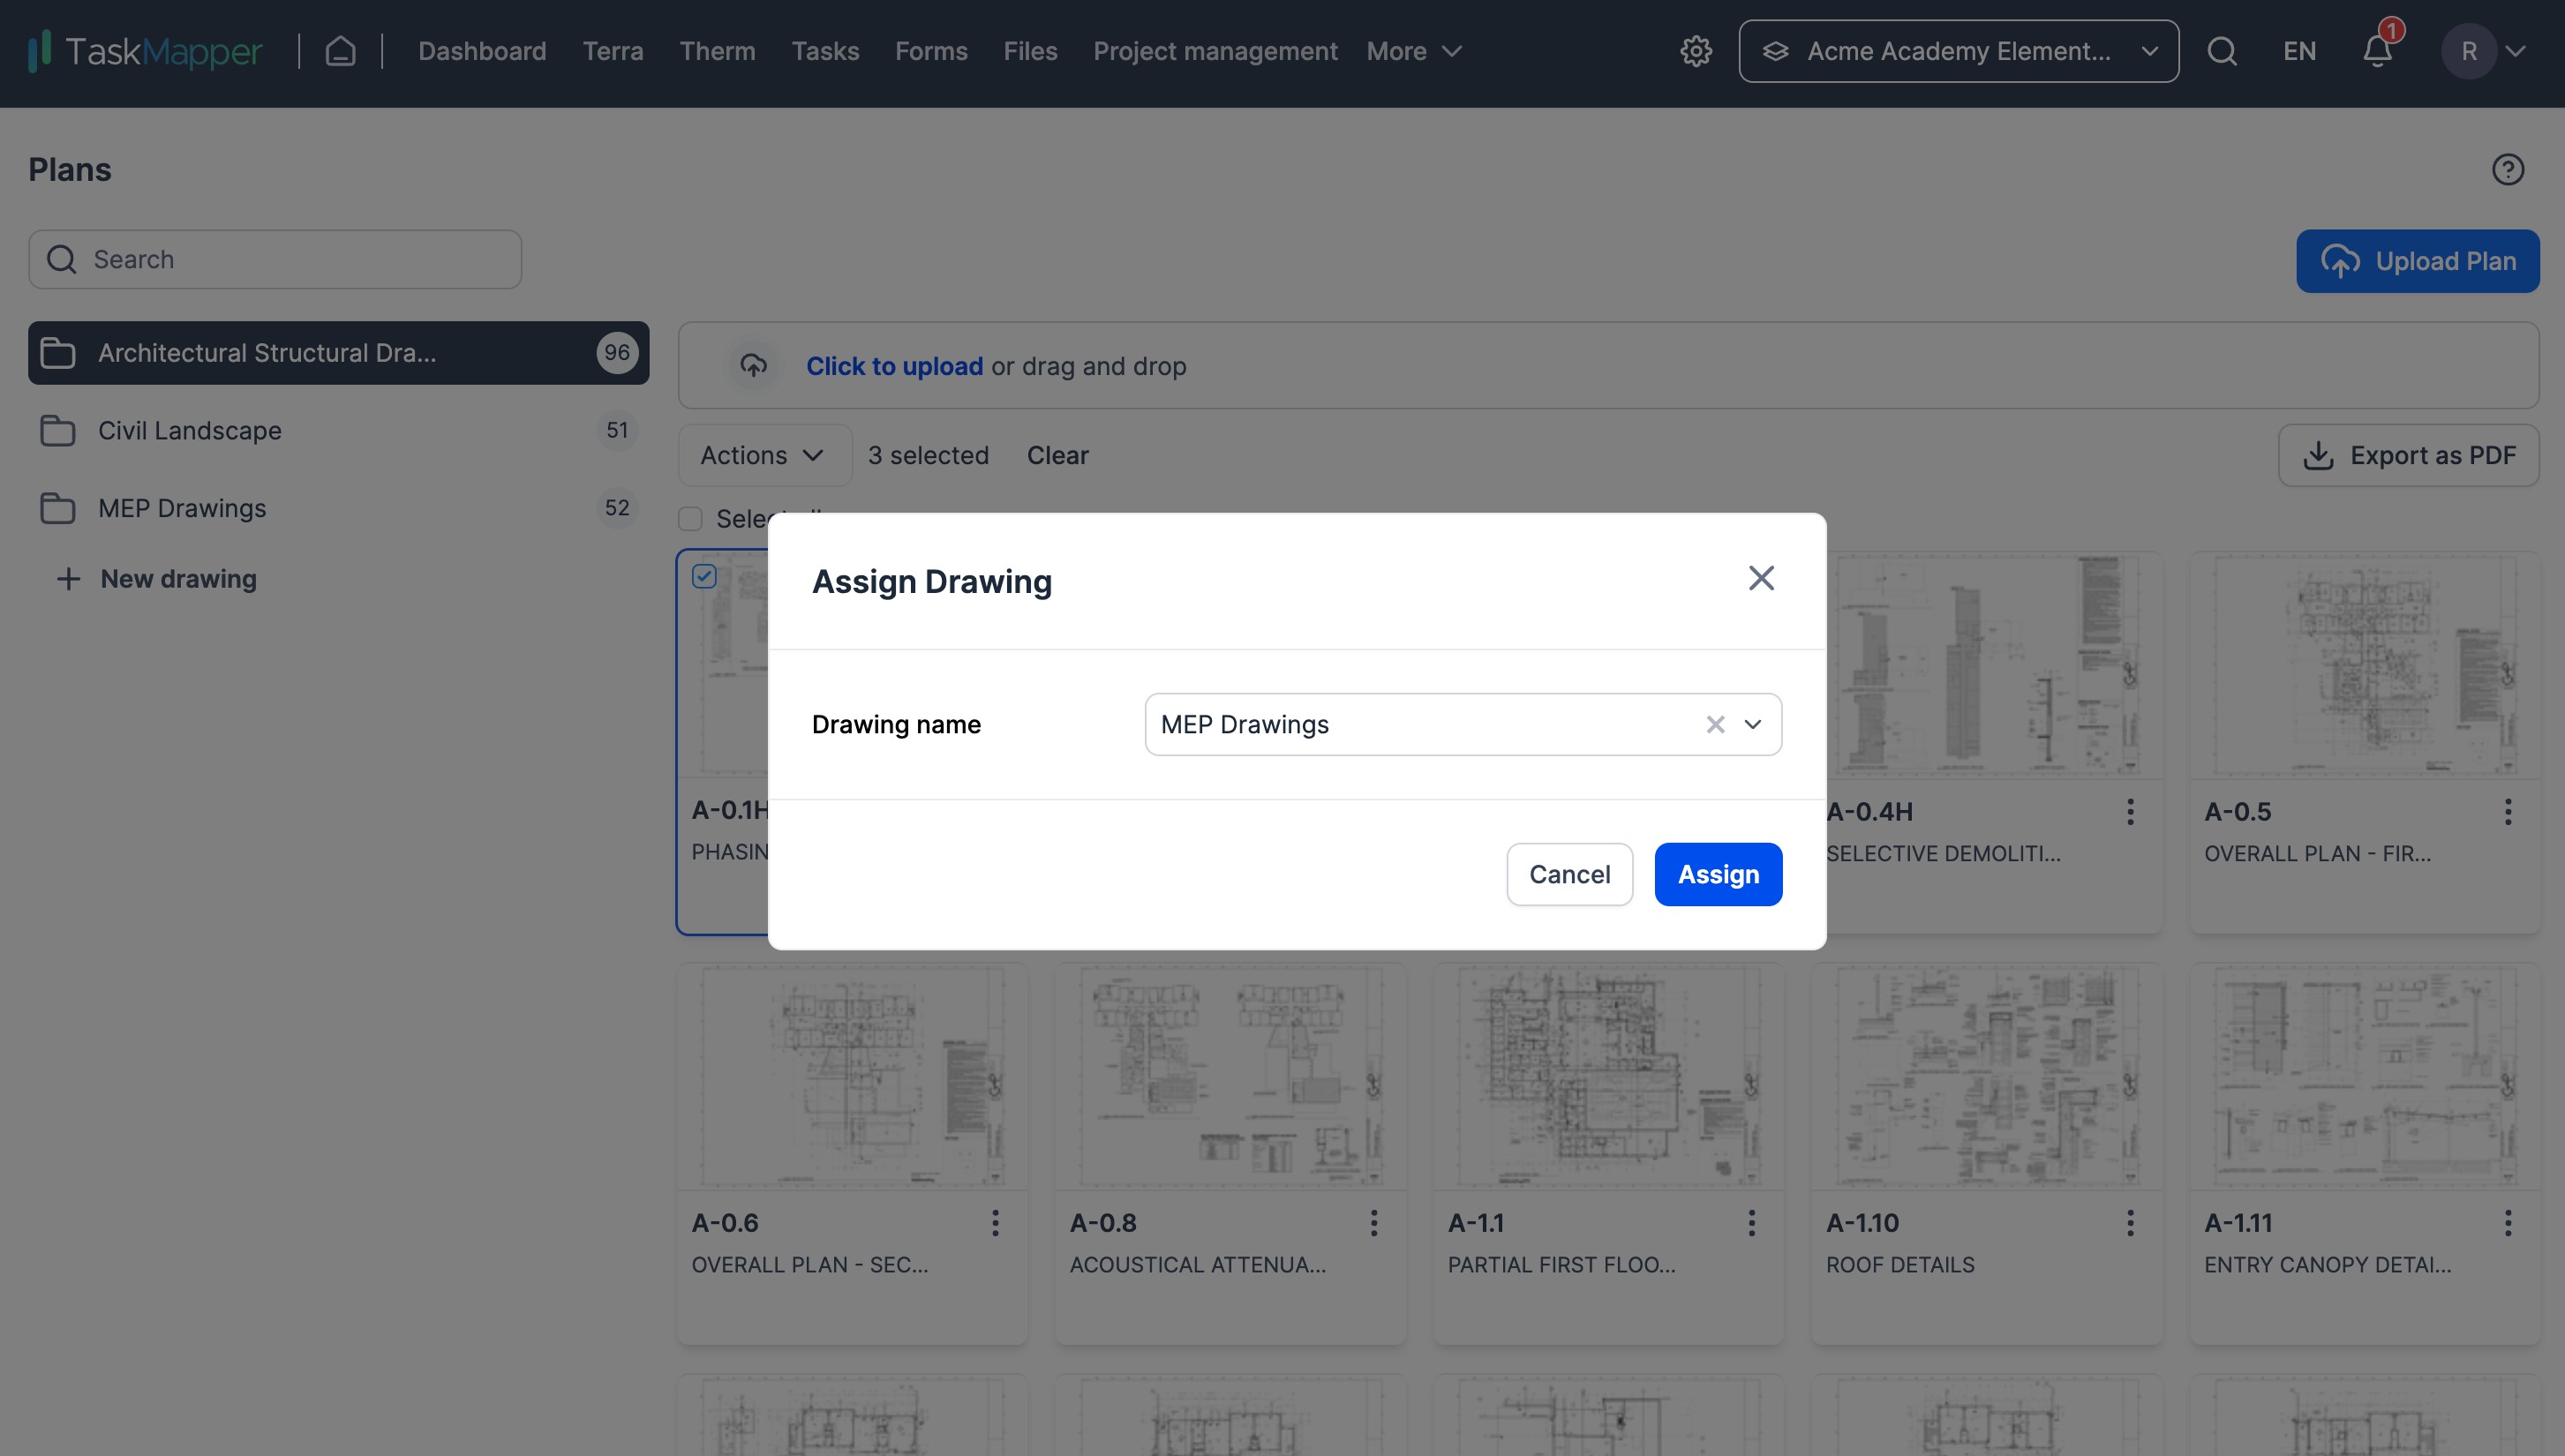
Figure 14(b): Move plans
How to filter tasks, forms, markups and comments on the plan view?
Click on the gear icon on the marker tool. Select/deselect the checkbox for tasks, forms, markups and comments
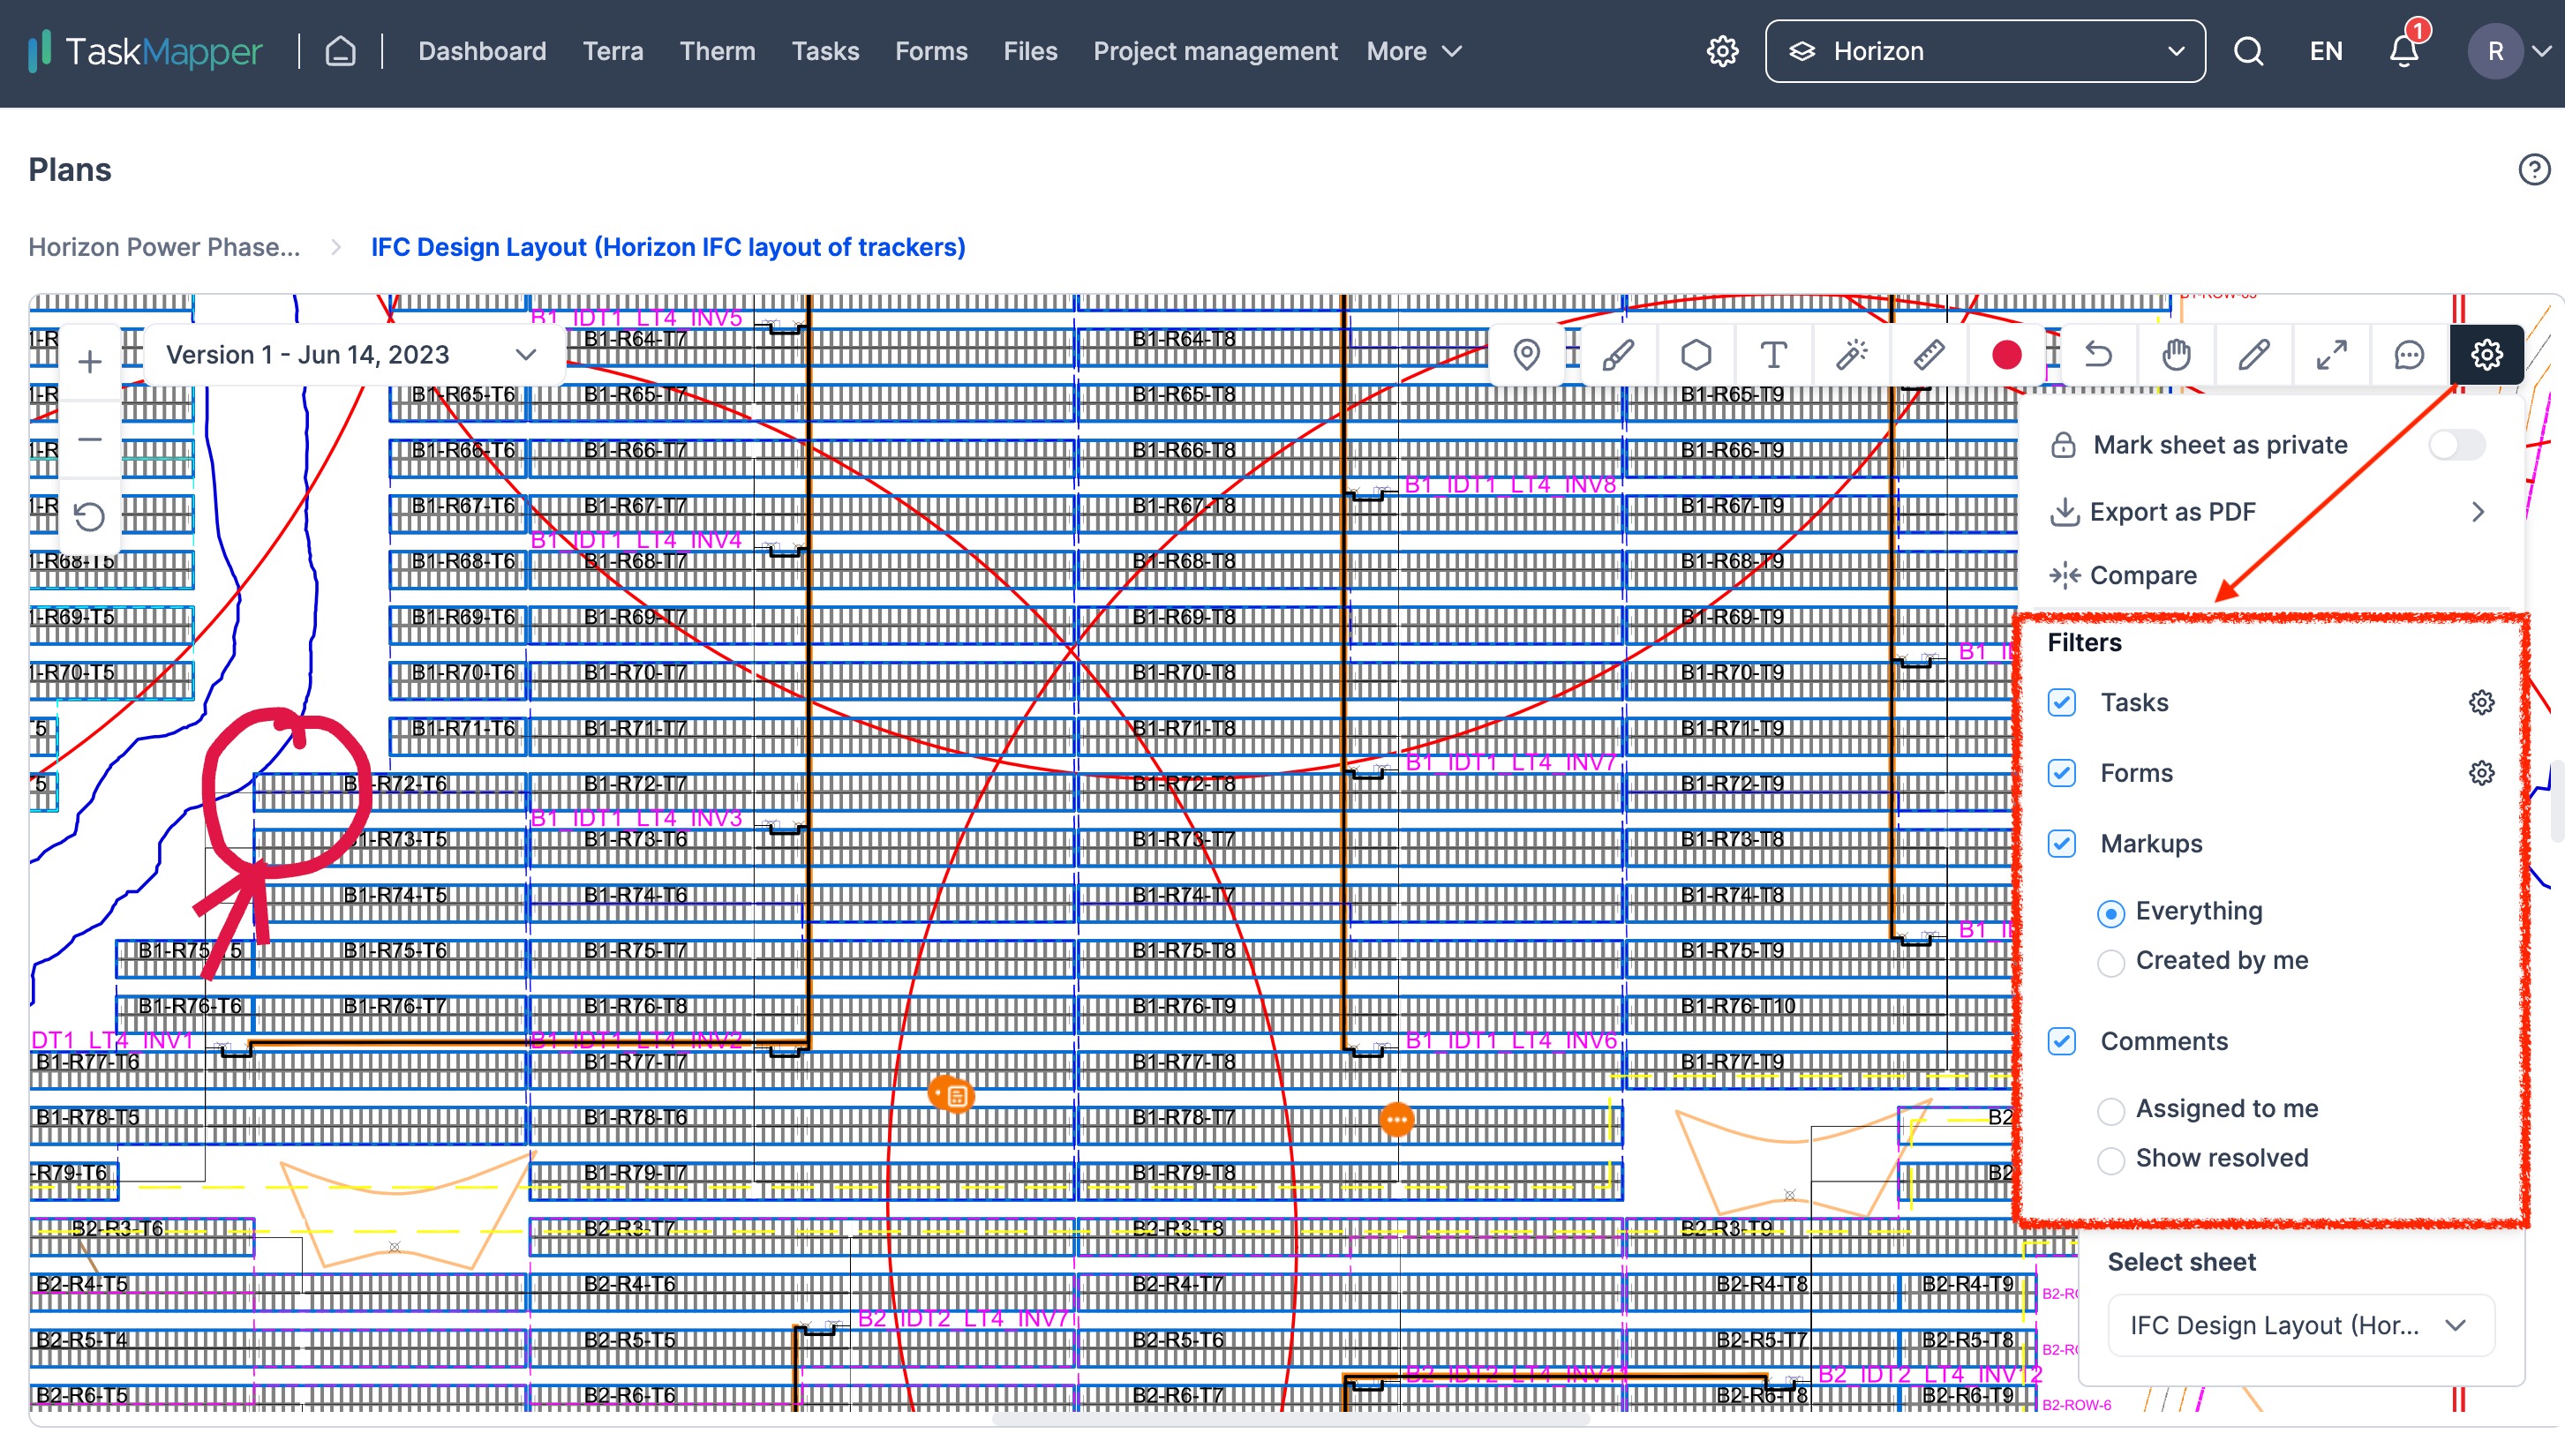
Figure 15: Plan view filters
How to add markups to the plan view?
The plan view supports multiple options in the marker tool to add markups to the plan. Choose from options such as drawing, shape or text. Based on your selection, add the markup on the plan view and annotate using the text and colour options.
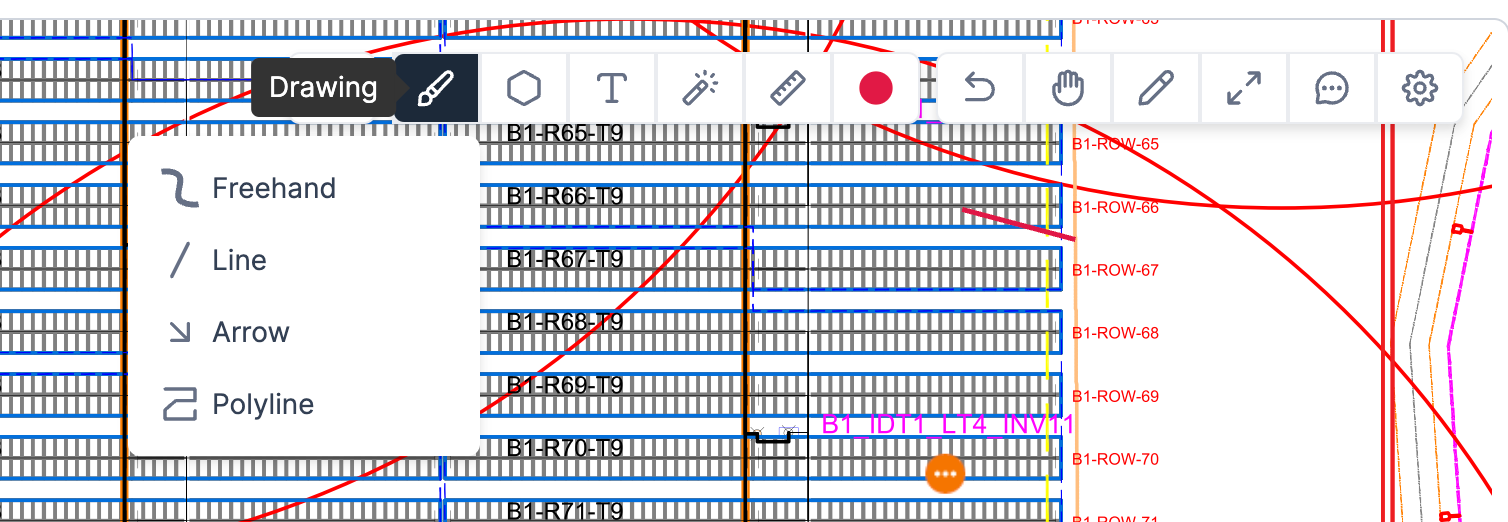
Figure 16(a): Drawing options in the marker tool
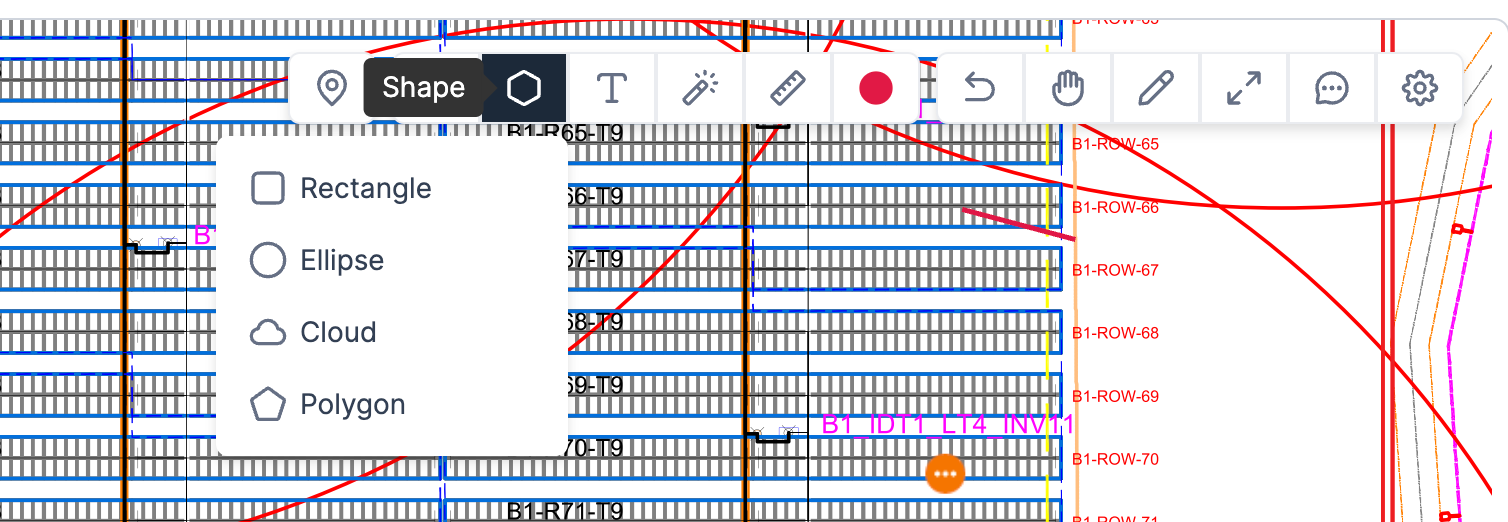
Figure 16(b): Shape options in the marker tool

Figure 16(c): Include text using the marker tool
How to make measurements?
The marker tool allows for calibration and measurement in the plan view. Use the scale to calibrate and perform measurements with the marker tool's measurement option.
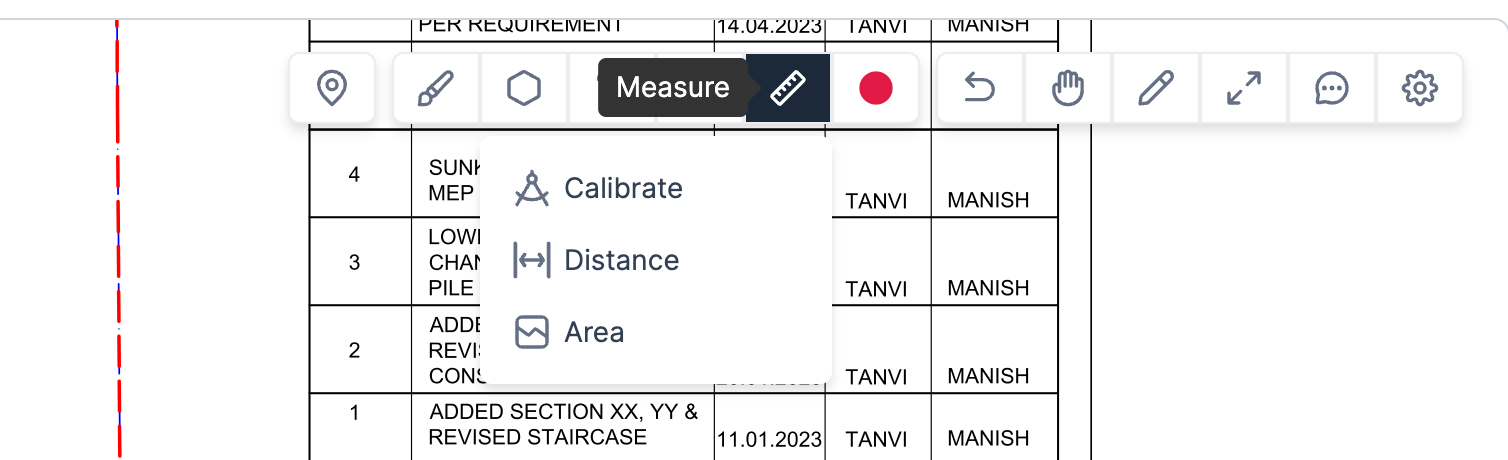
Figure 17(a): Measure options in the marker tool
1) The first step is to calibrate. Select calibrate under the measure option and choose the calibrate.
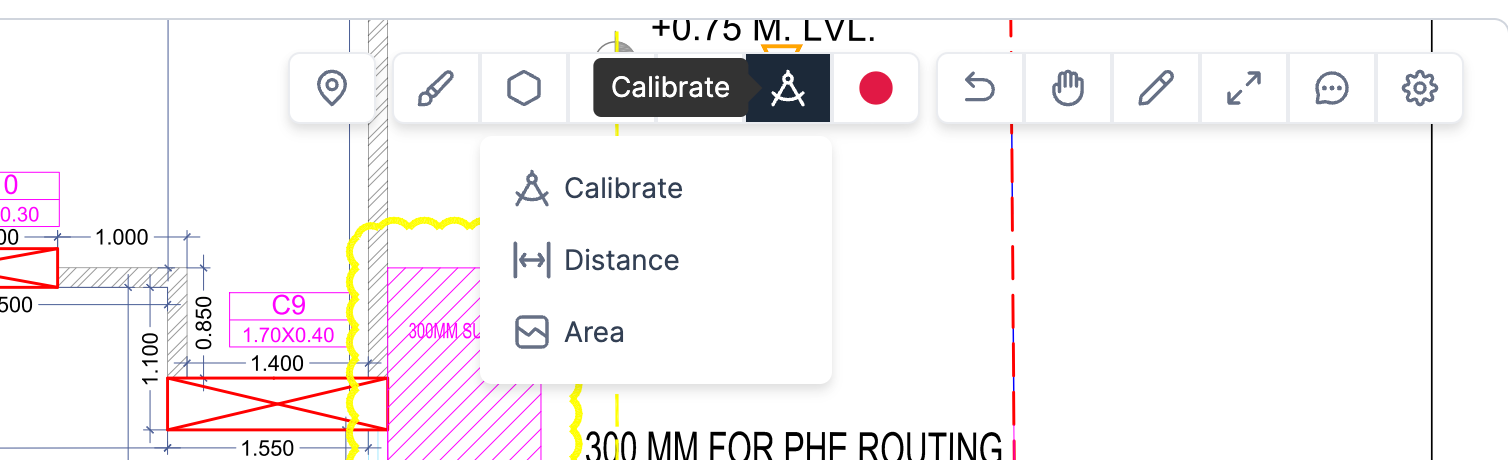
Figure 18(a): Calibrate
2) Once calibrated, choose between area or distance to measure
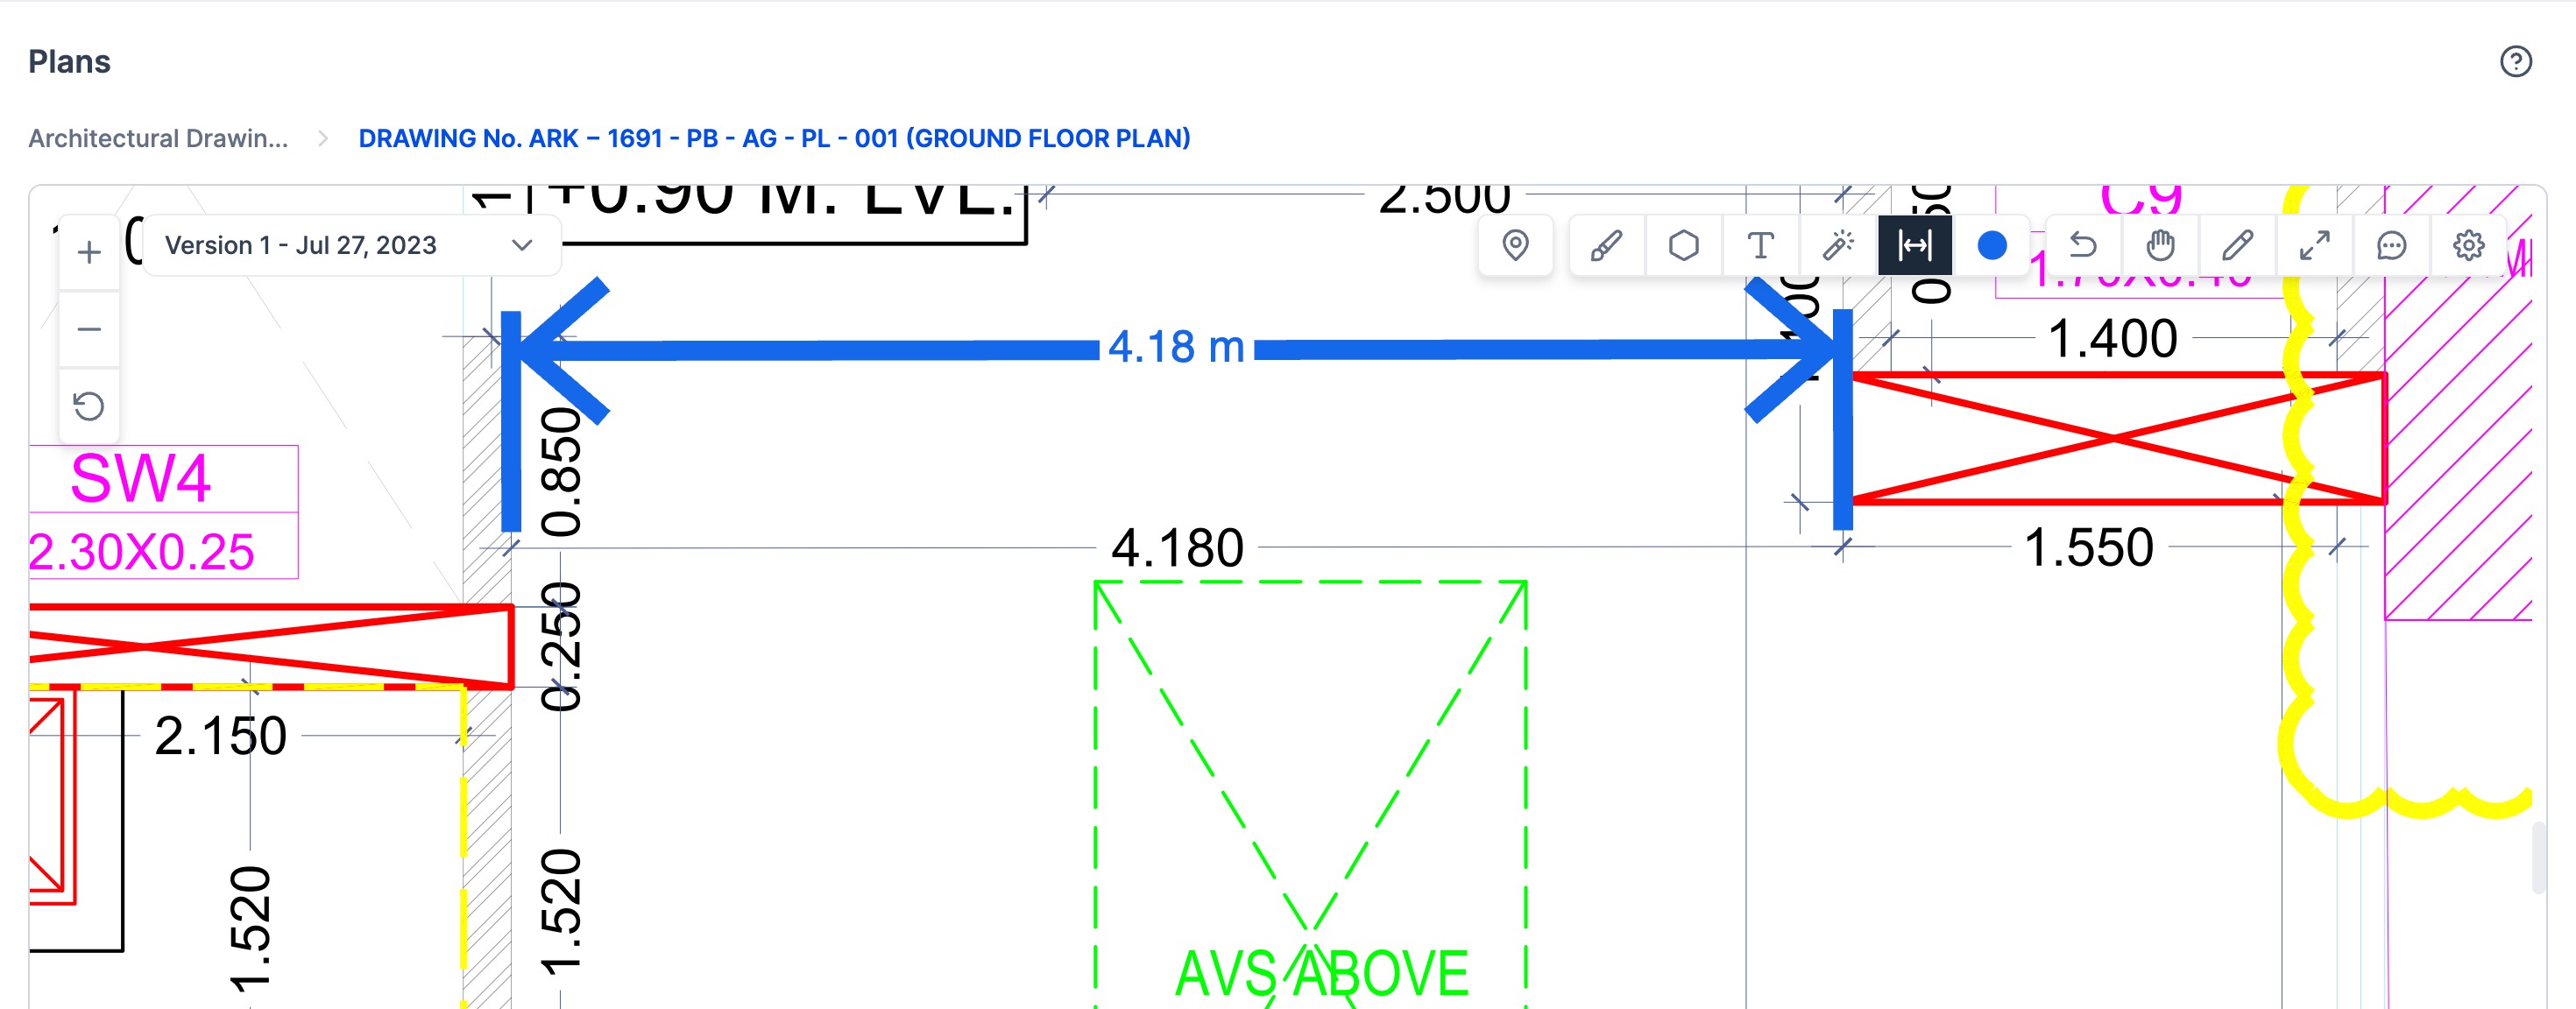
Figure 18(b): Measurements in plans
How to add a task, form and comment?
Click on the GPS icon in the marker tool to add a task or a form to the plan.
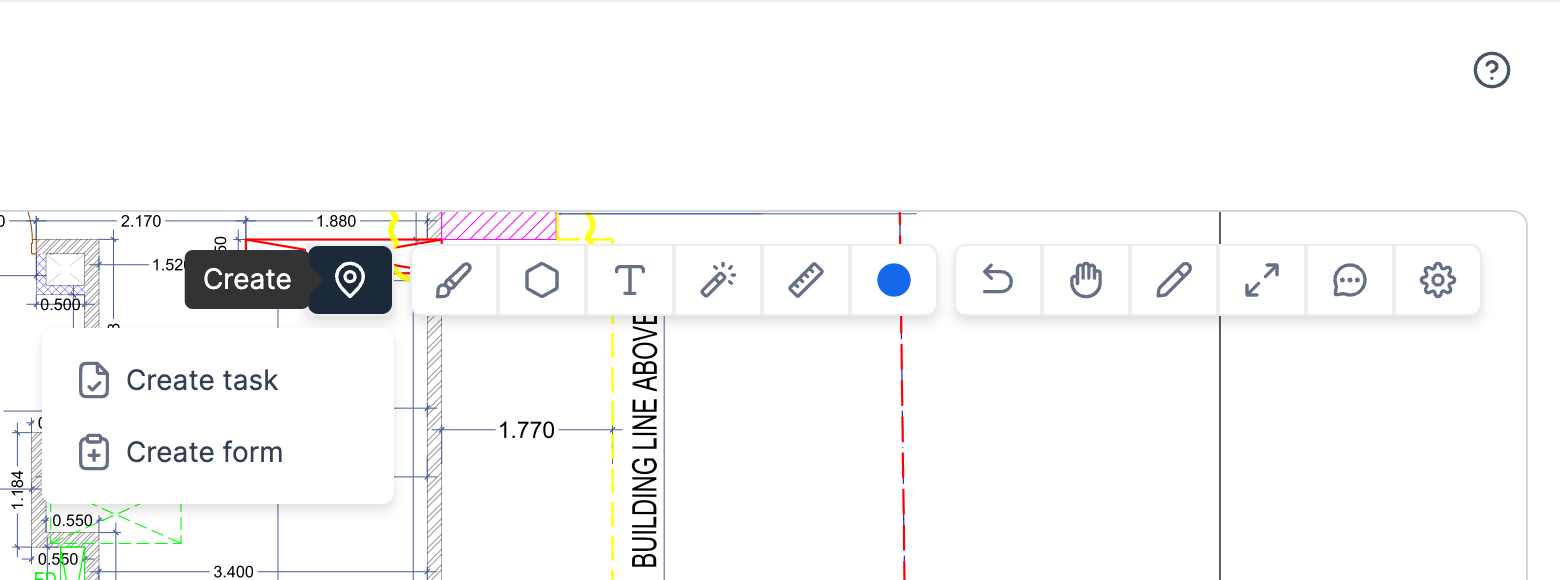
Figure 19(a): Attaching a task or a form to a plan
1) Select 'Create task' to add a task or 'Create form' to add a form to the plan.
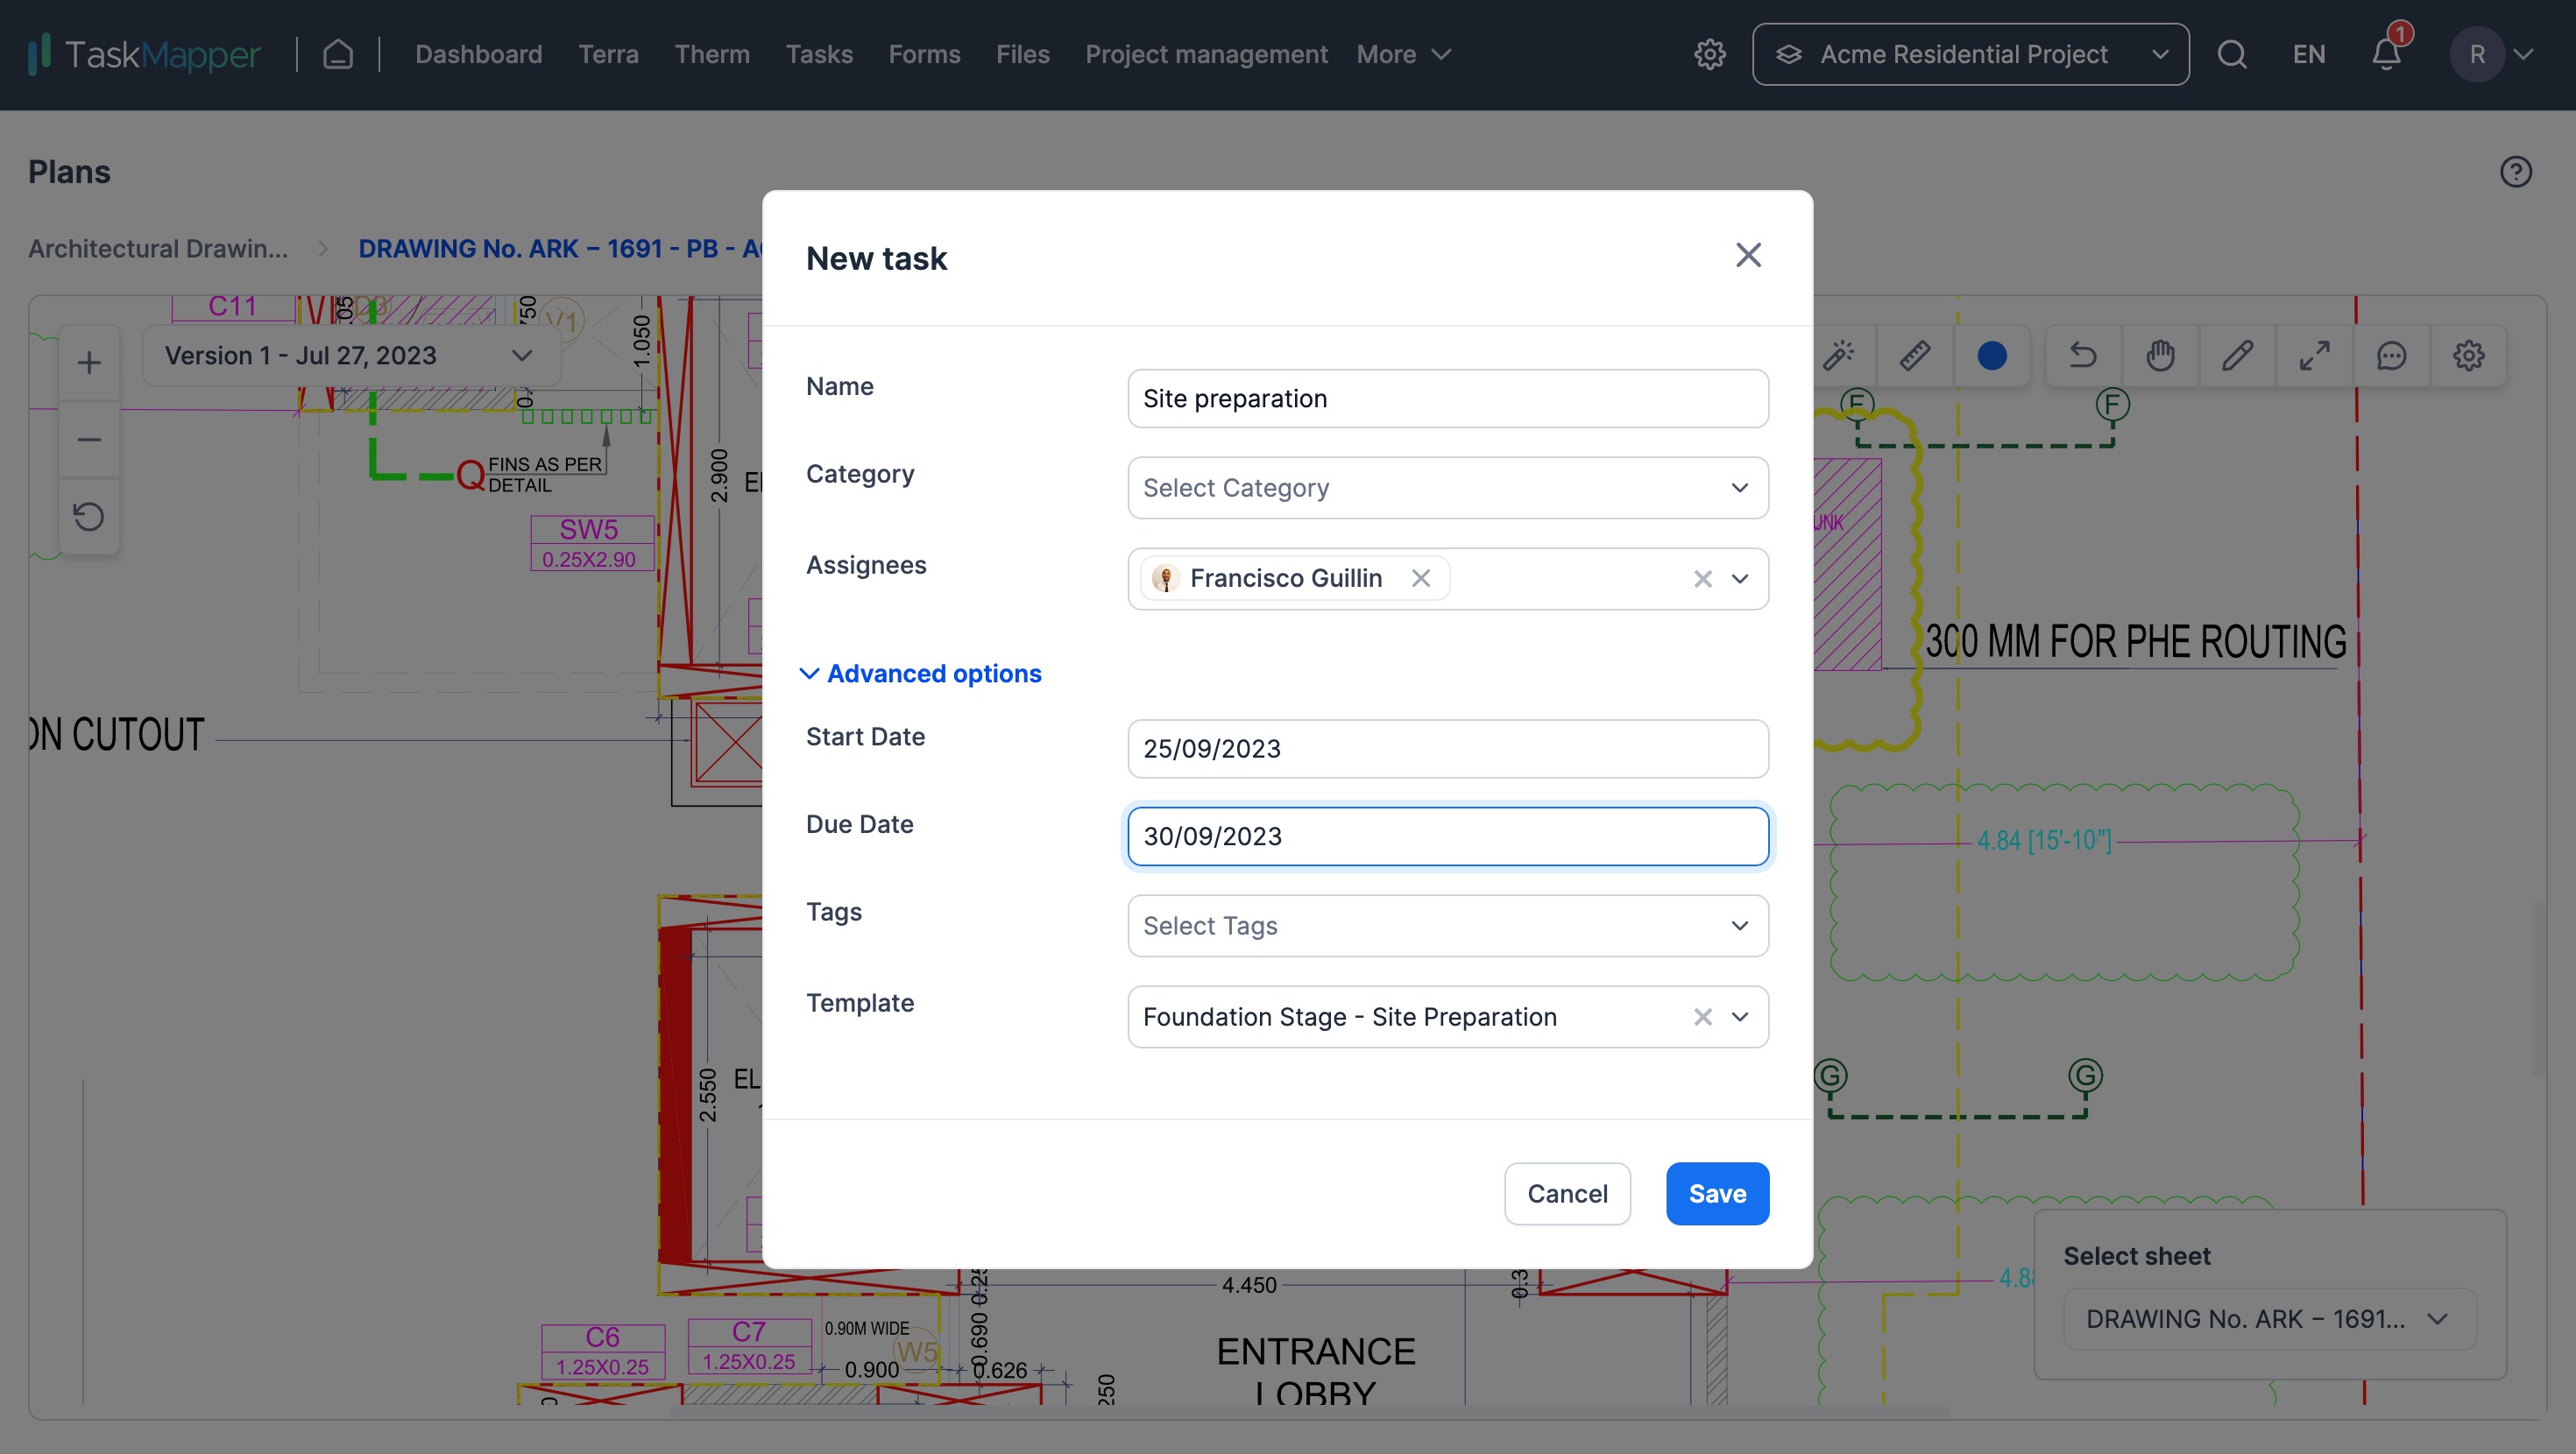
Figure 19(b): Create task
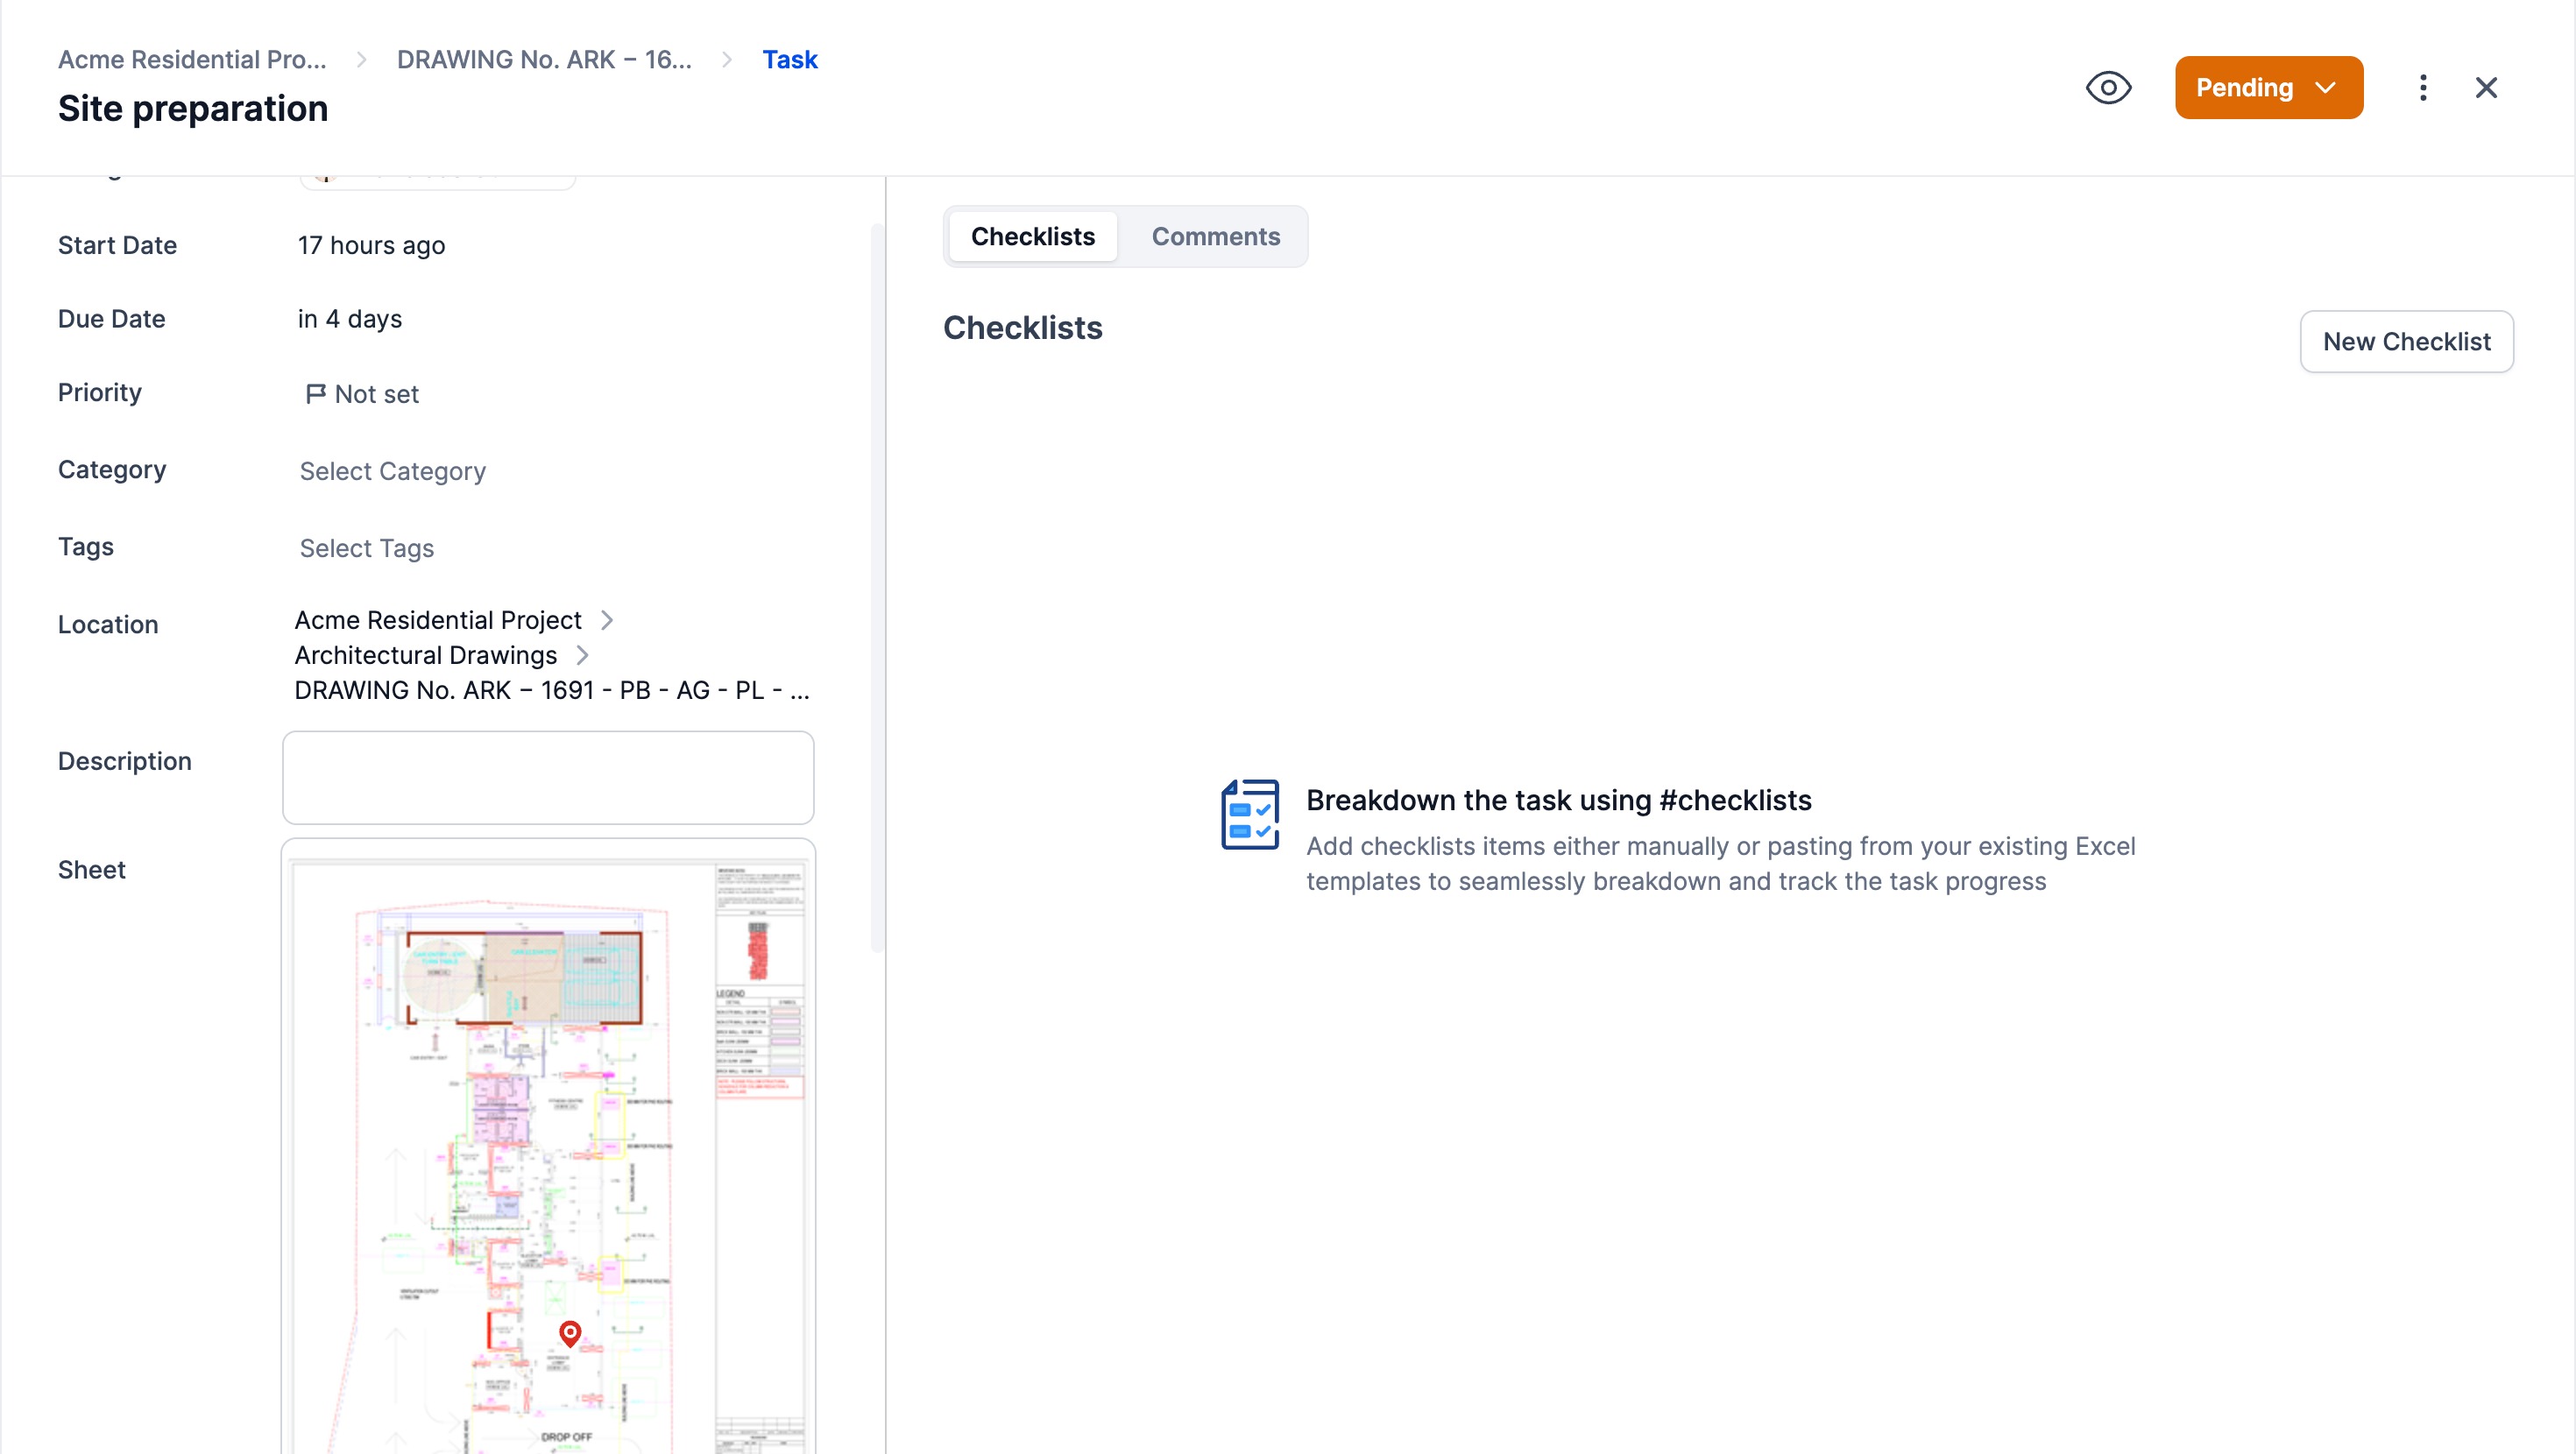
Figure 19(c): Task details
3) Select the 'Comment' icon in the marker tool to add a comment to a plan.
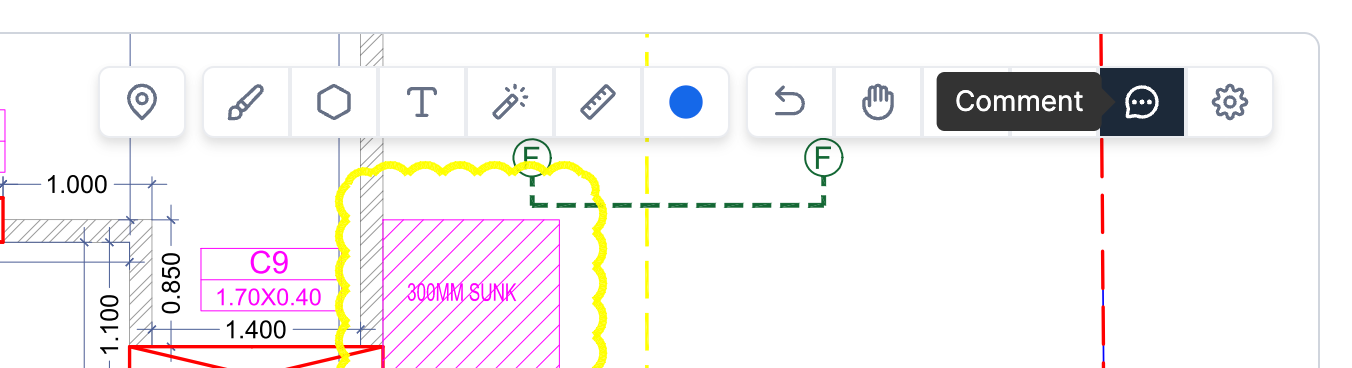
Figure 20(a): Comment
To add a comment to a plan, select a comment from the marker tool and click anywhere on the map to place the comment.
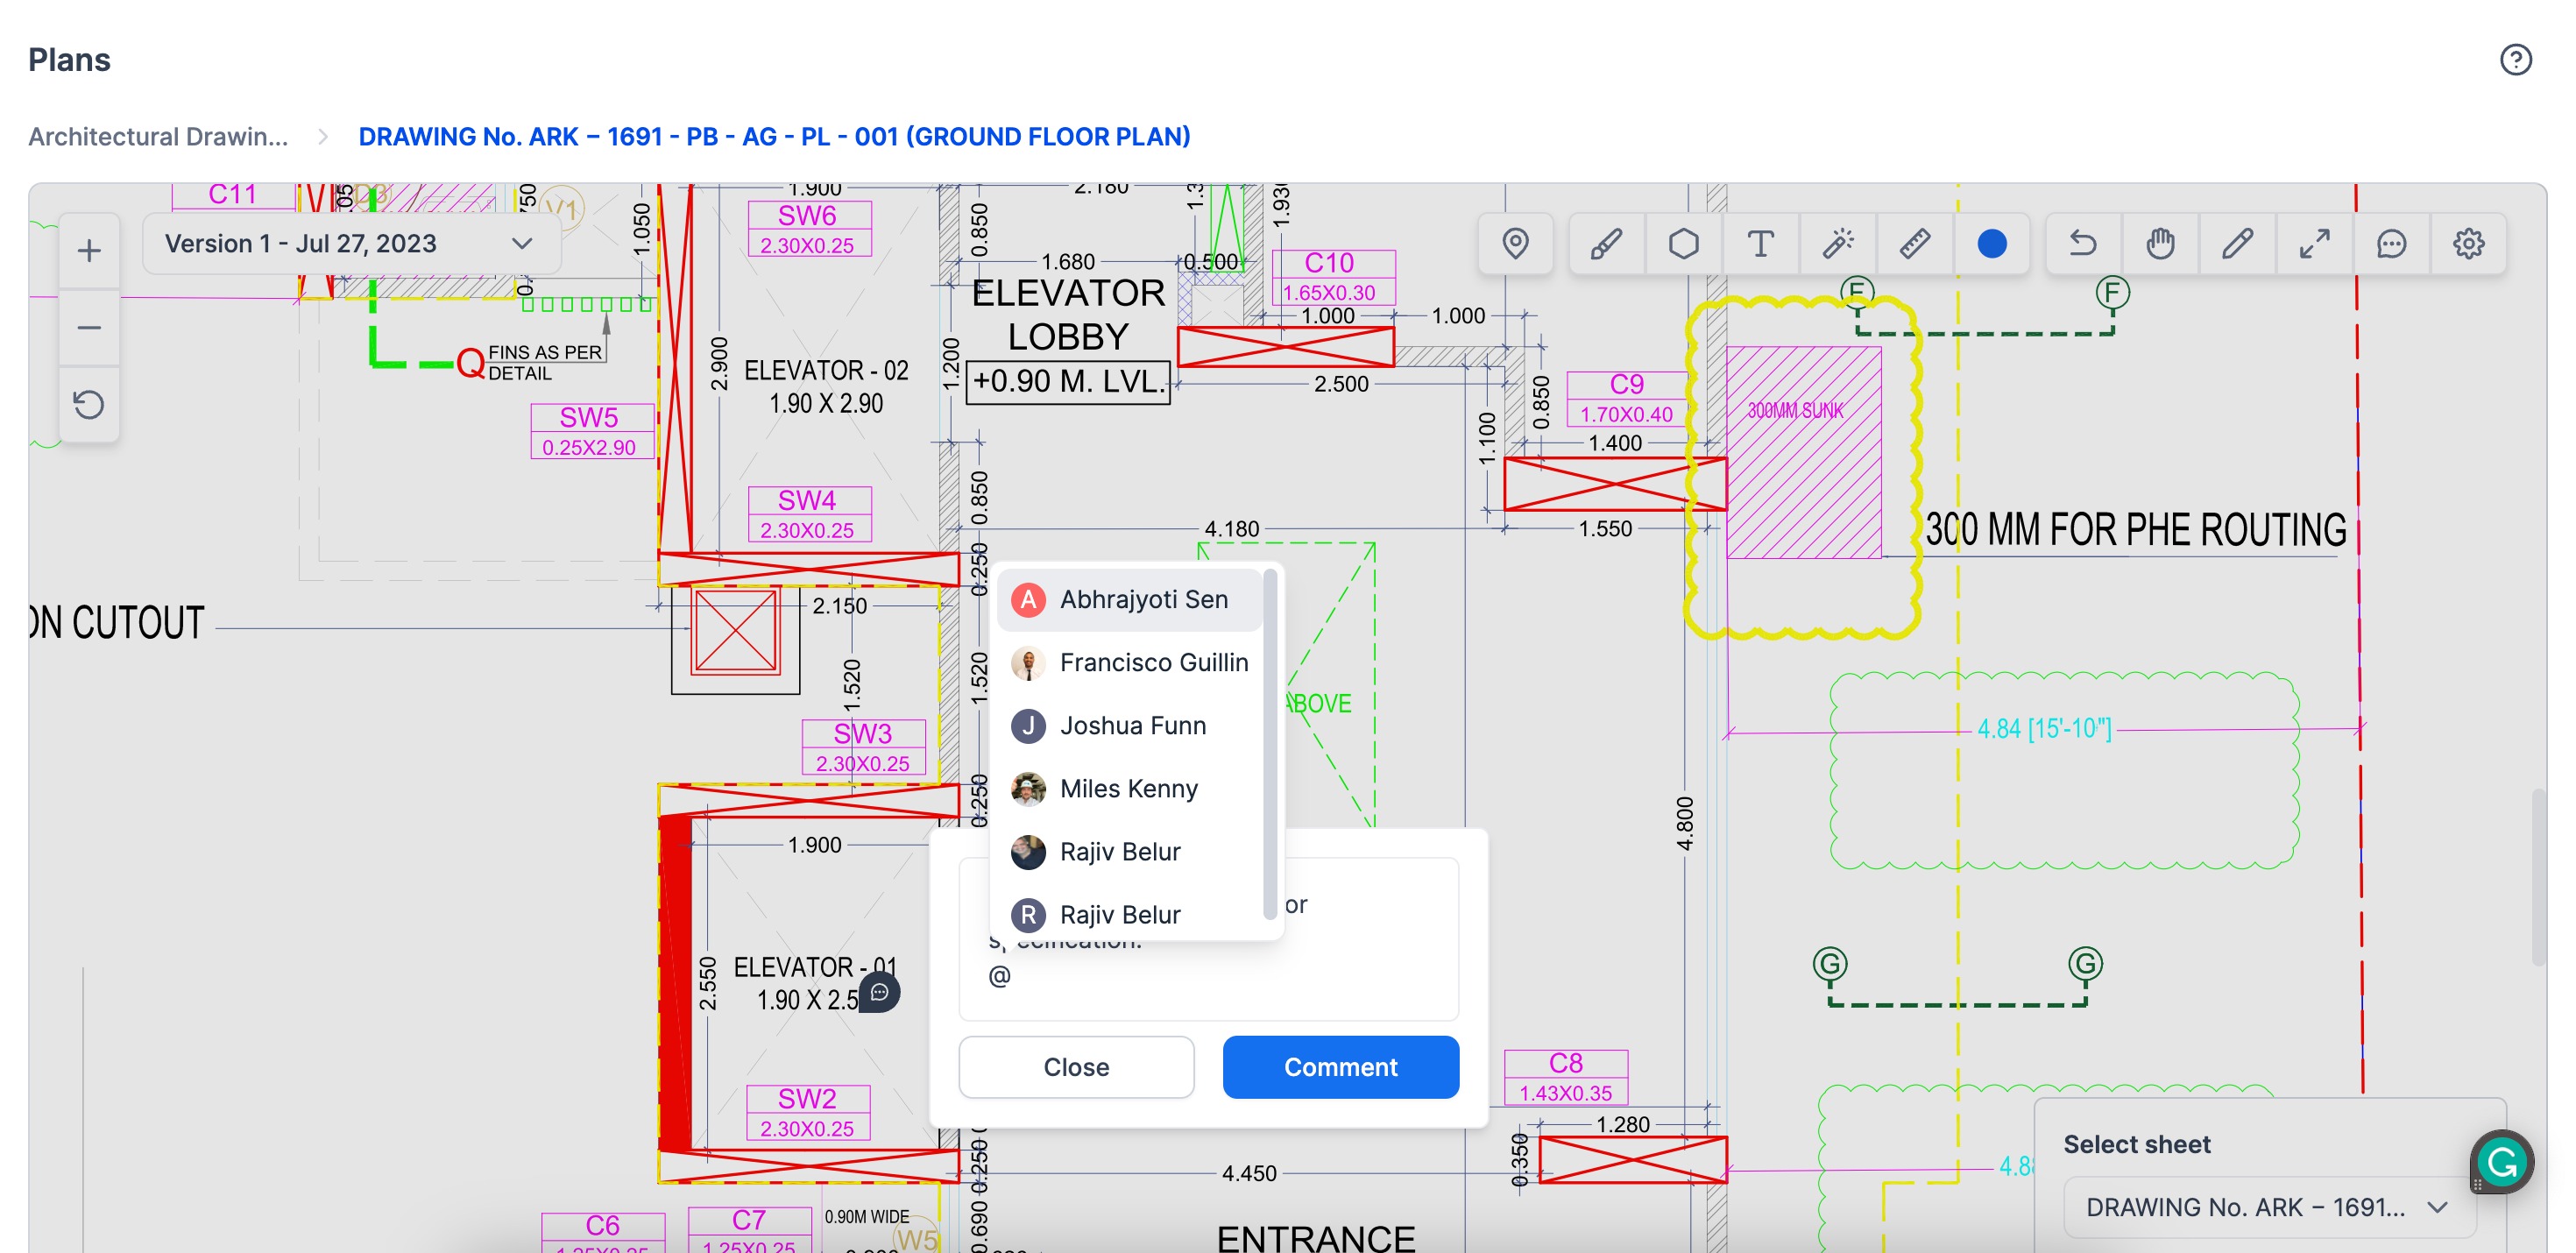
Figure 20(b): Adding a comment to a plan