Therm
Last updated October 7, 2024
TABLE OF CONTENTS
Therm Overview
Guide 1: Therm
How to export reports from Therm?
To export a Therm report, click the 'Export' button and select 'Export as PDF' or 'Export as CSV' from the available options. This will allow you to extract the report in your preferred format.
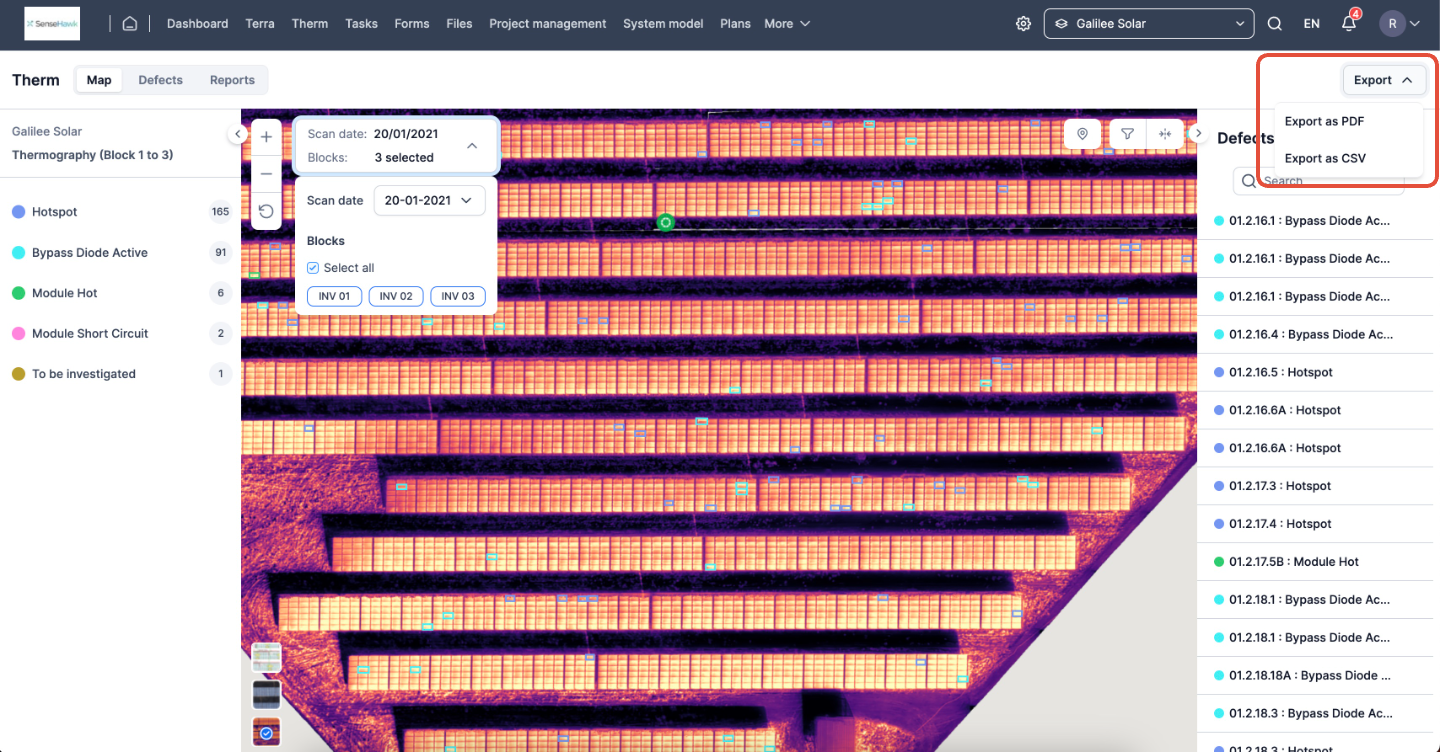
Figure 1: Export Options
How to convert defects to tasks?
If you need to validate a defect, you can convert it into a task and assign it to a specific person or team for validation. The mobile application's GPS feature makes it easy for them to locate the defect on the field. To convert a defect to a task, click on the defect on the map or in the defect list, then select 'Create task'.
Note: When a defect is converted into a task, all the defect details, including the raw images, are automatically recorded in the task.
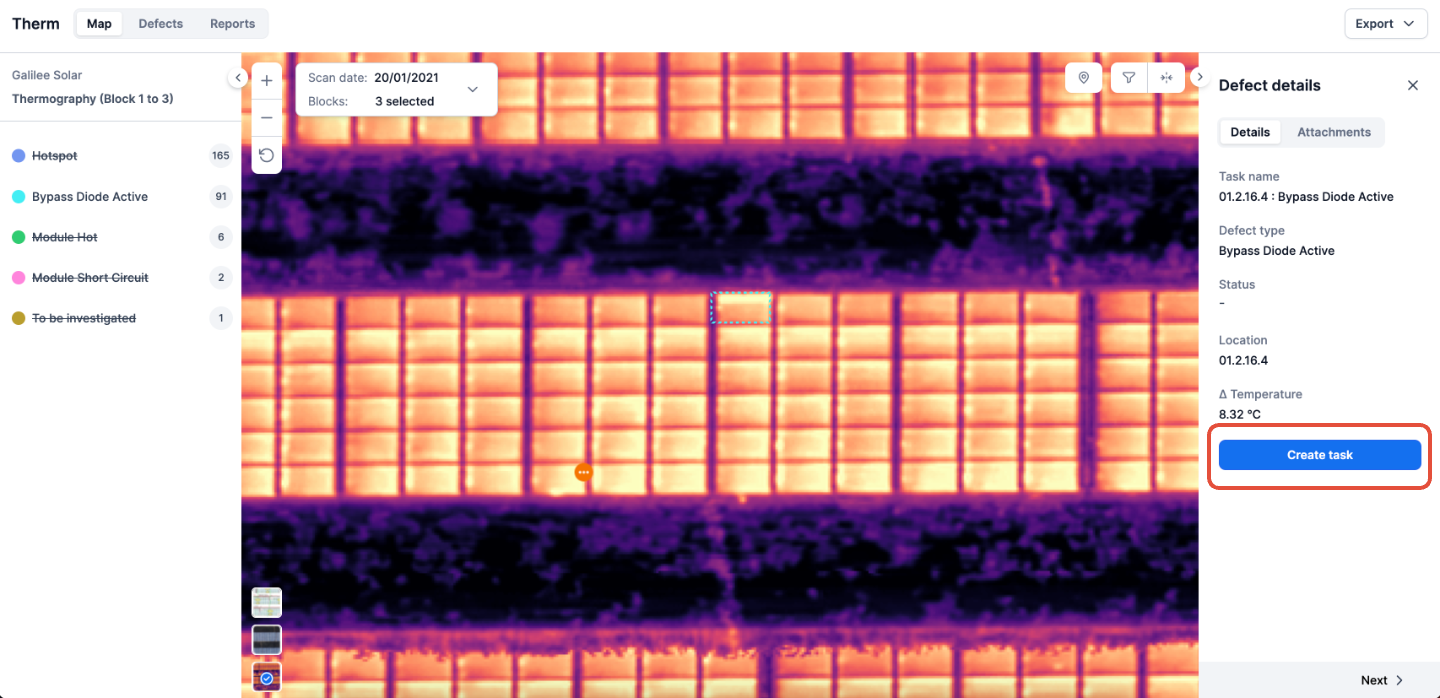
Figure 2: Converting a Defect to a Task
How to filter by defects in the map view?
On the left side of the screen, you can find a list of defects that are color-coded for easy identification on the map view. You can filter the defects on the map by selecting specific ones or deselecting multiple ones. Here are the steps to do so:
1) Filtering by a defect
Click on the number next to the defect to view only that particular defect on the map and defect list.

Figure 3a: Filters
Filtered view
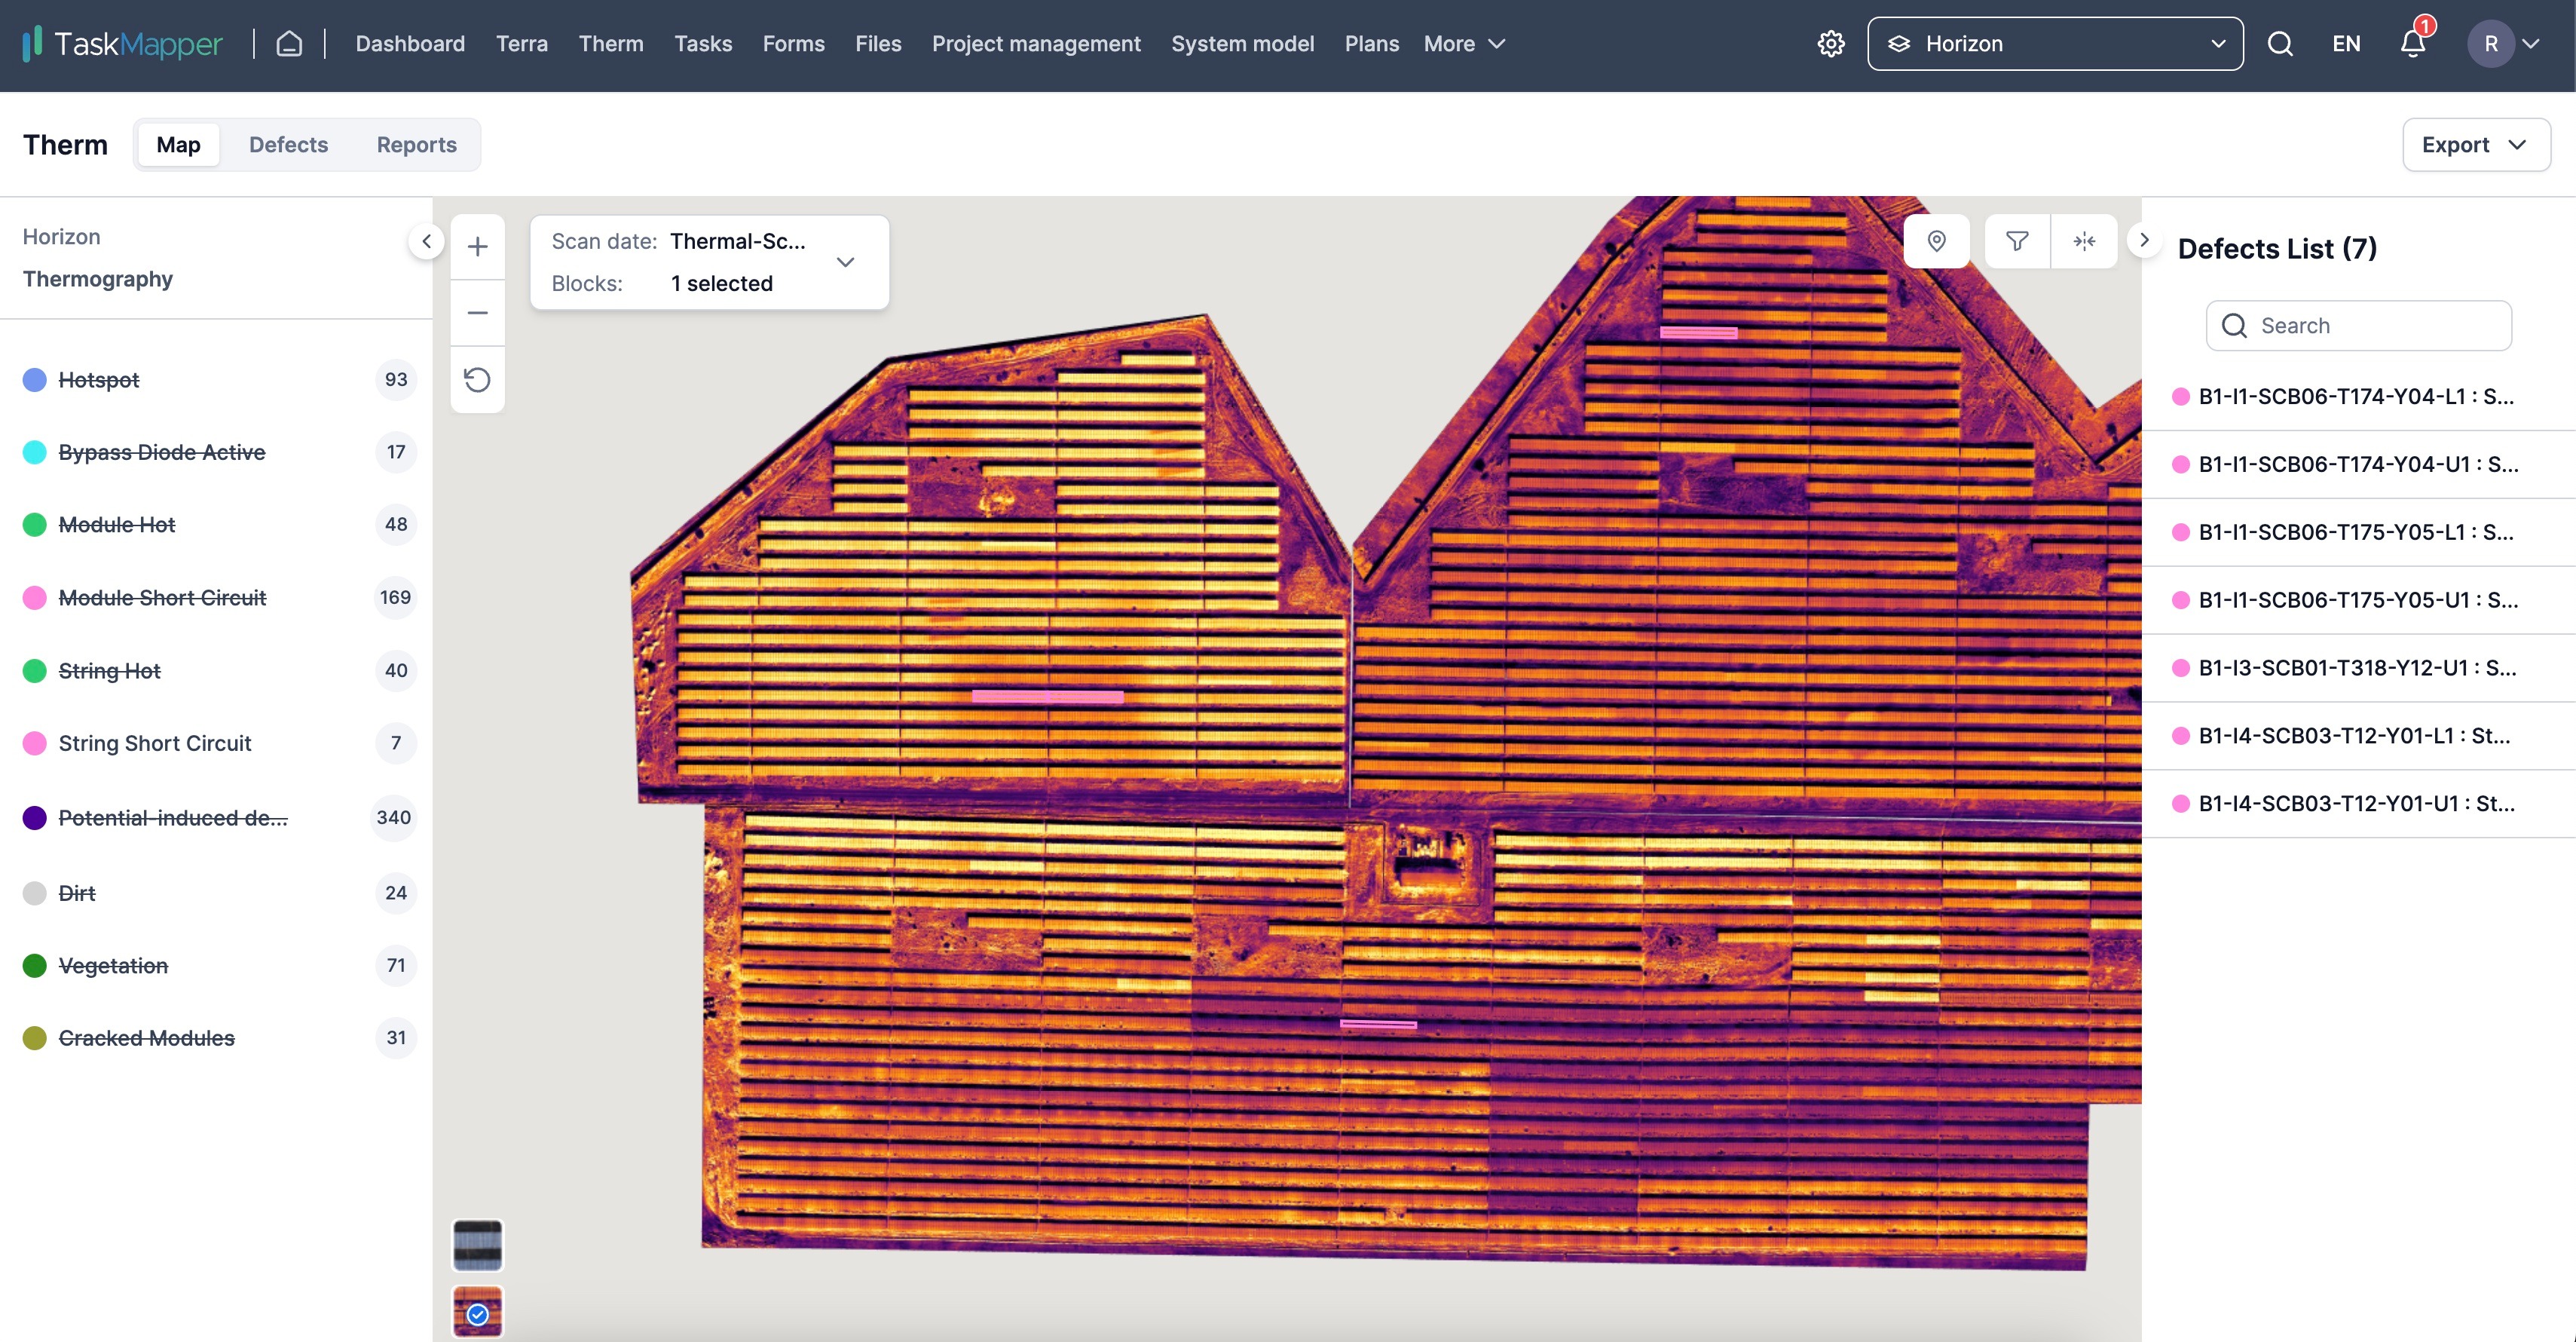
Figure 3b: Filtered view
2) Select/Deselect multiple defects
Click on the defect name to select or deselect the defect

Figure 4: Defects classification
How to filter by block/substation?
To filter by block, click the Scan date/Block drop-down in the map view. Select the blocks you would like to view on the map.
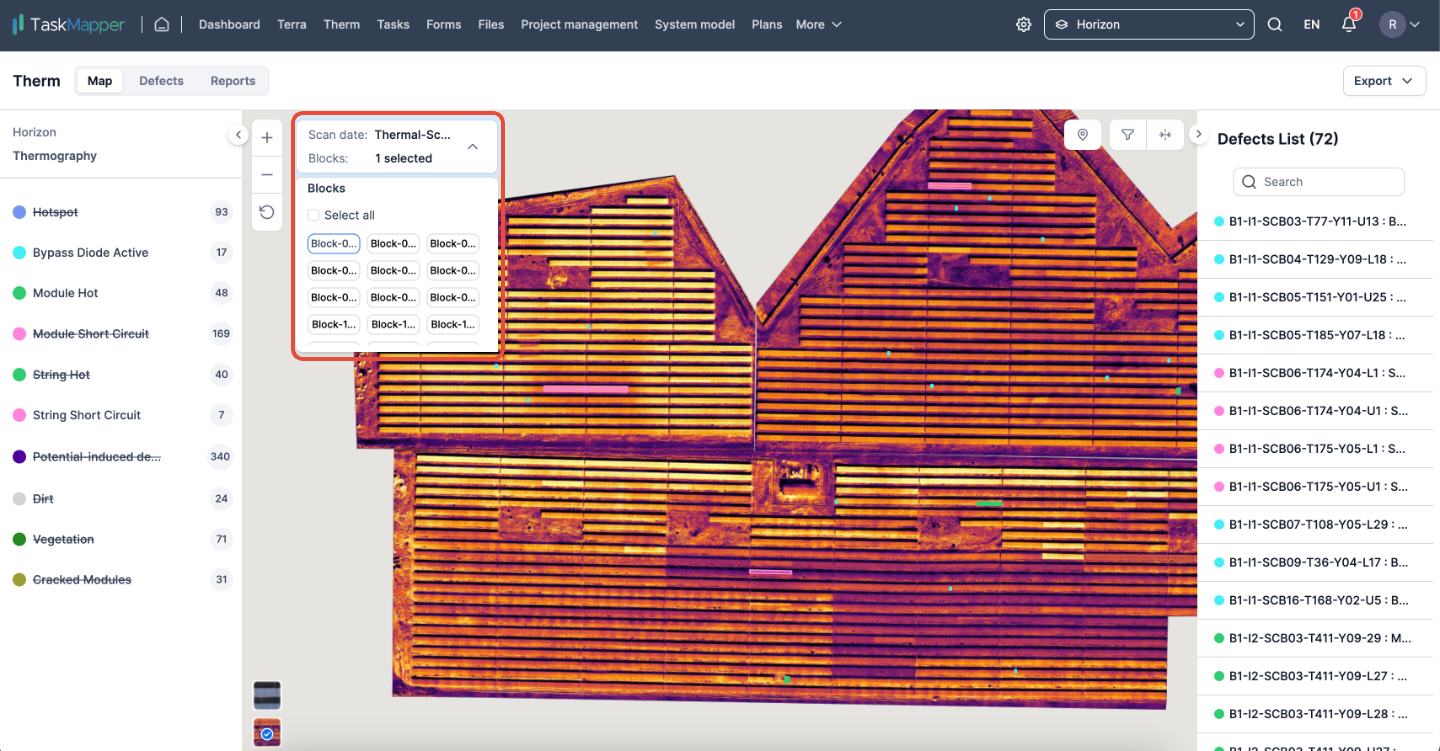
Figure 5: Block selection
How to convert a set of defects to tasks?
To select all defects or a filtered set, click on the checkbox located on the tab. You can then perform bulk actions by clicking on the 'Actions' dropdown, such as converting the selected defects to tasks or updating them in bulk once converted or exporting the list to .CSV format.
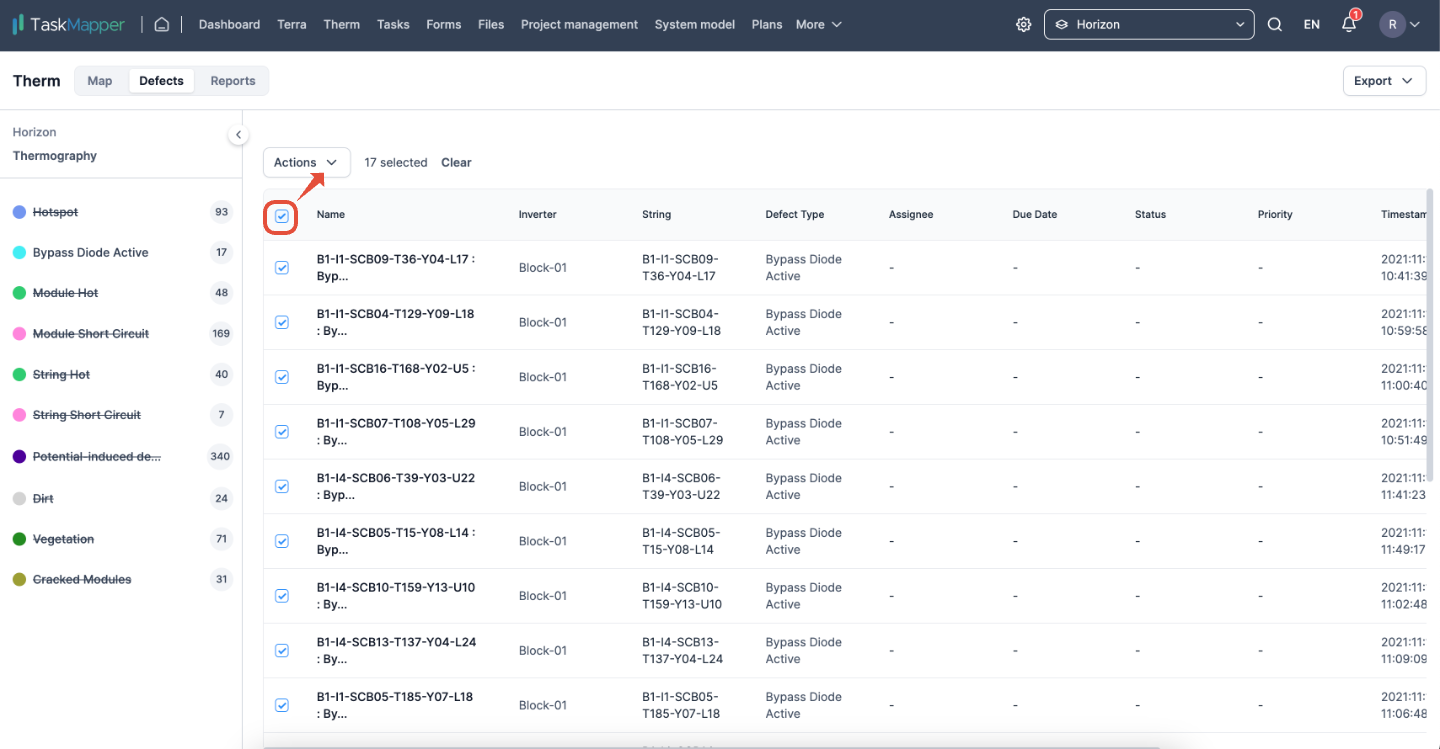
Figure 6(a): Bulk Actions
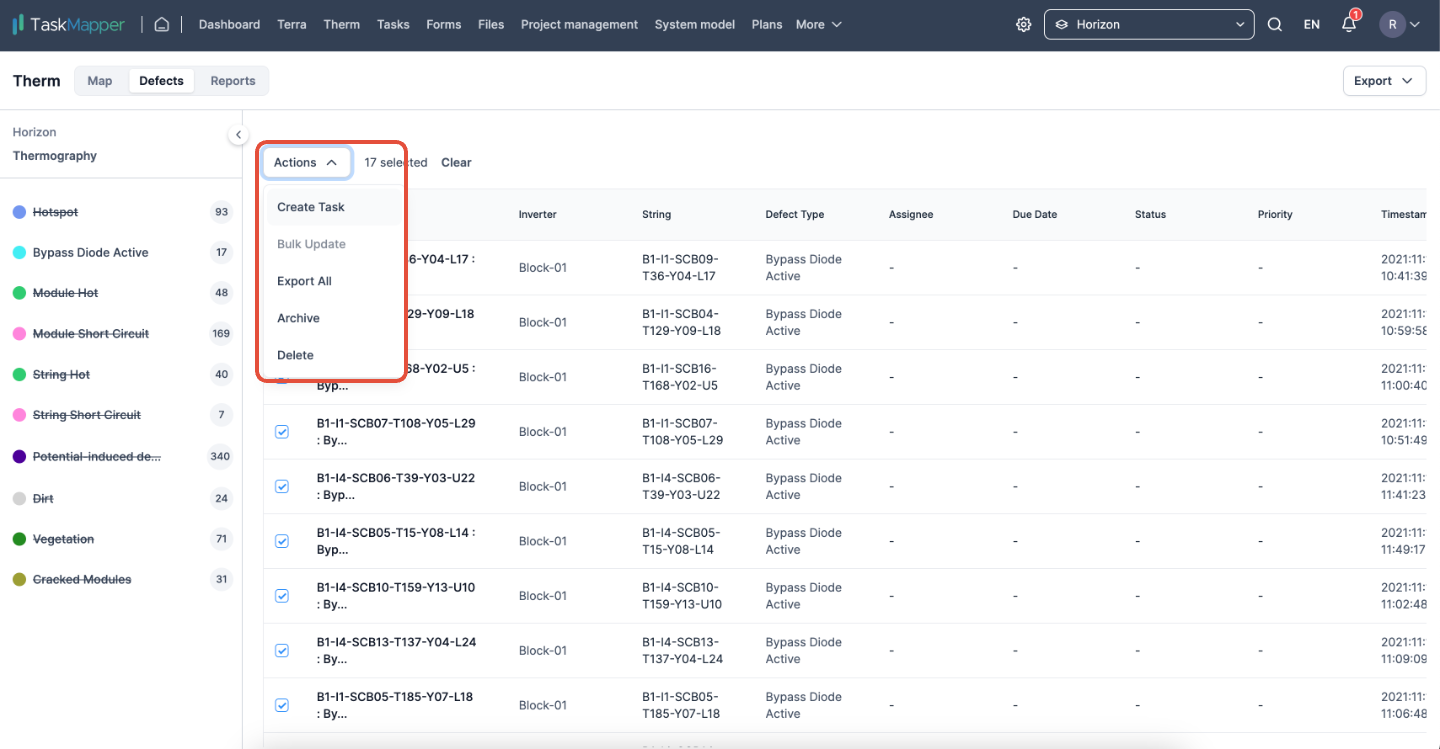
Figure 6(b): Bulk Actions
How to create therm-specific dashboards?
To create a dashboard with Therm data, go to the dashboard and click on the '+' icon to add a new dashboard.
Below are the further steps
1) Enter a dashboard name and click 'Save'.
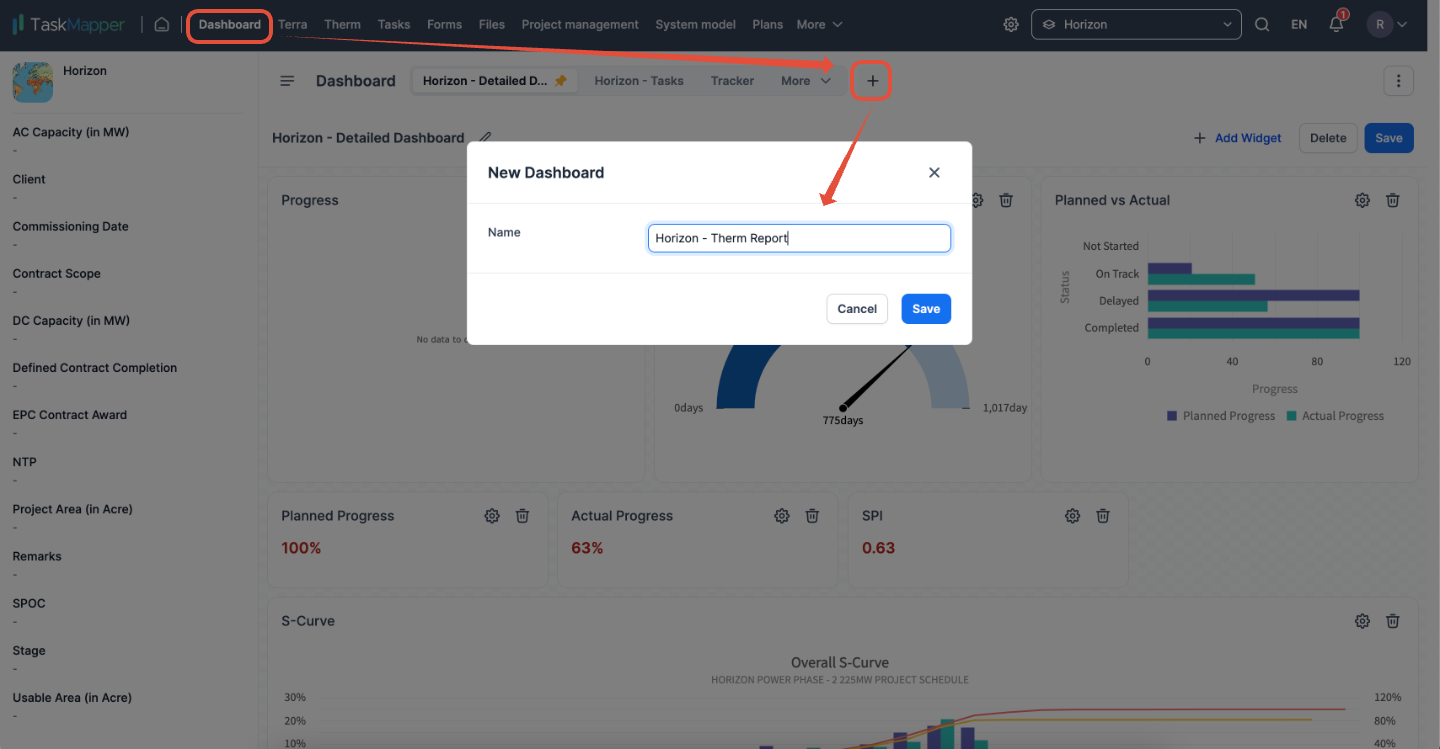
Figure 7: New dashboard
2) Click the 'Add Widget' button to add therm-specific widgets. From there, you can select which widgets to add to your dashboard. The options for therm-specific widgets include 'Defects by Inverter', 'Temperature Histogram', and 'Defects by Severity'. Click on 'Save' to complete.
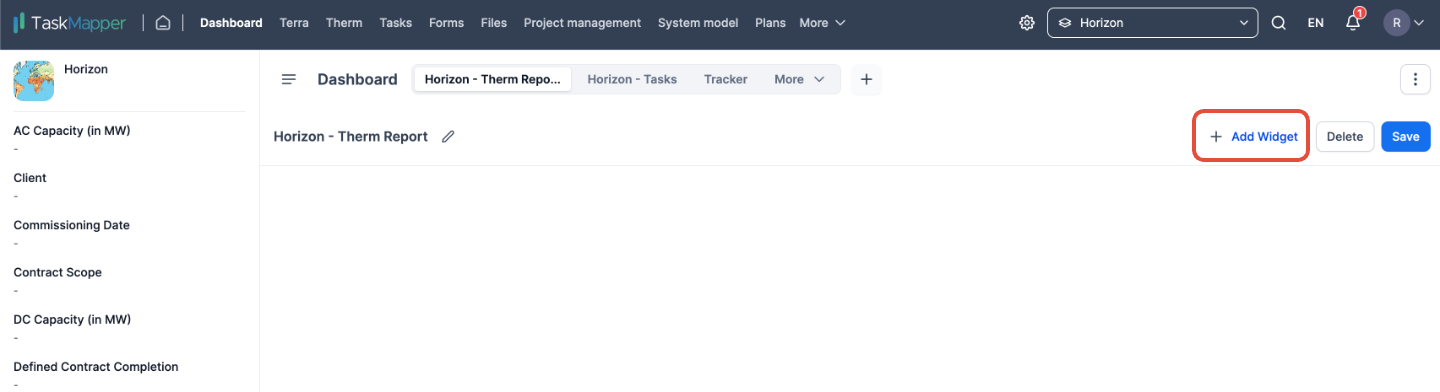
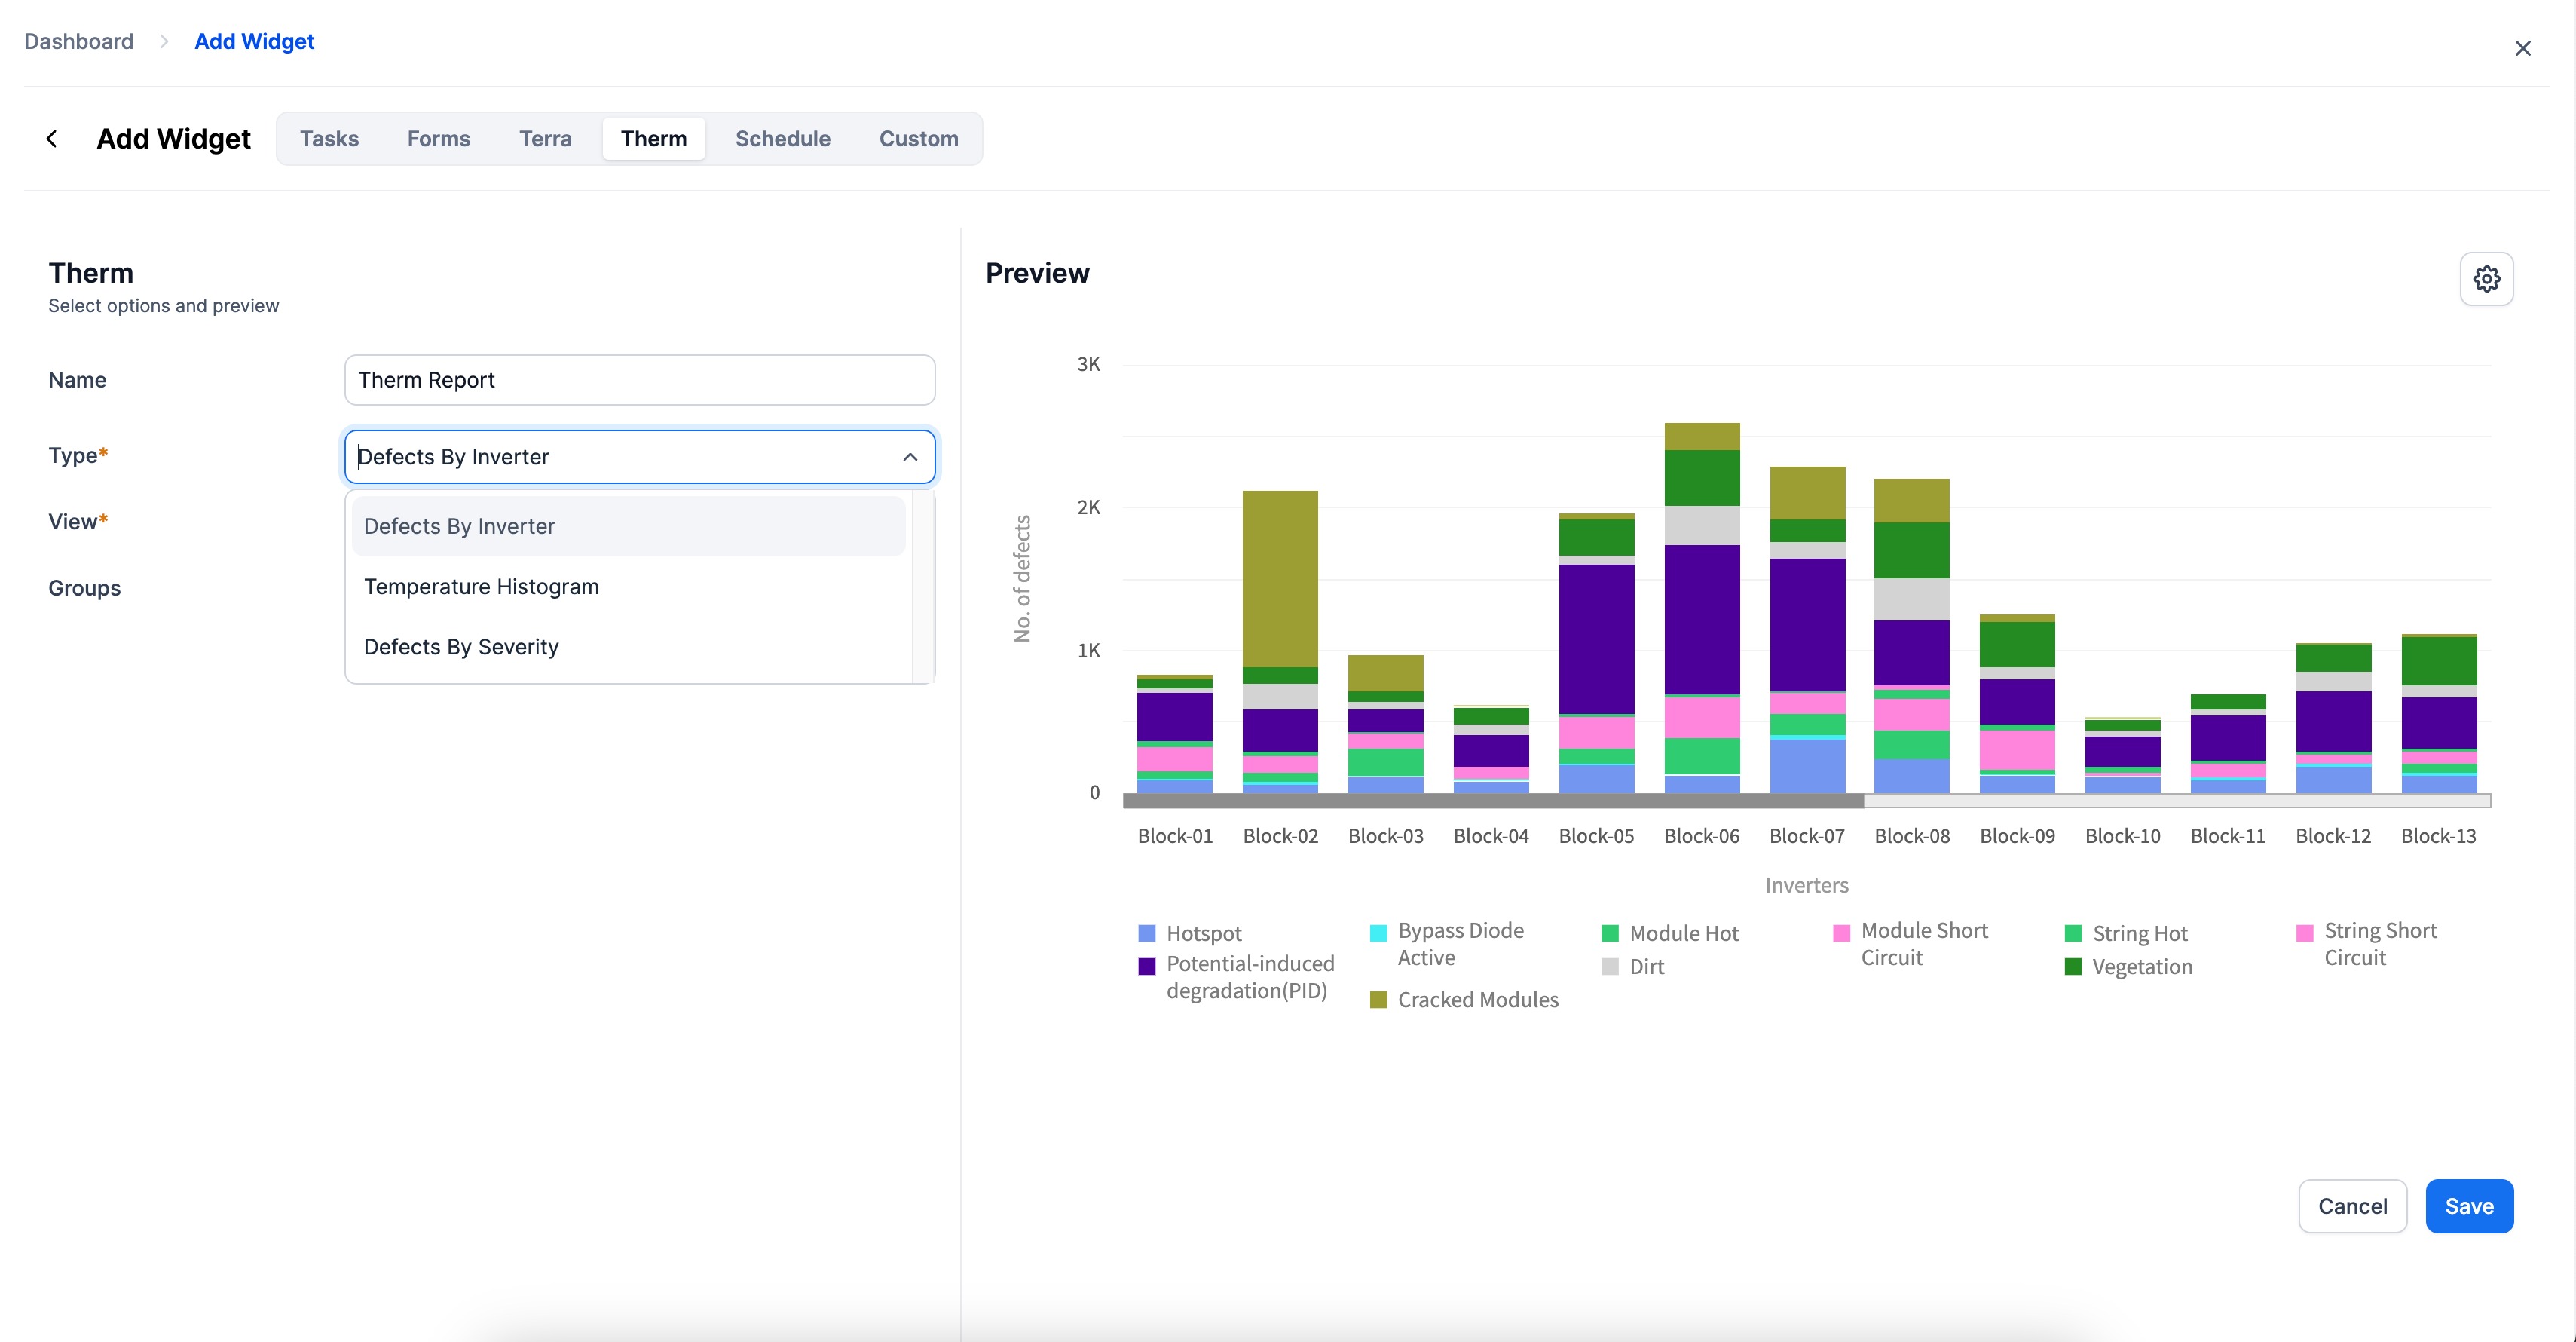
Figure 8: Widgets in the dashboard
Note: If you're looking to stay on top of your tasks, you might want to consider adding task widgets to your dashboard. This will make it easy to view all of your tasks or defects converted to tasks in one place and stay organized. Alternatively, you could create a separate dashboard specifically for tasks
How to download or print a dashboard?
Click on the print icon in the dashboard view to generate a PDF report.
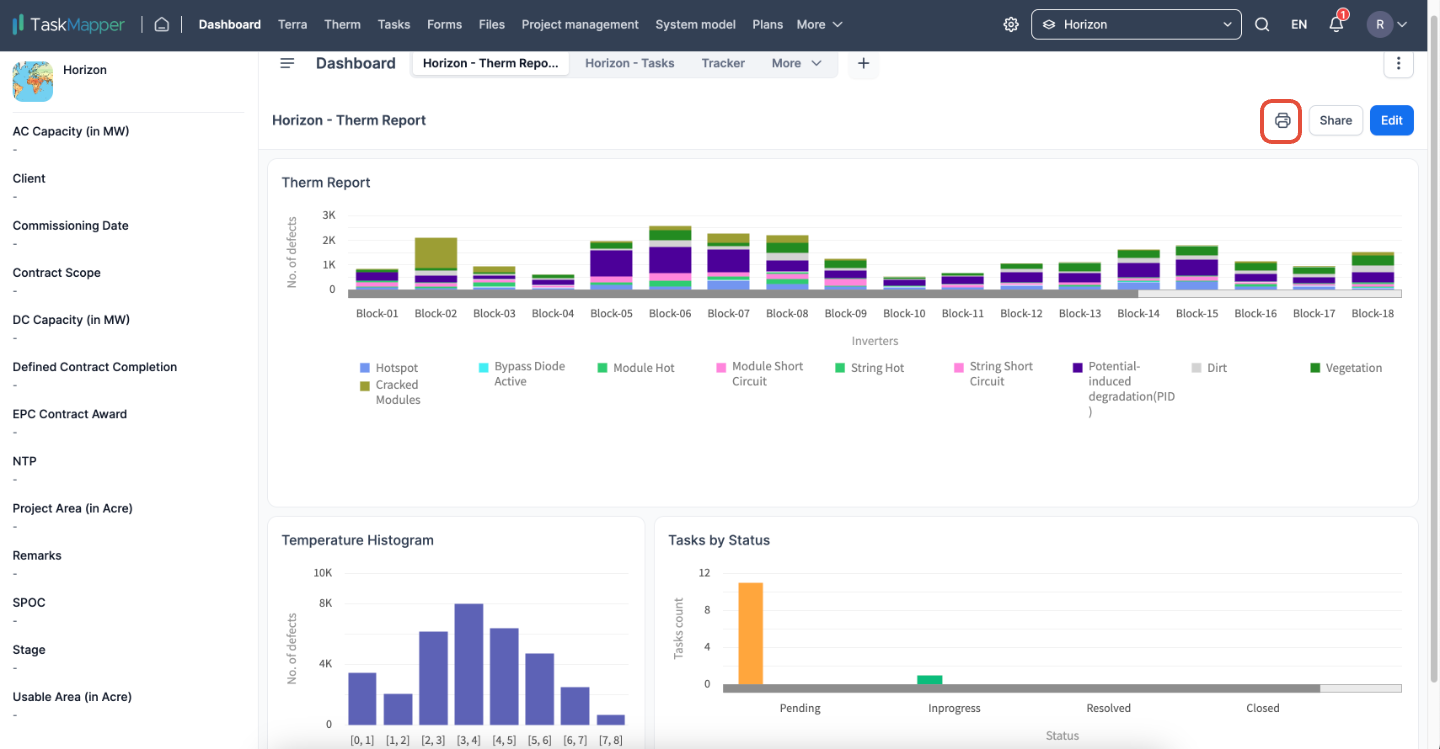
Figure 9: Print dashboard