TaskMapper - Account Administration
Last updated March 5, 2025
TABLE OF CONTENTS
- How to invite members?
- How to reset your password?
- How to enable/disable notifications?
- How to change a password?
- How to update your profile?
- How to update organization details?
- How to add and update asset information?
- How to add categories?
- How to view app notifications?
- How to change the default language
Account Administration
Organization & Asset Details
1. Organization name, Address and Logo
(Account Setting >> General)
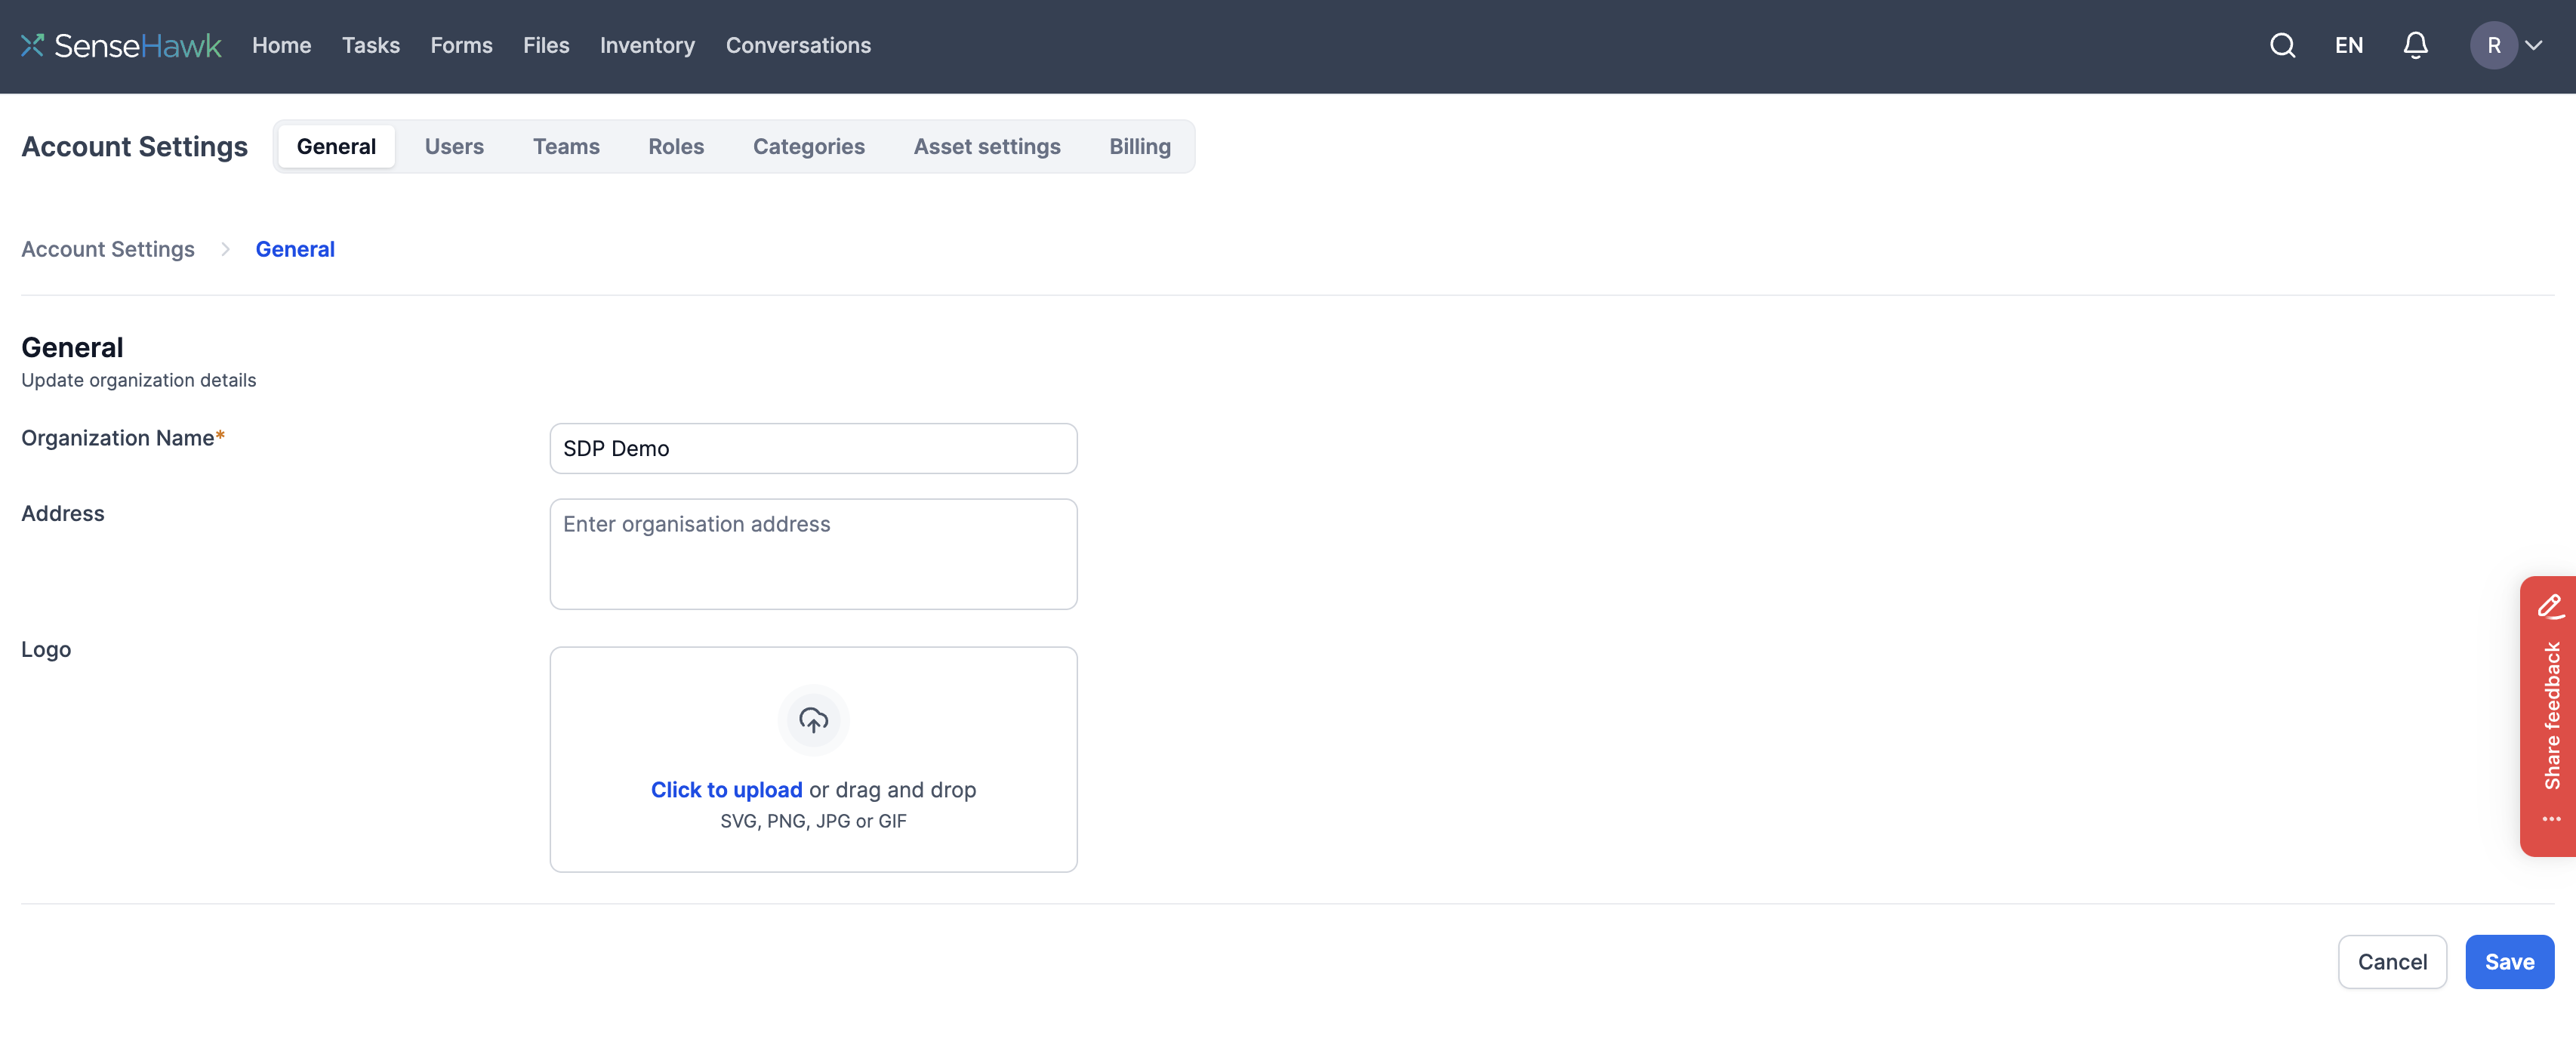
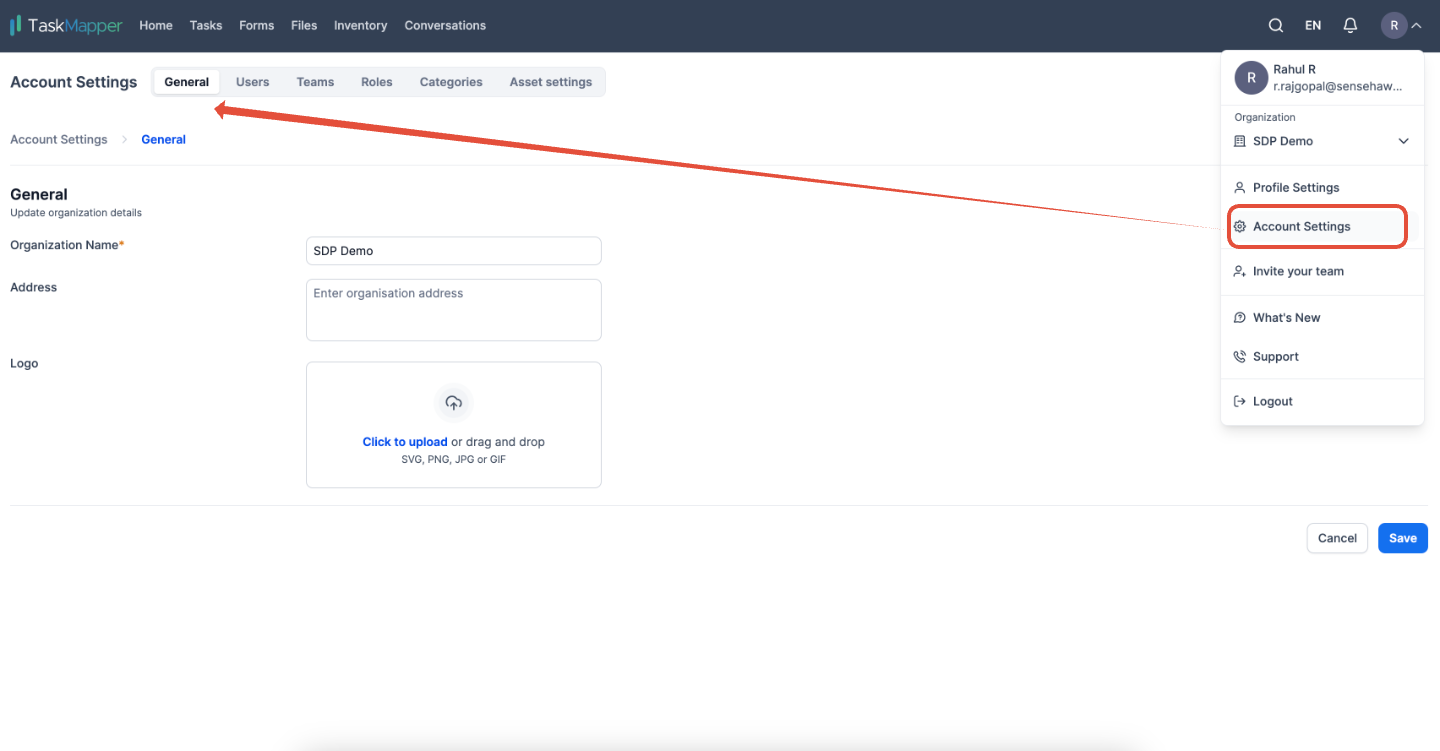
Organization details can be updated on the Accounts setting page. Under the general section, details such as the organization's name, address, and logo can be updated.
Figure 1: Organization Details in Account Settings
2. Asset Properties
(Account Settings >> Asset Settings)
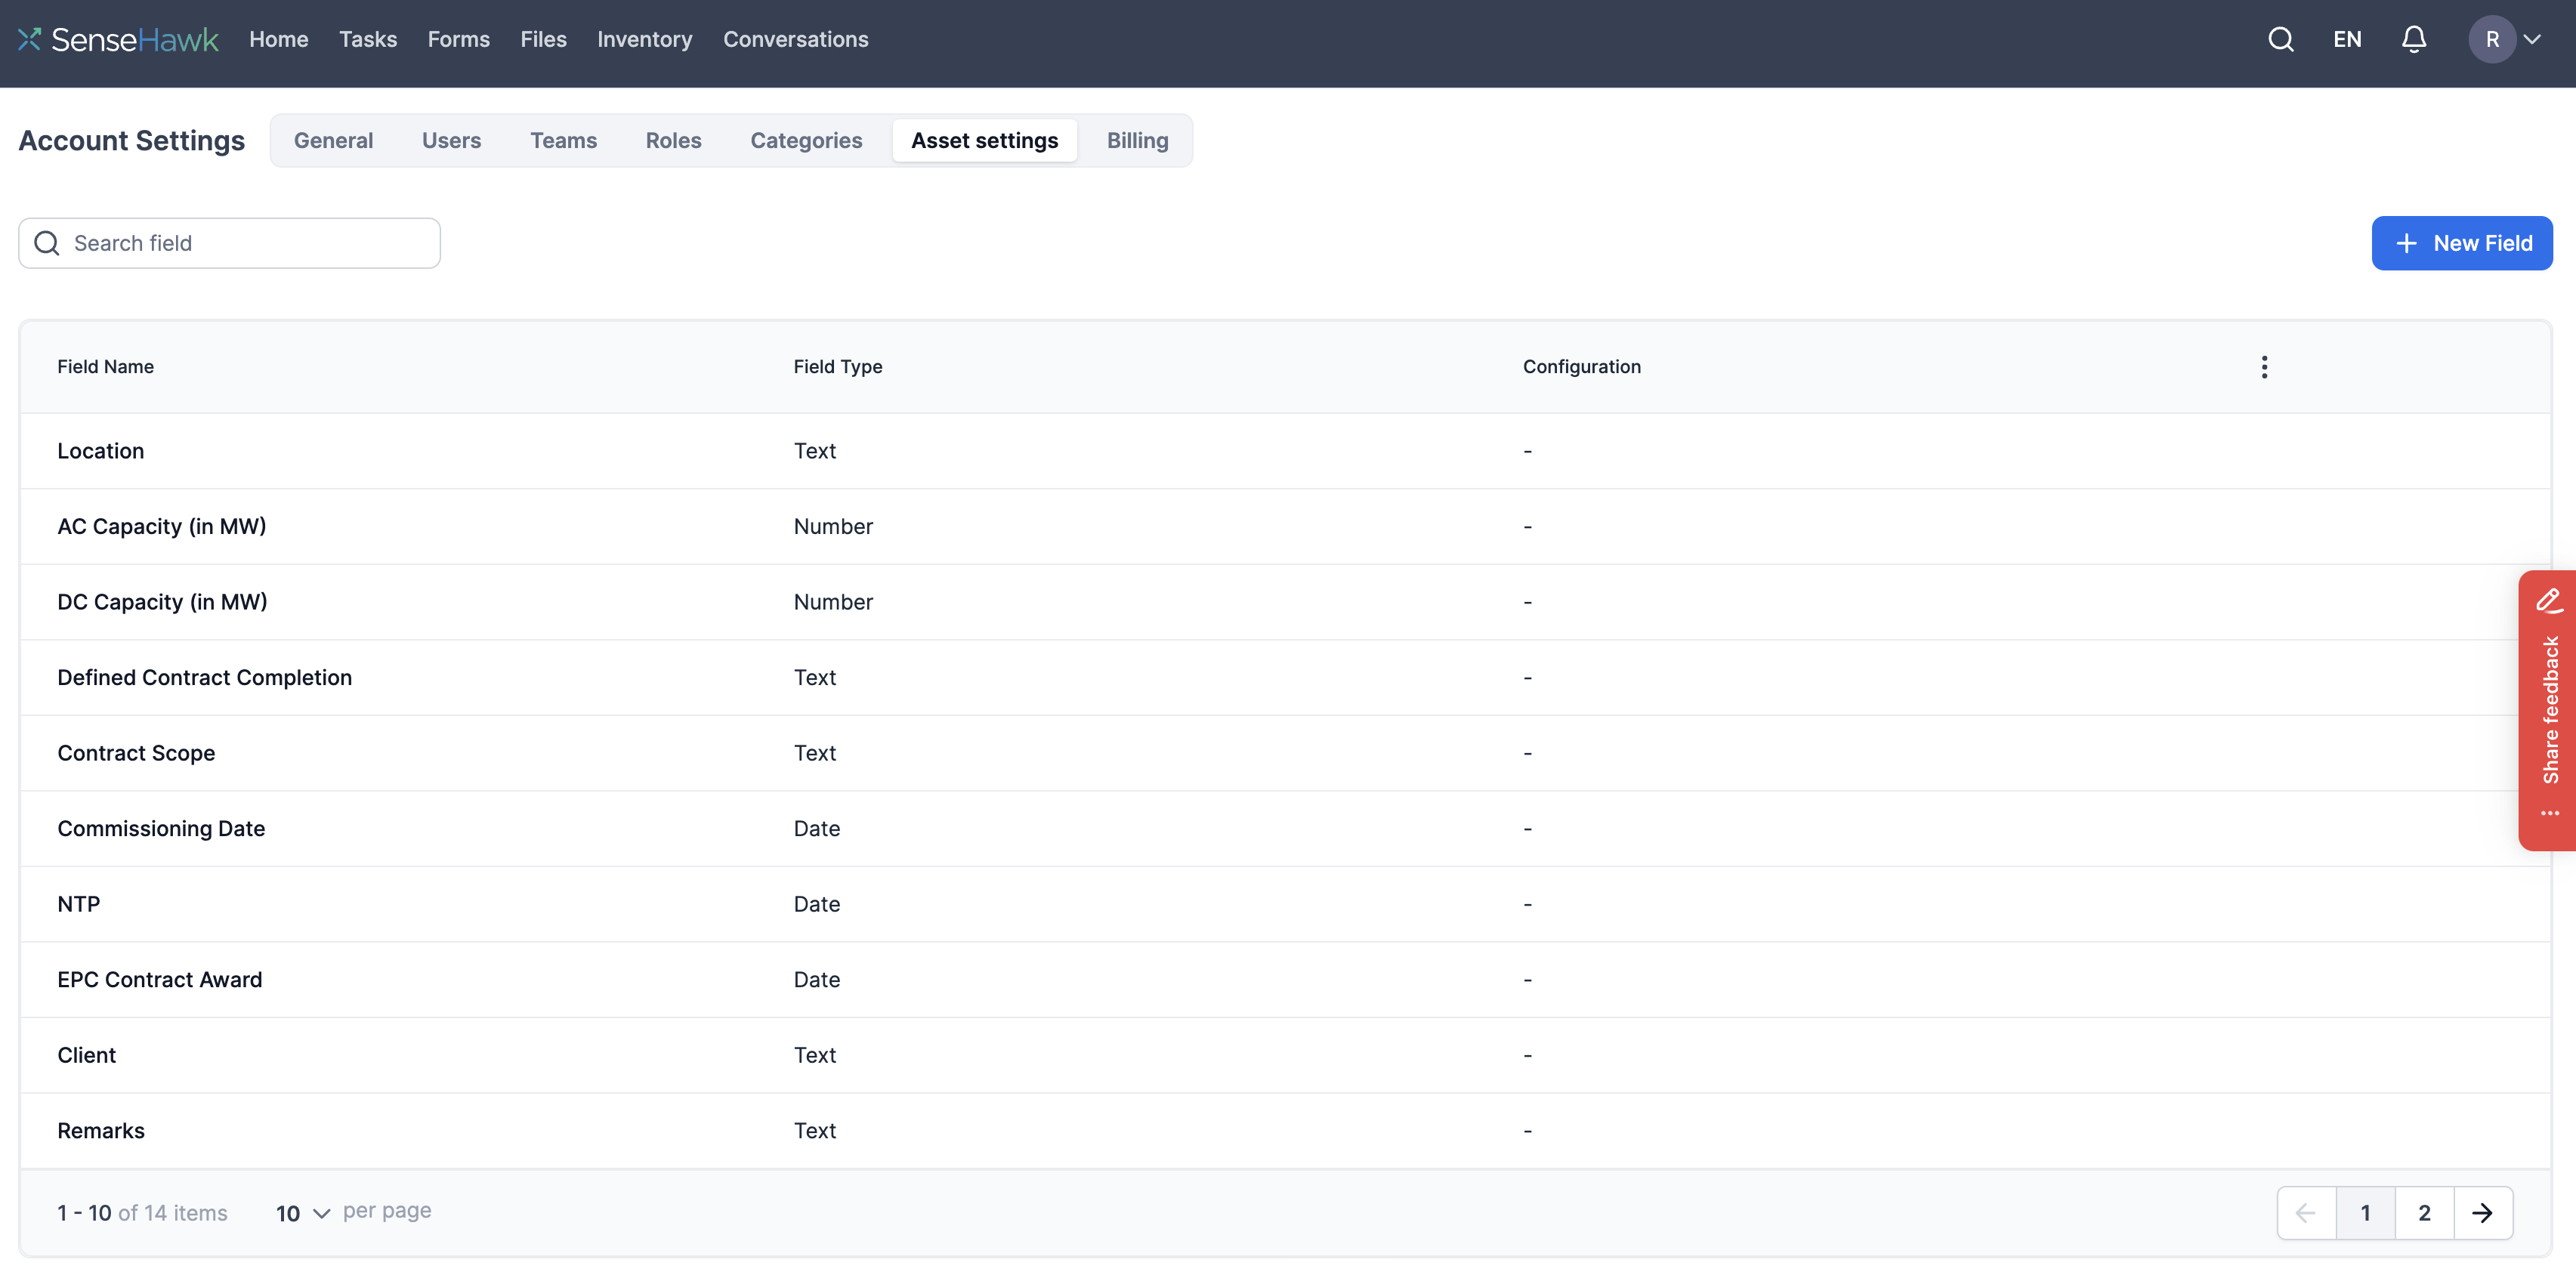
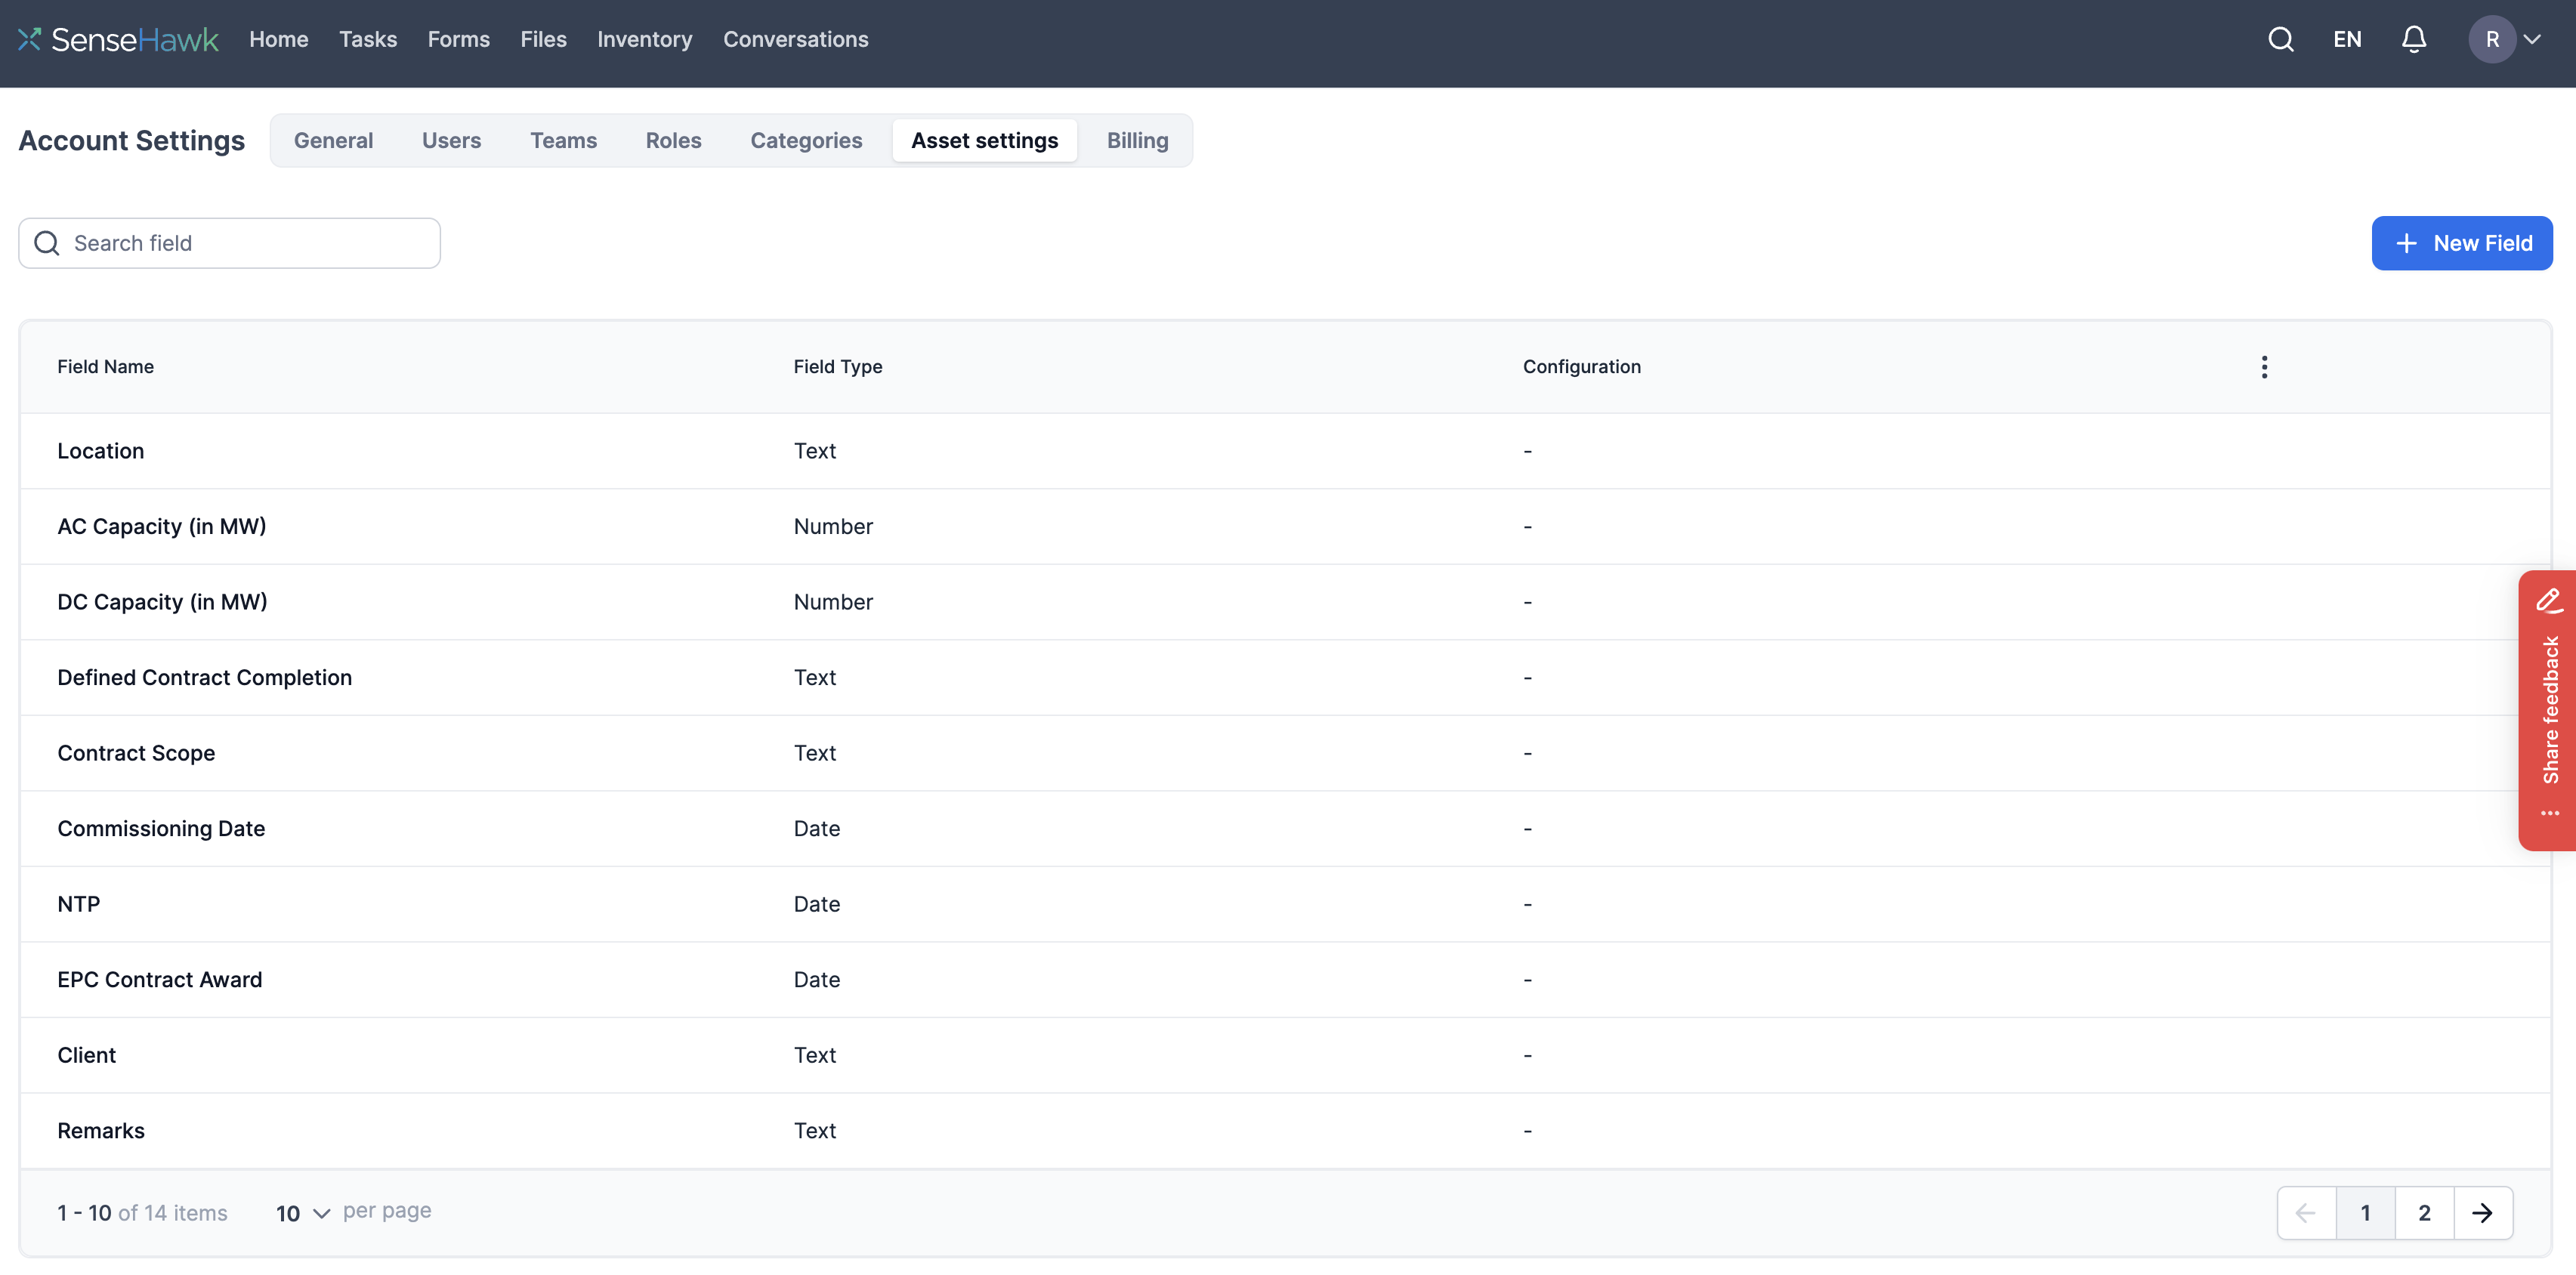
Asset properties provide additional information about assets, such as AC & DC capacity, asset area, and asset type. They are common for all organization assets.
Figure 2: Asset Metadata fields
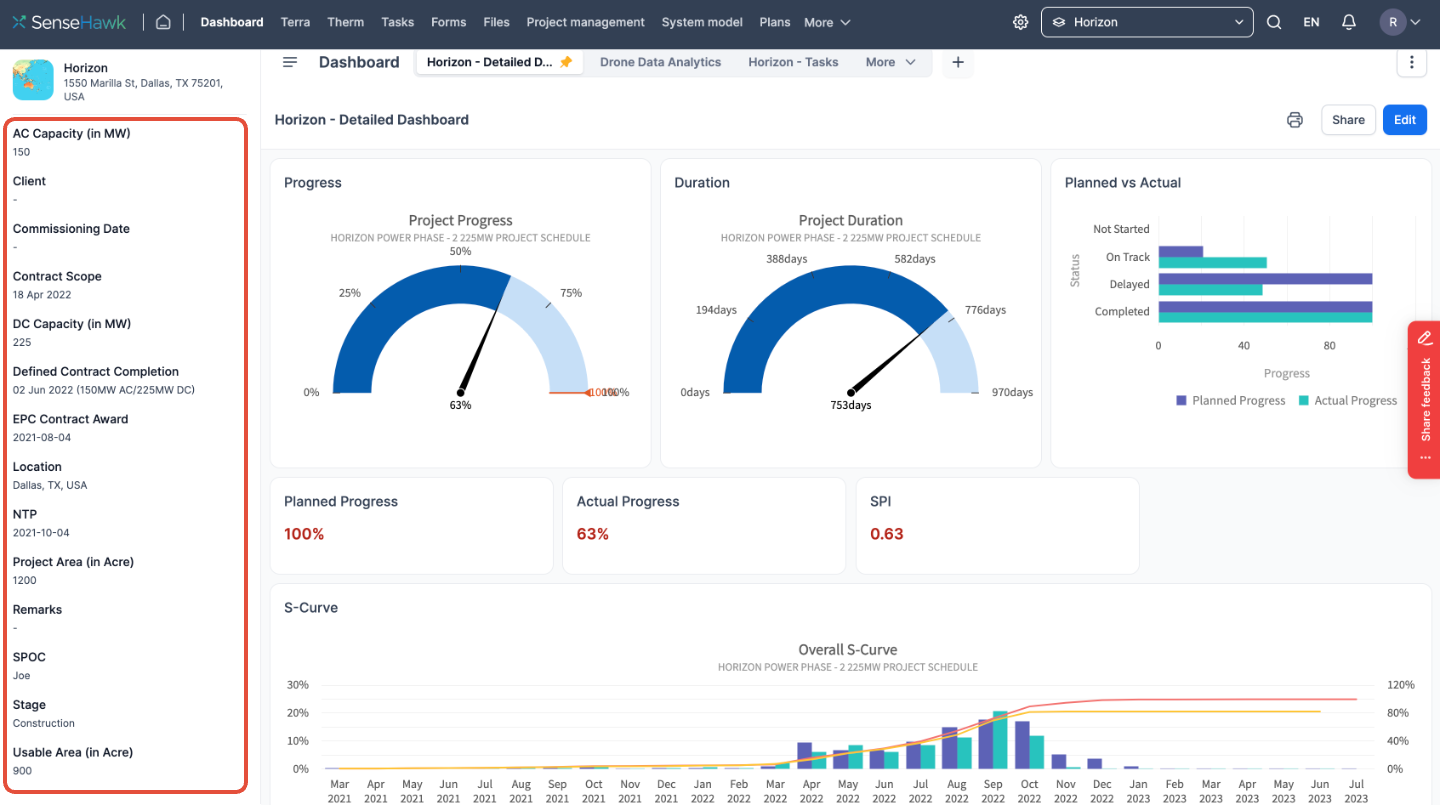
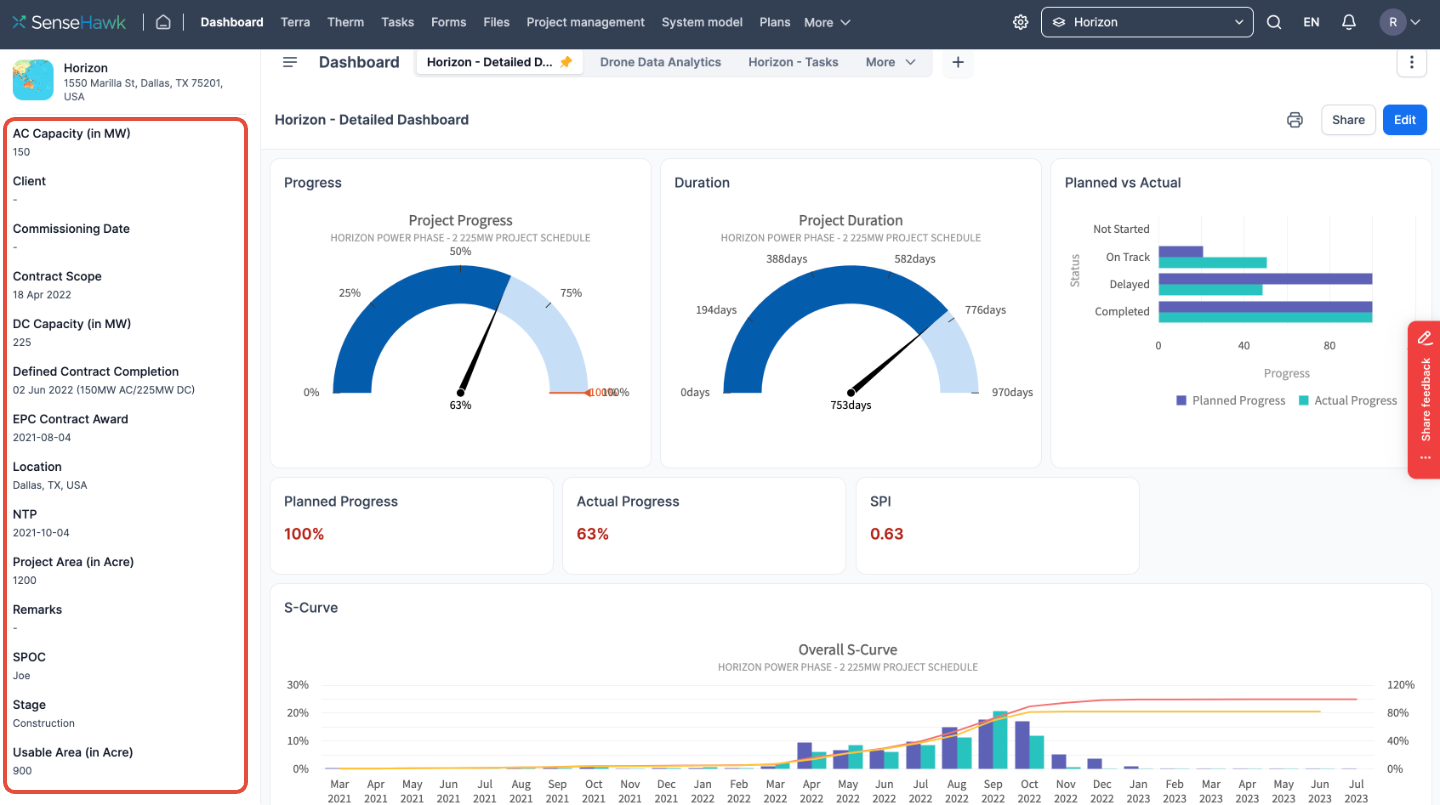
Figure 3: Metadata Information in Asset Dashboards
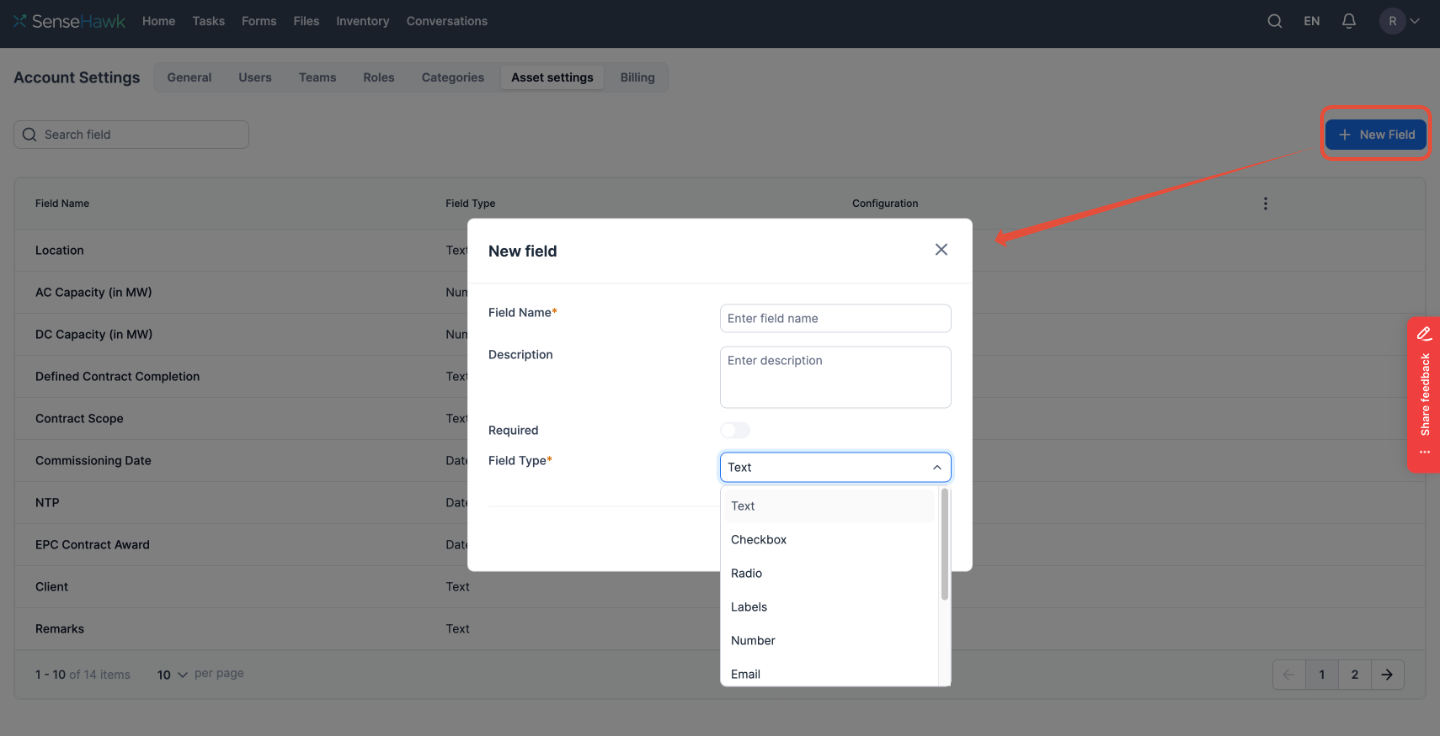
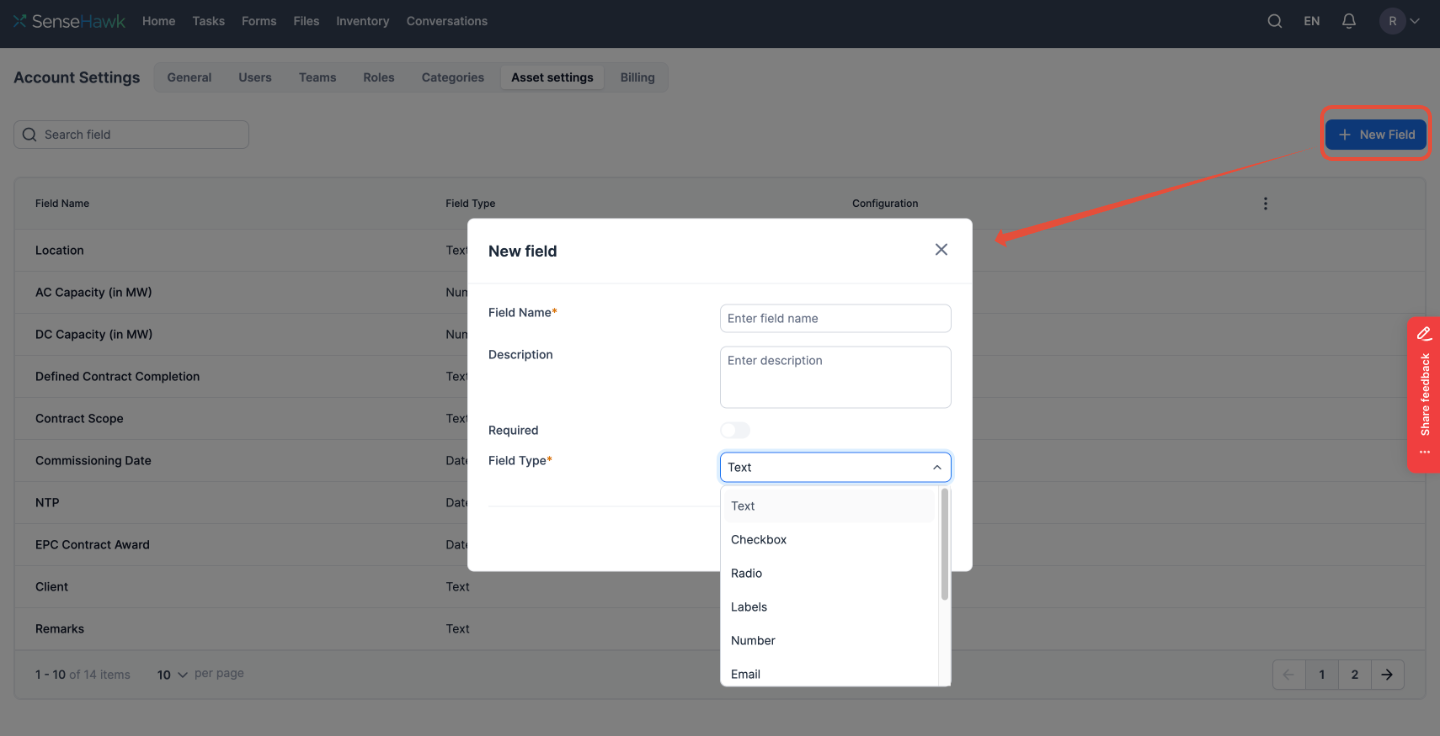
You have various options for fields, including text, checkboxes, radio buttons, email and mobile number fields, money fields, dropdown menus, URL fields, and date fields.
Figure 4: Adding new Asset Metadata field
Group assets
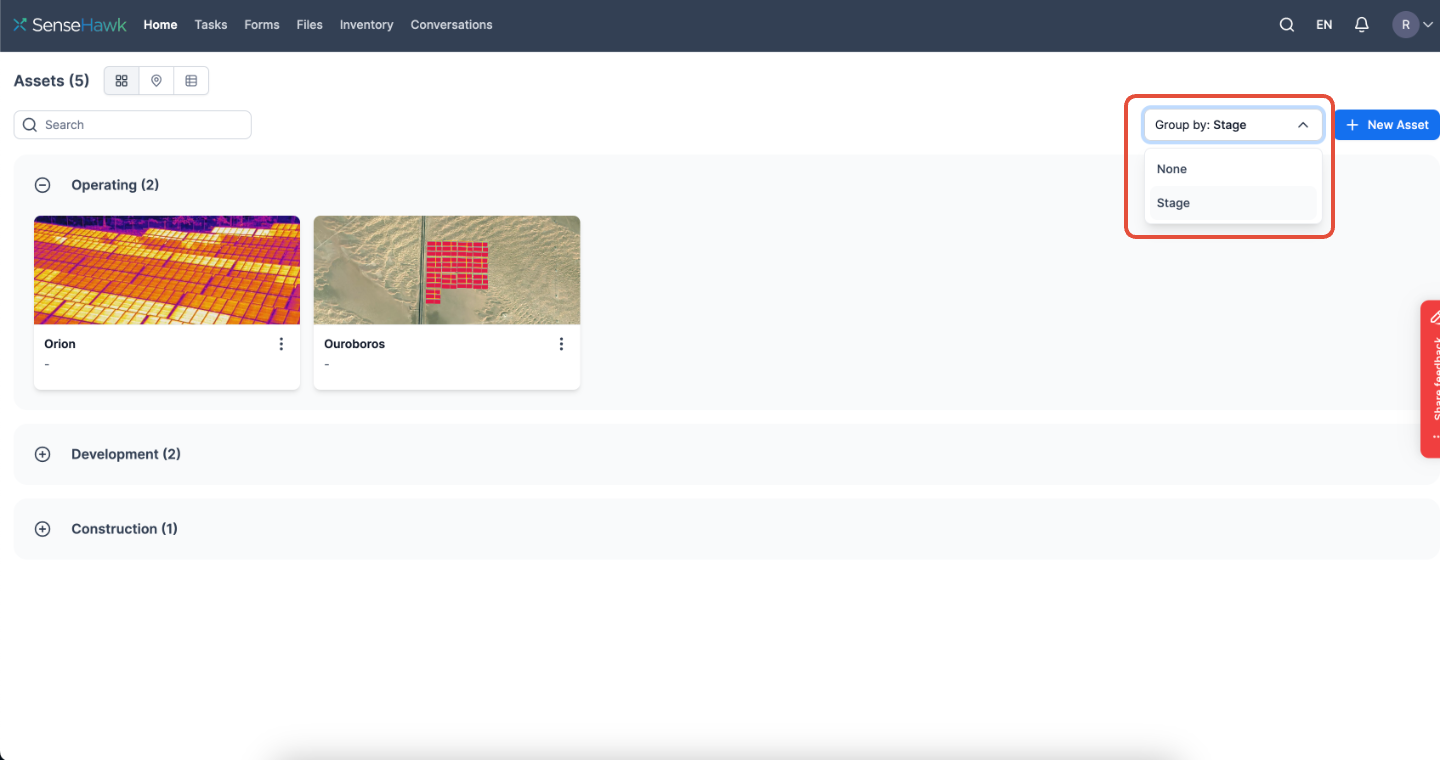
To organize your assets on the home page, you can group them using the dropdown fields in the asset metadata. By selecting the appropriate dropdown fields for each asset, you can easily categorize them and quickly find what you need.
Figure 5: Group Assets
Switch asset view
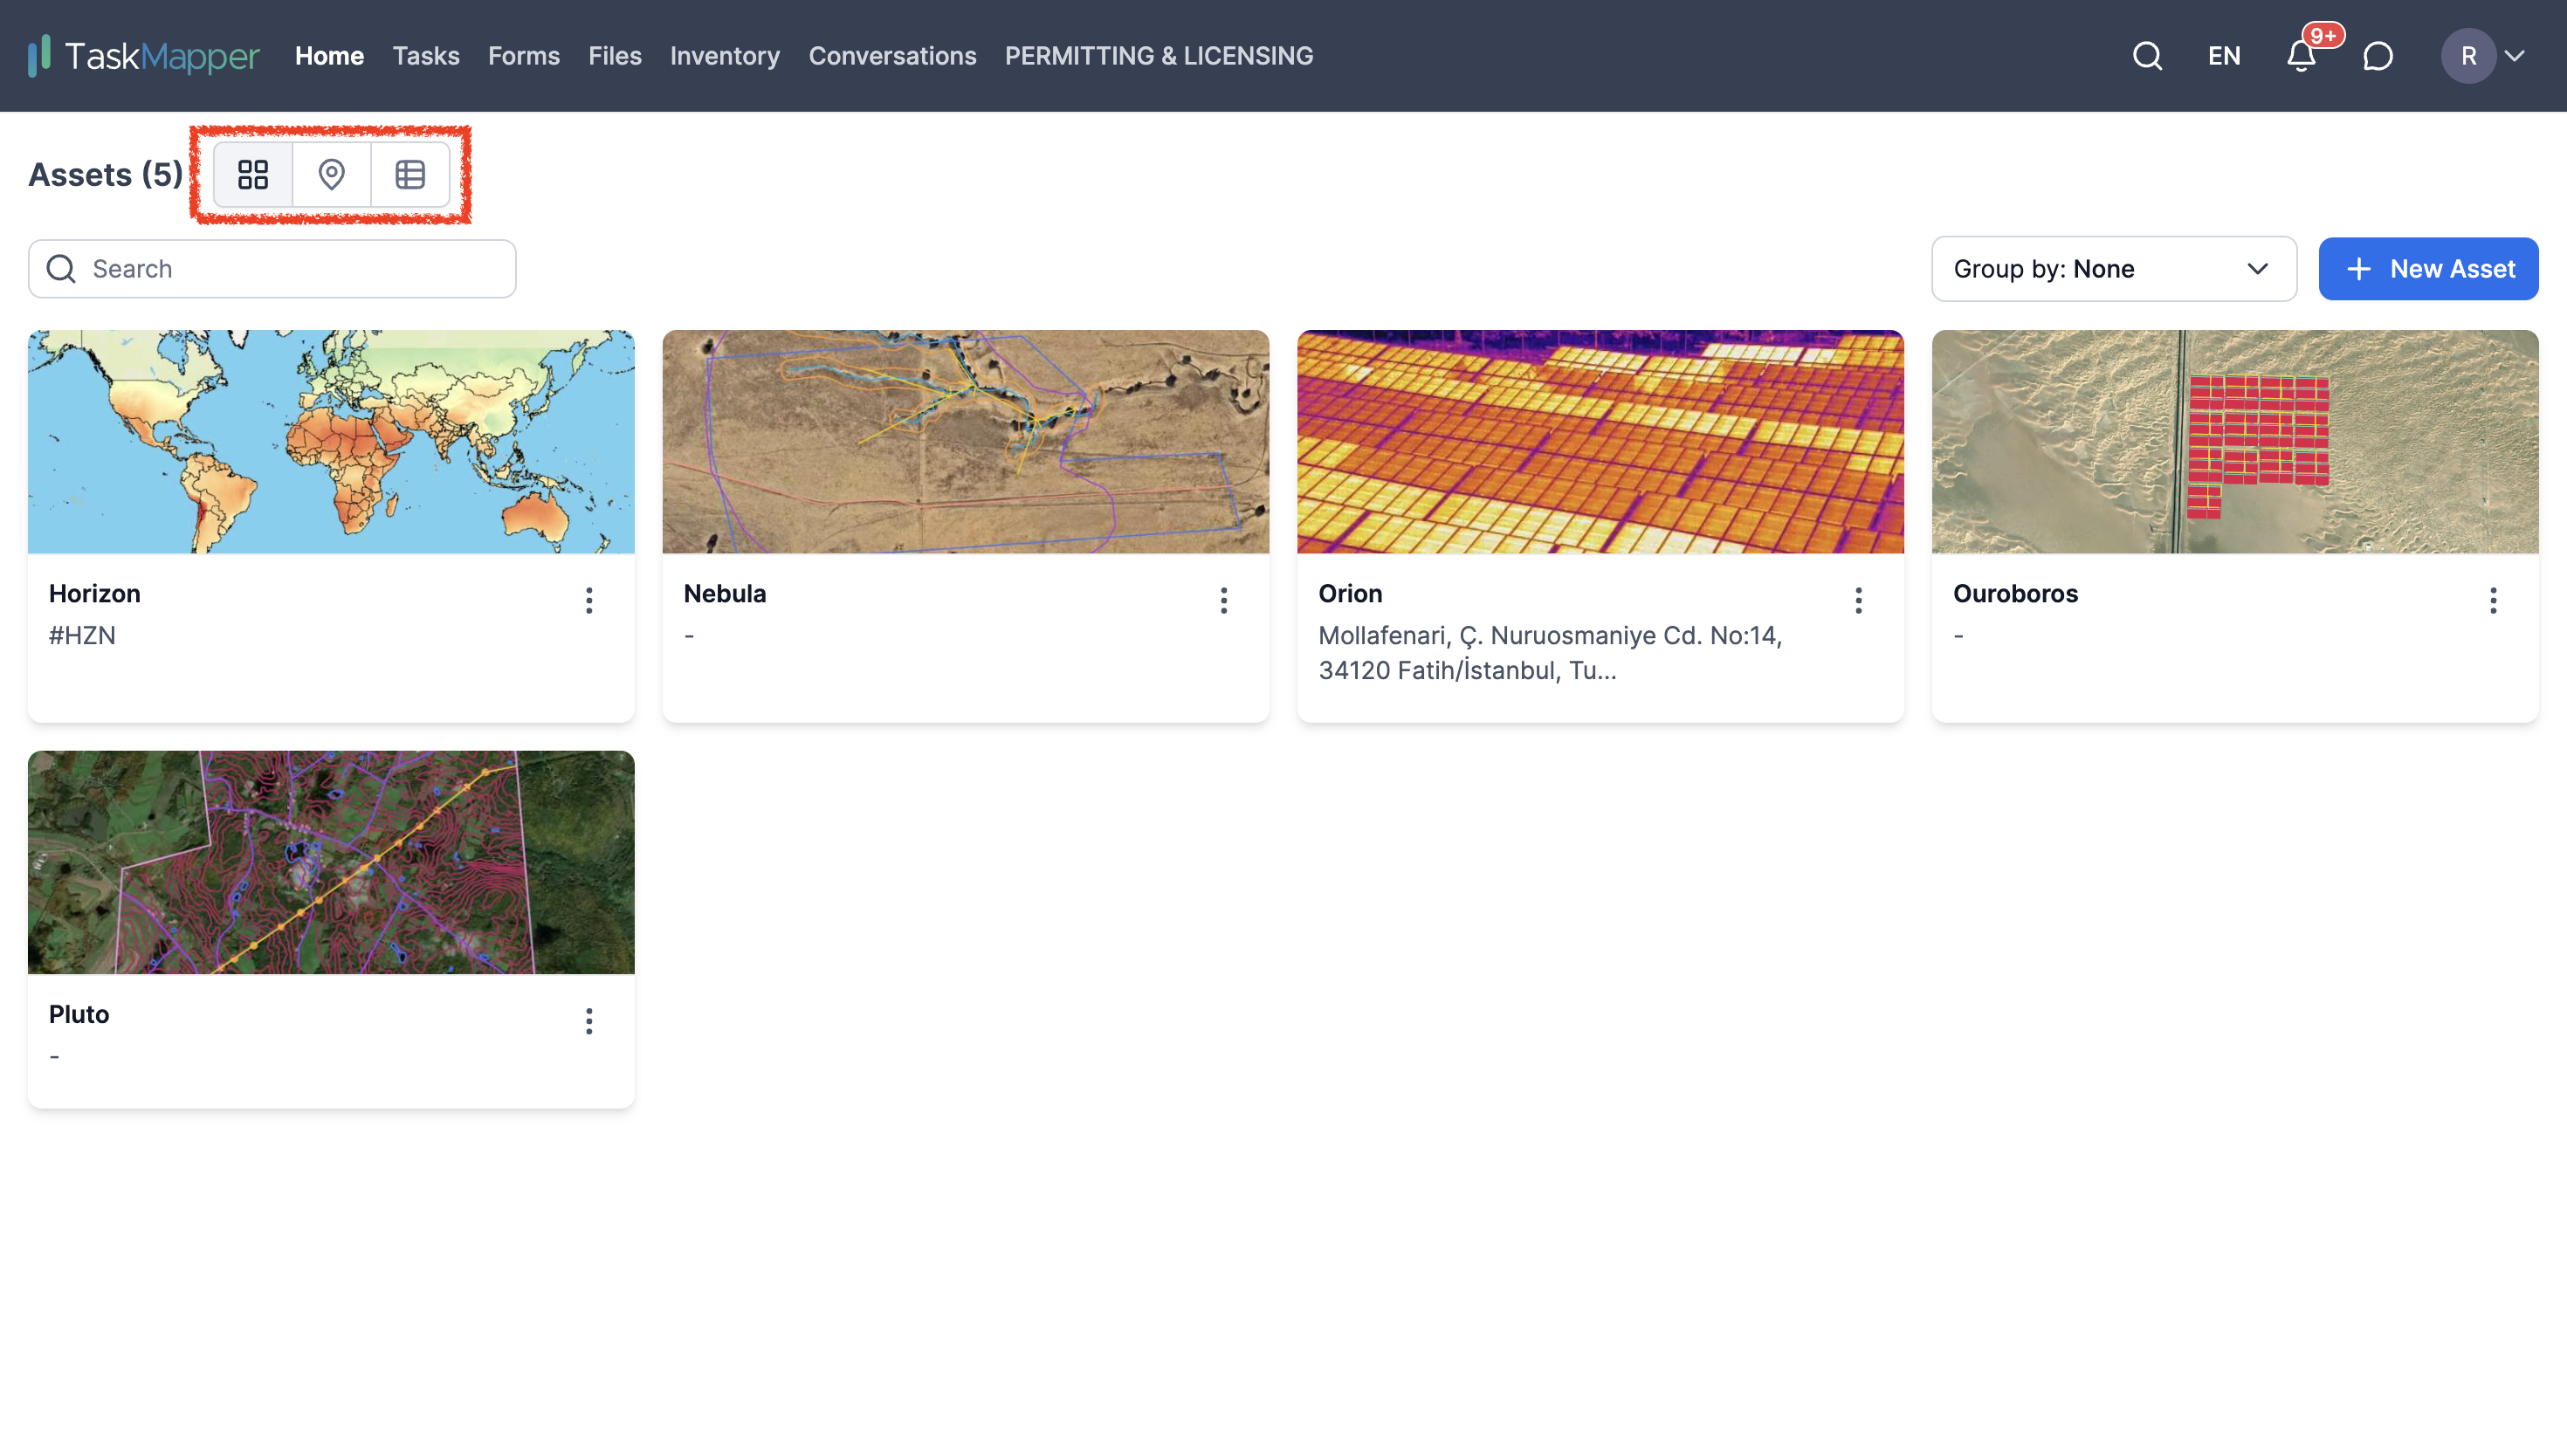
You have three options to view assets: tile, map, or list view. Click the ellipsis to see the assets and their information in the tile view. Alternatively, you can view the asset pinned on the map. You can see the list of assets and their information in the list view. Choose the view that works best for you!
Figure 6: Switch Assets View
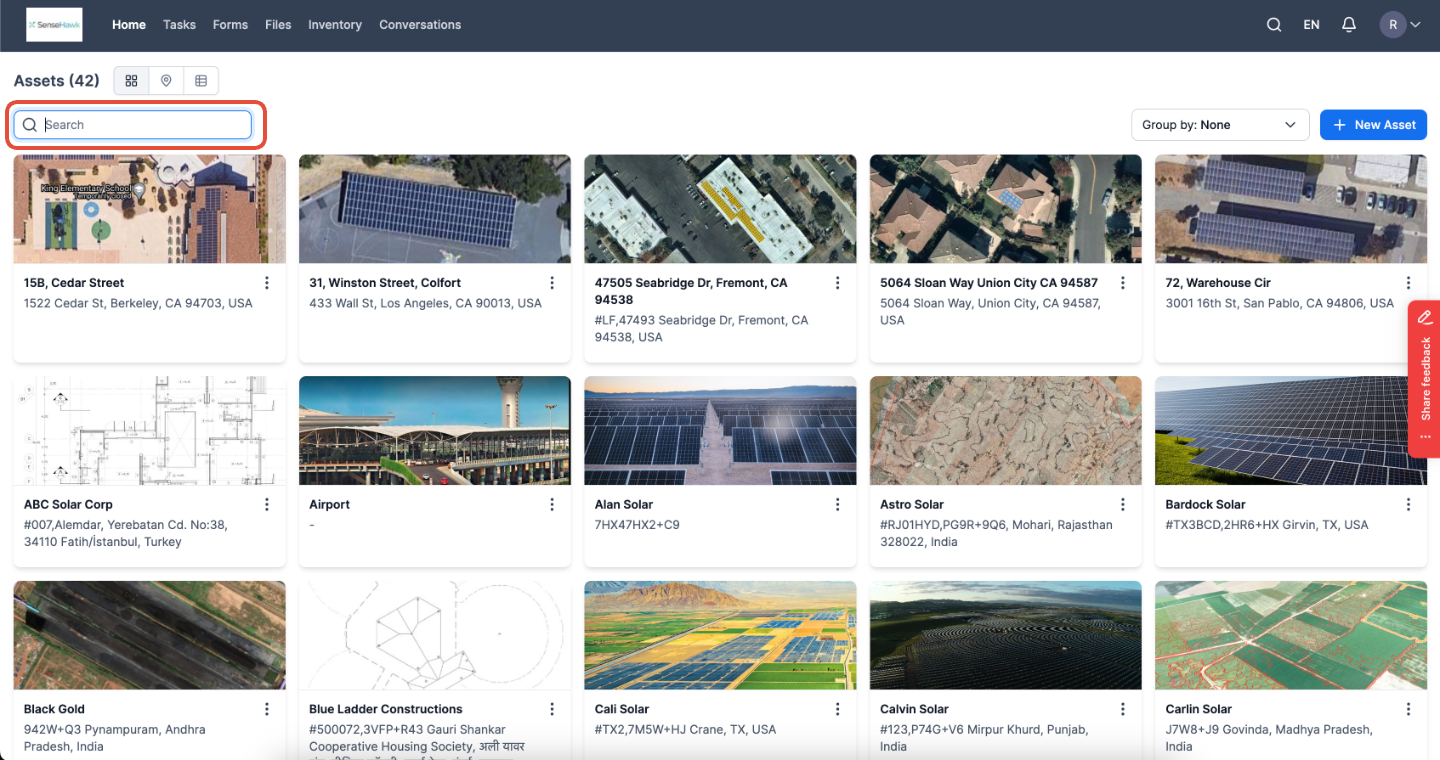
Search asset
Figure 7: Asset Search
Files
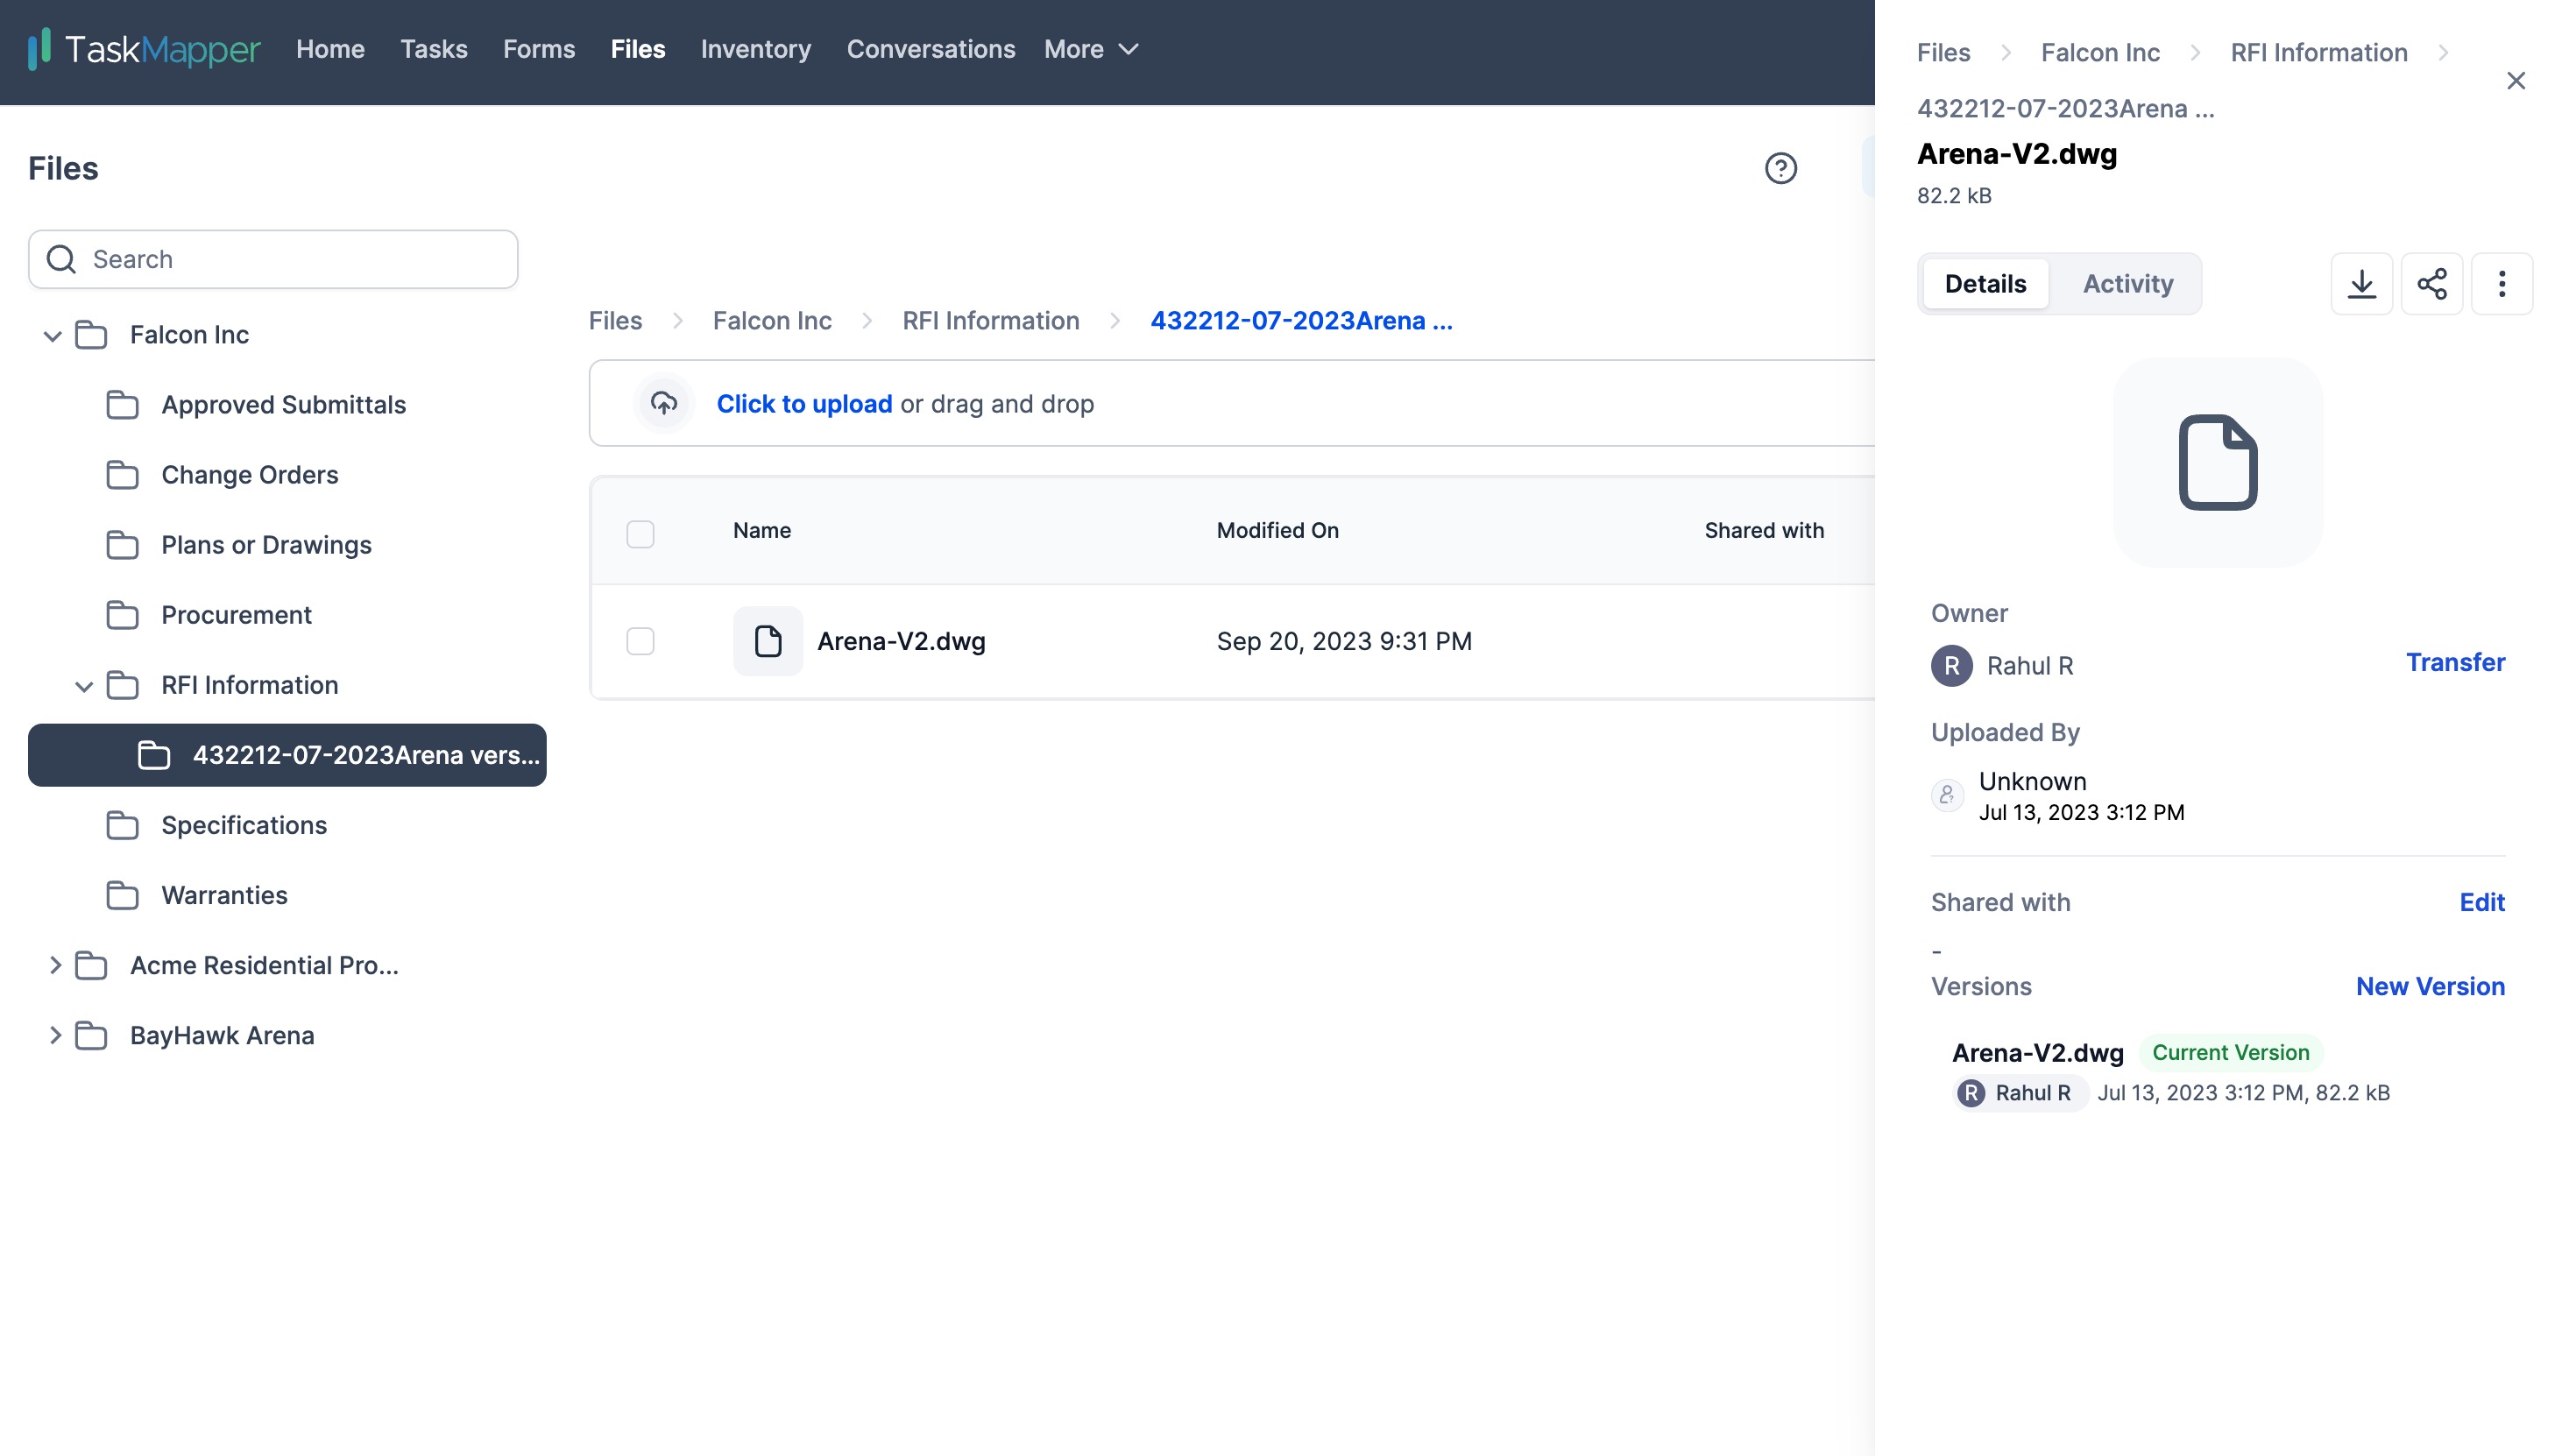
Access and manage all your project documents in one place. Upload, share, and store datasheets, warranties, approvals, and more.
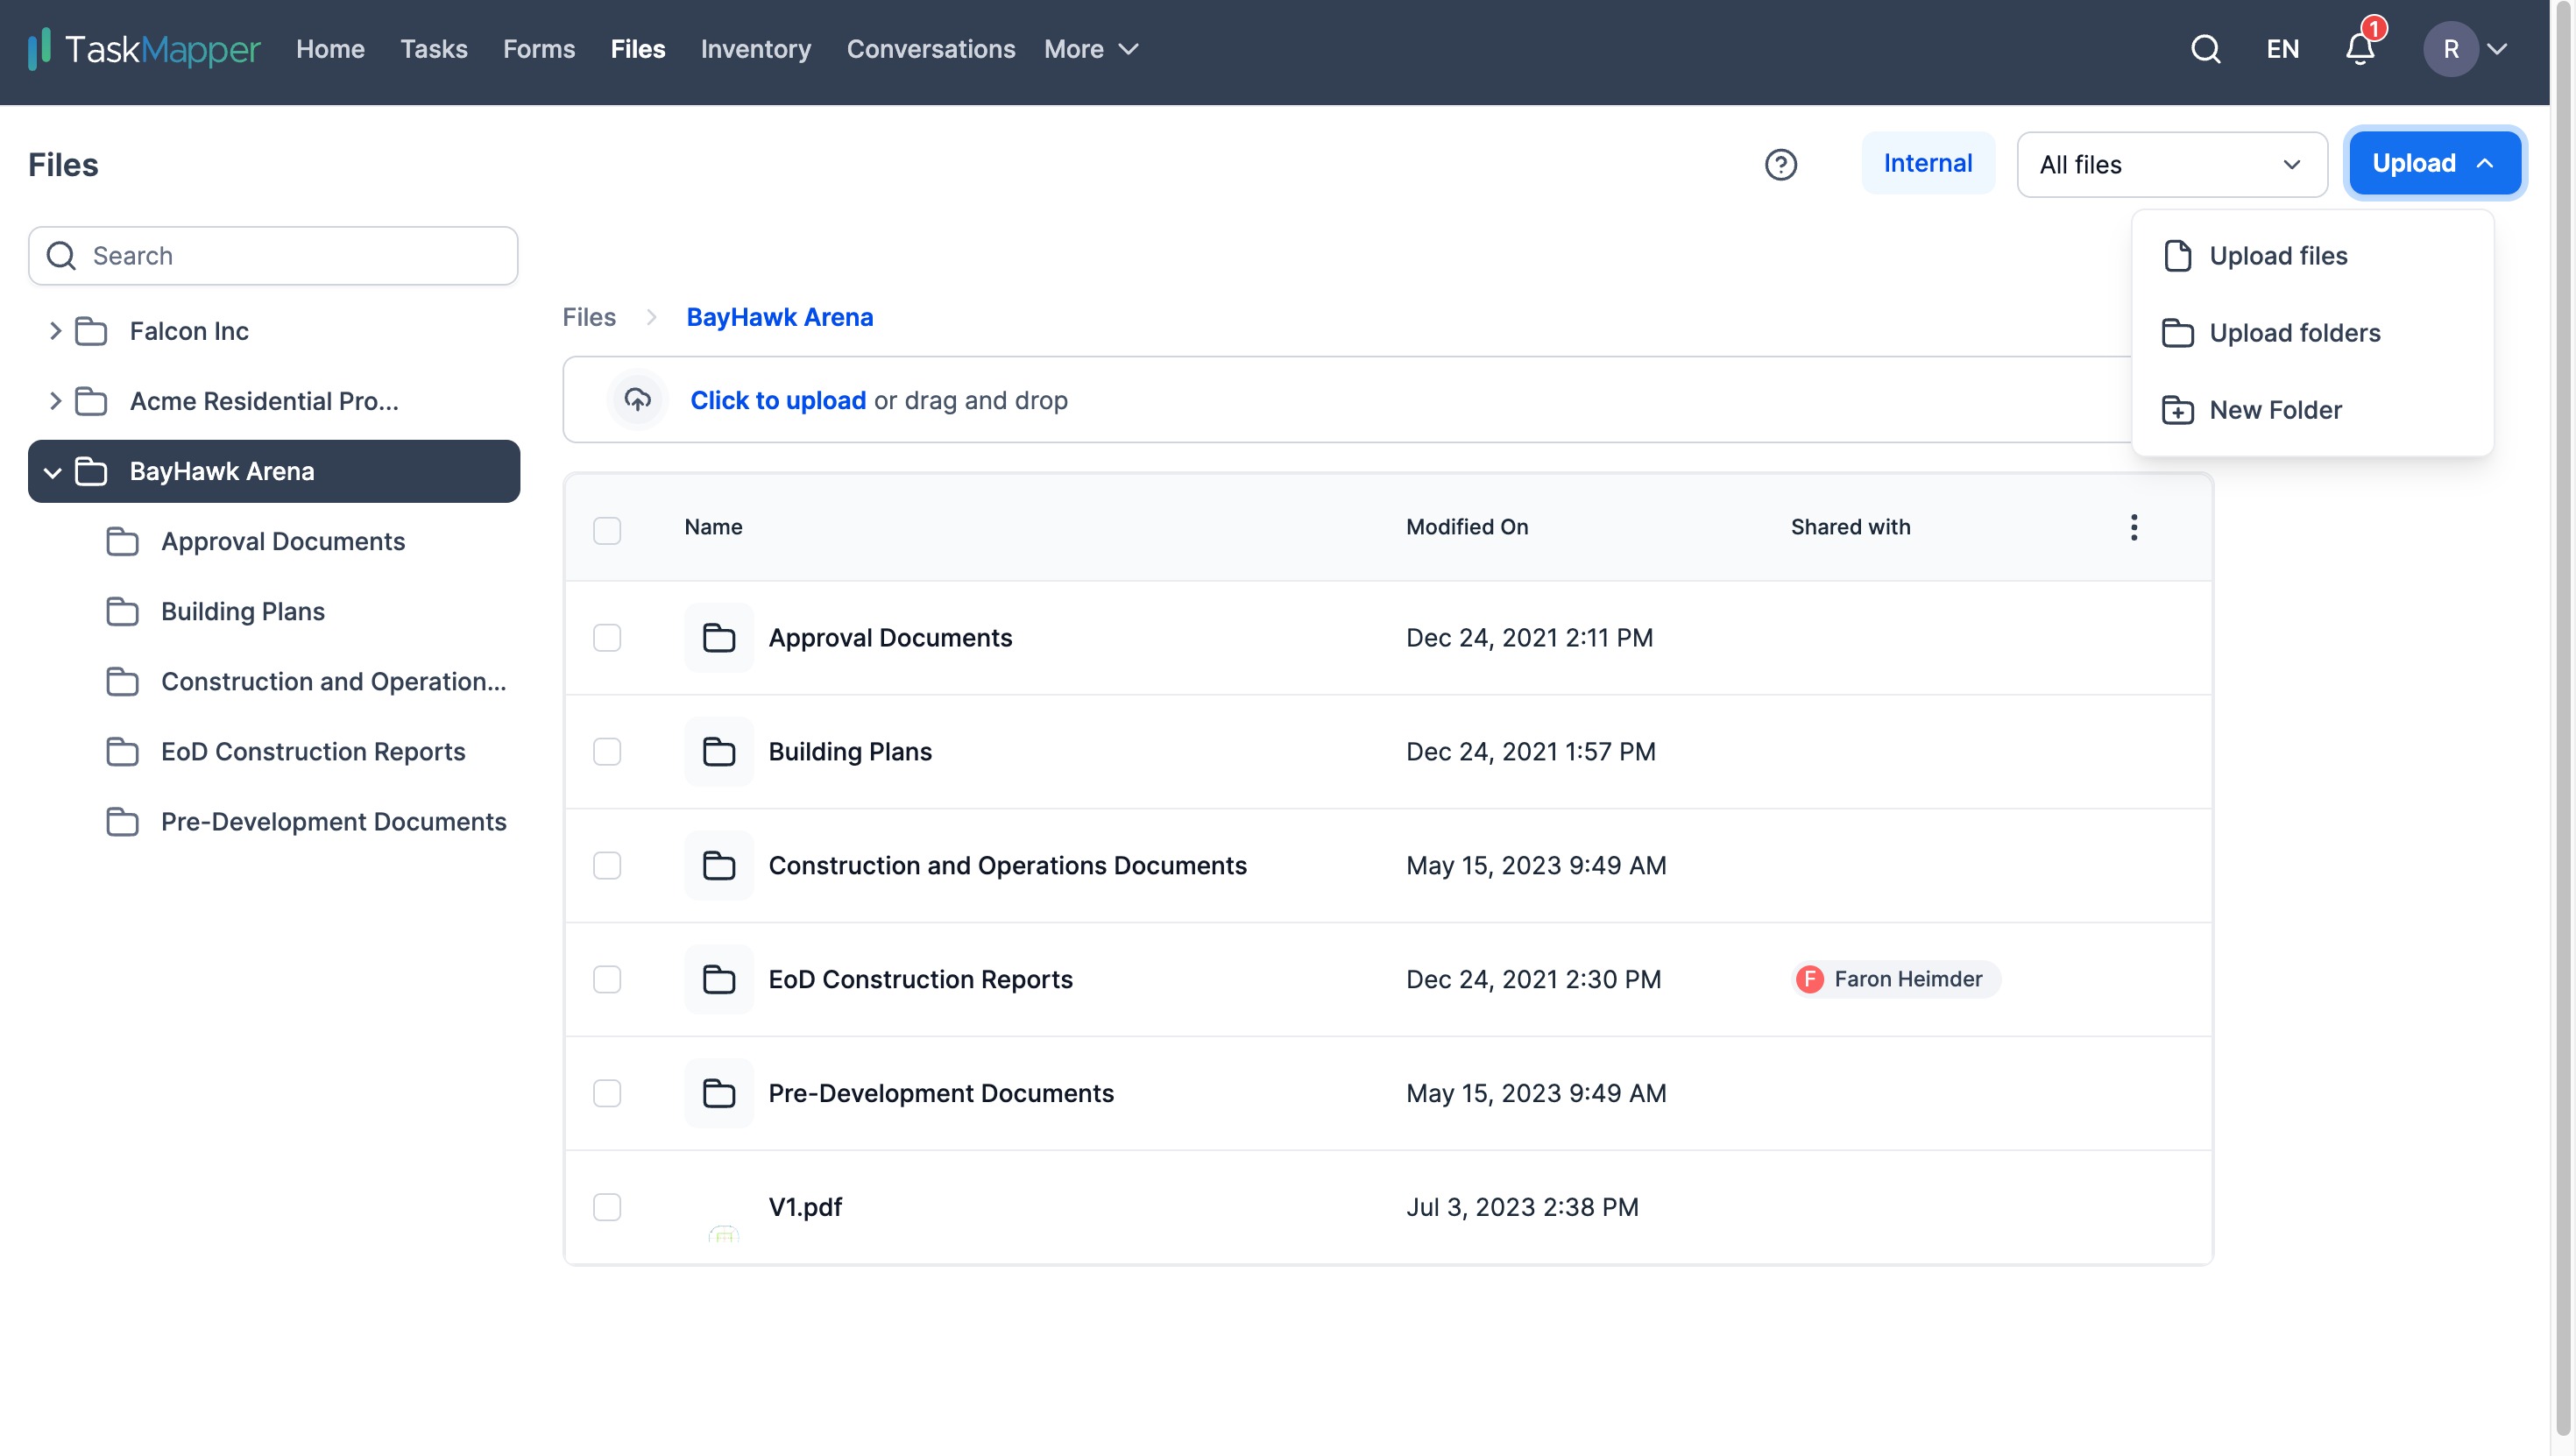
Figure 8: Files and folders
Create your folder structure
To create a new folder, click the 'Upload' drop-down menu and select 'New folder'.
Figure 9: Create a new folder
Upload files/folders
To upload files or folders, click on the 'Upload' drop-down menu and select 'Upload files' for files only or 'Upload folders' to upload the entire folder.
Figure 10: Upload files/folders
Categories
(Account Settings >> Categories)
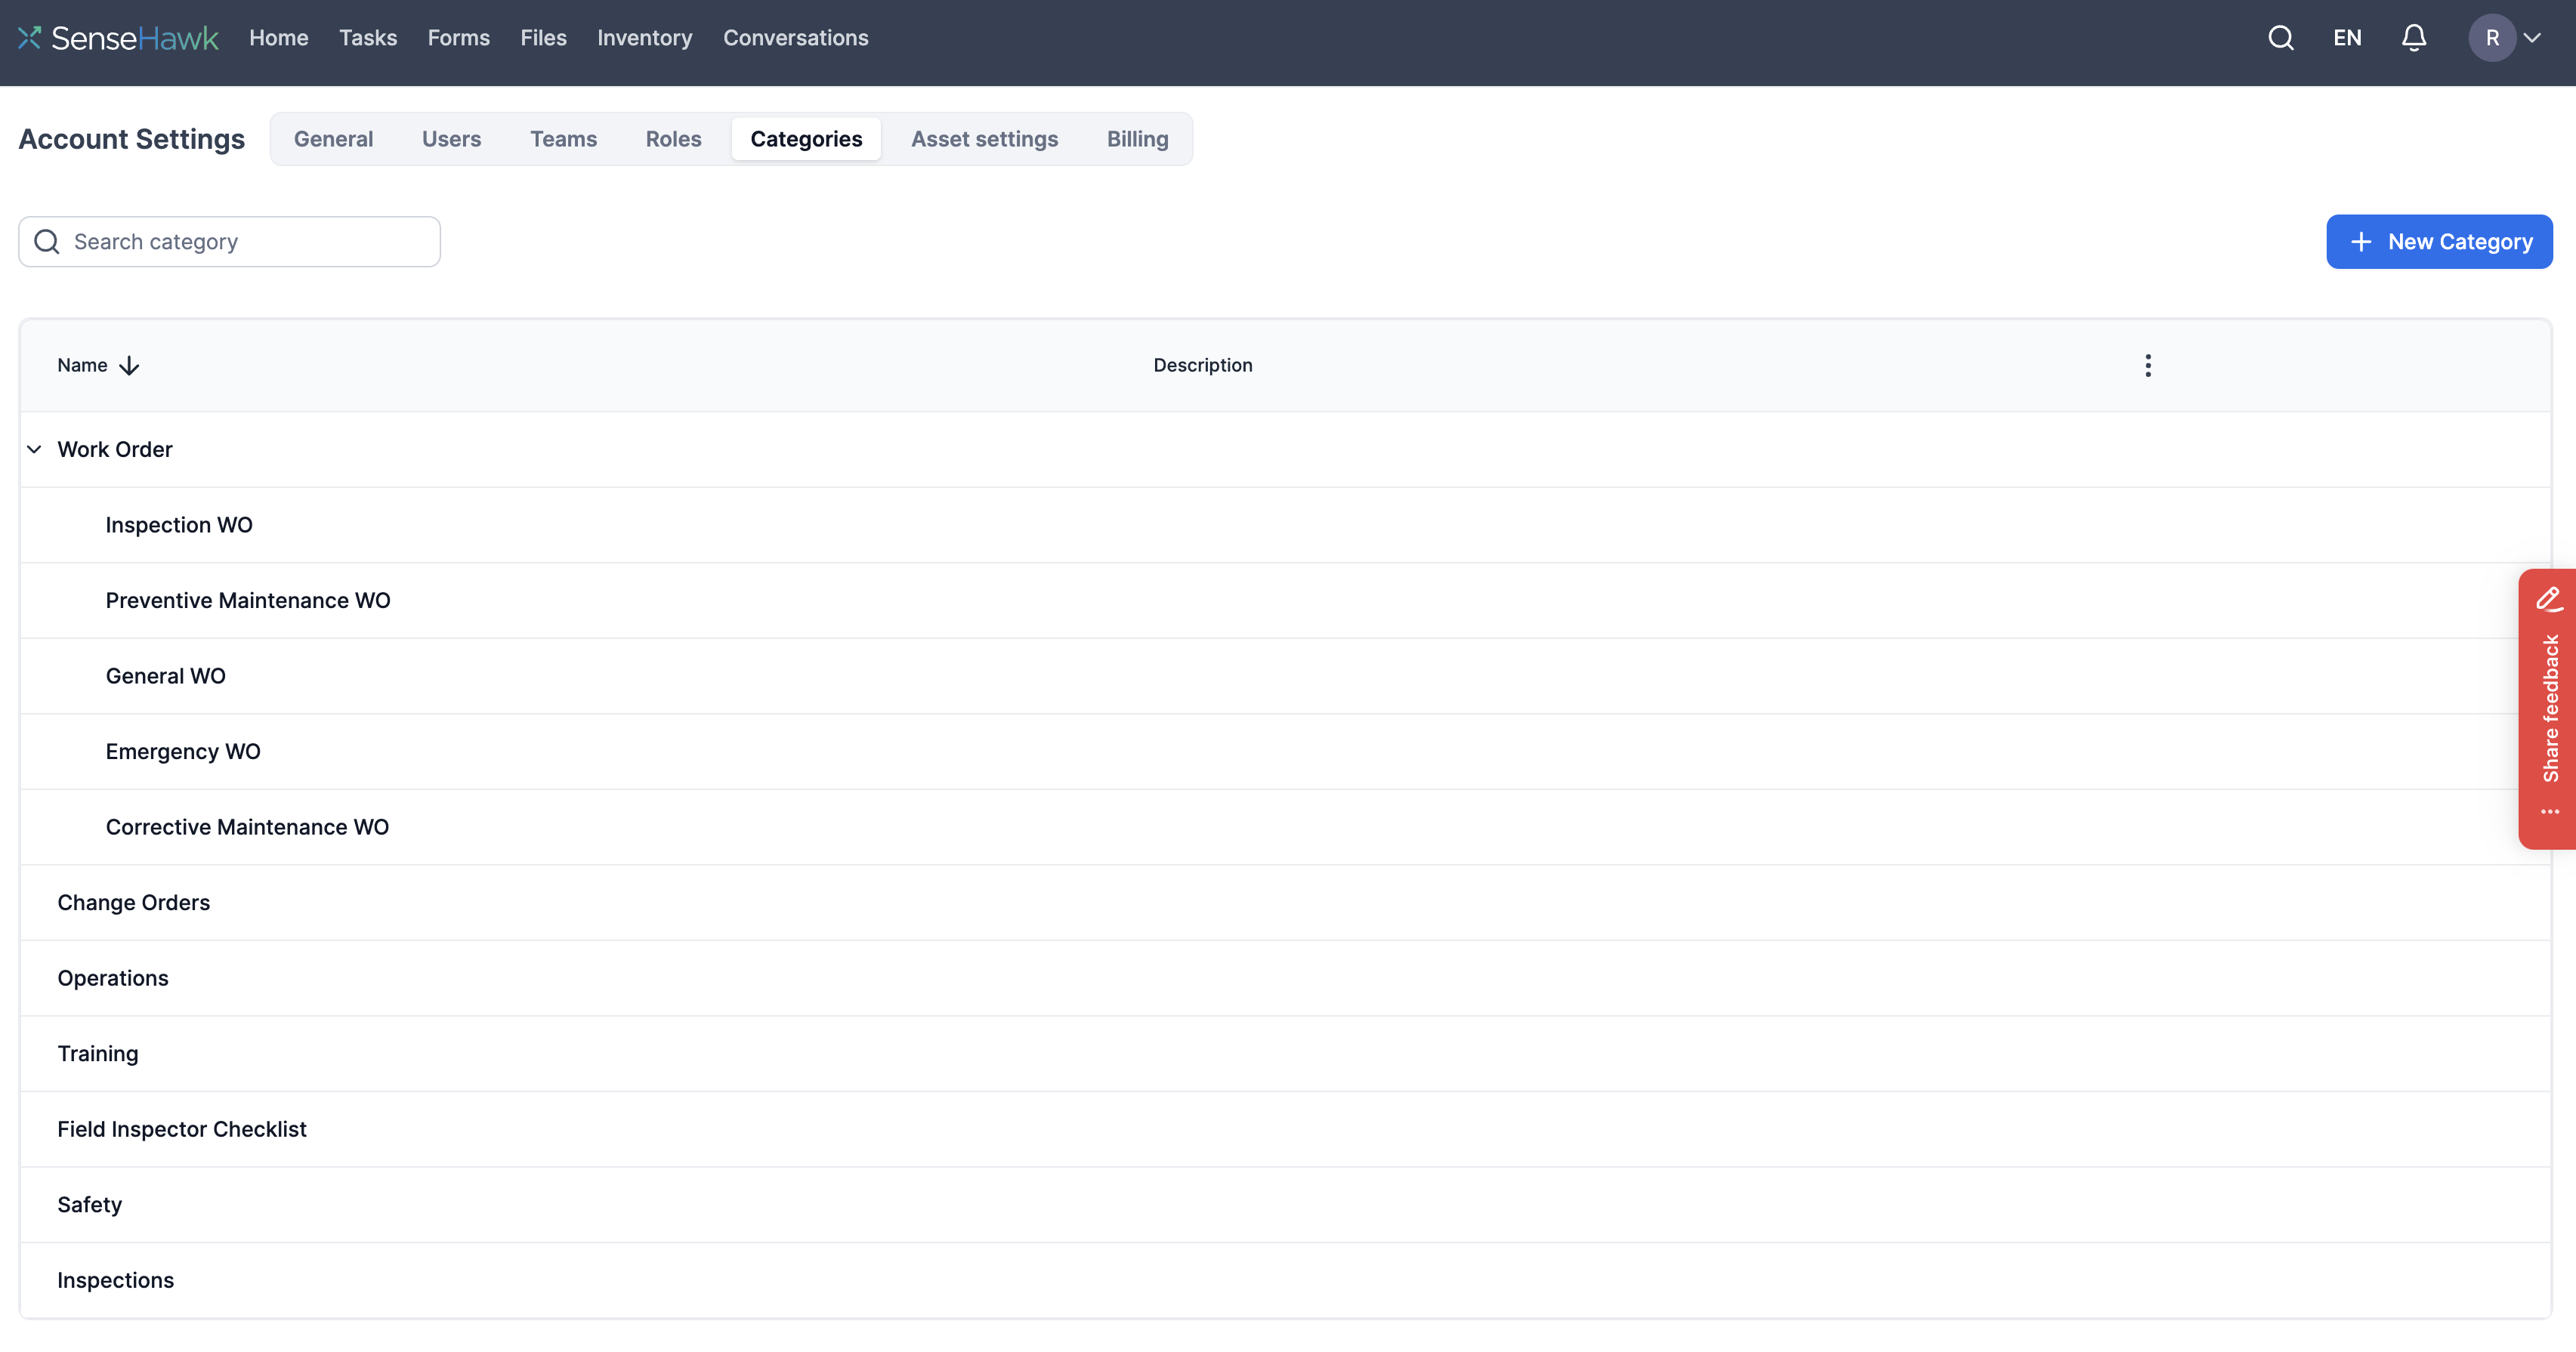
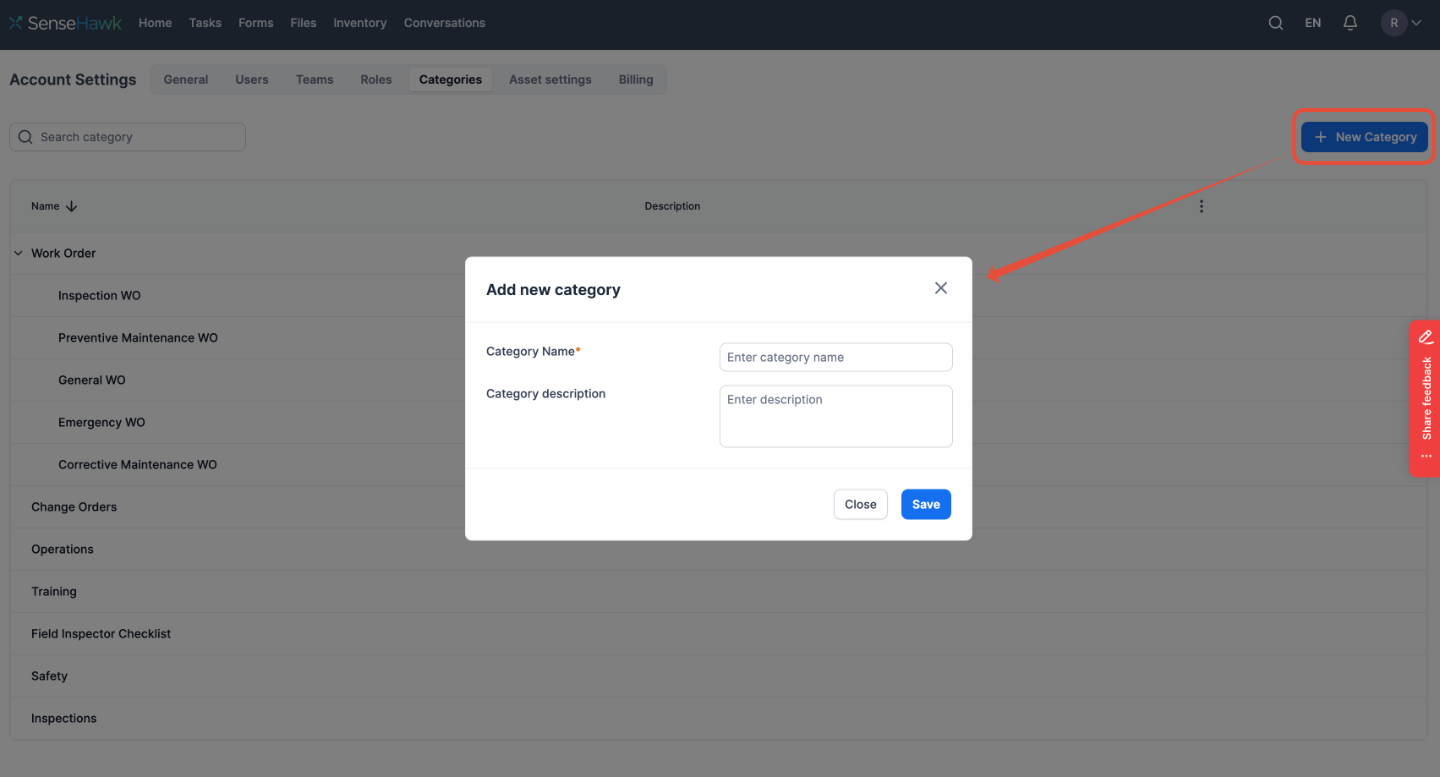
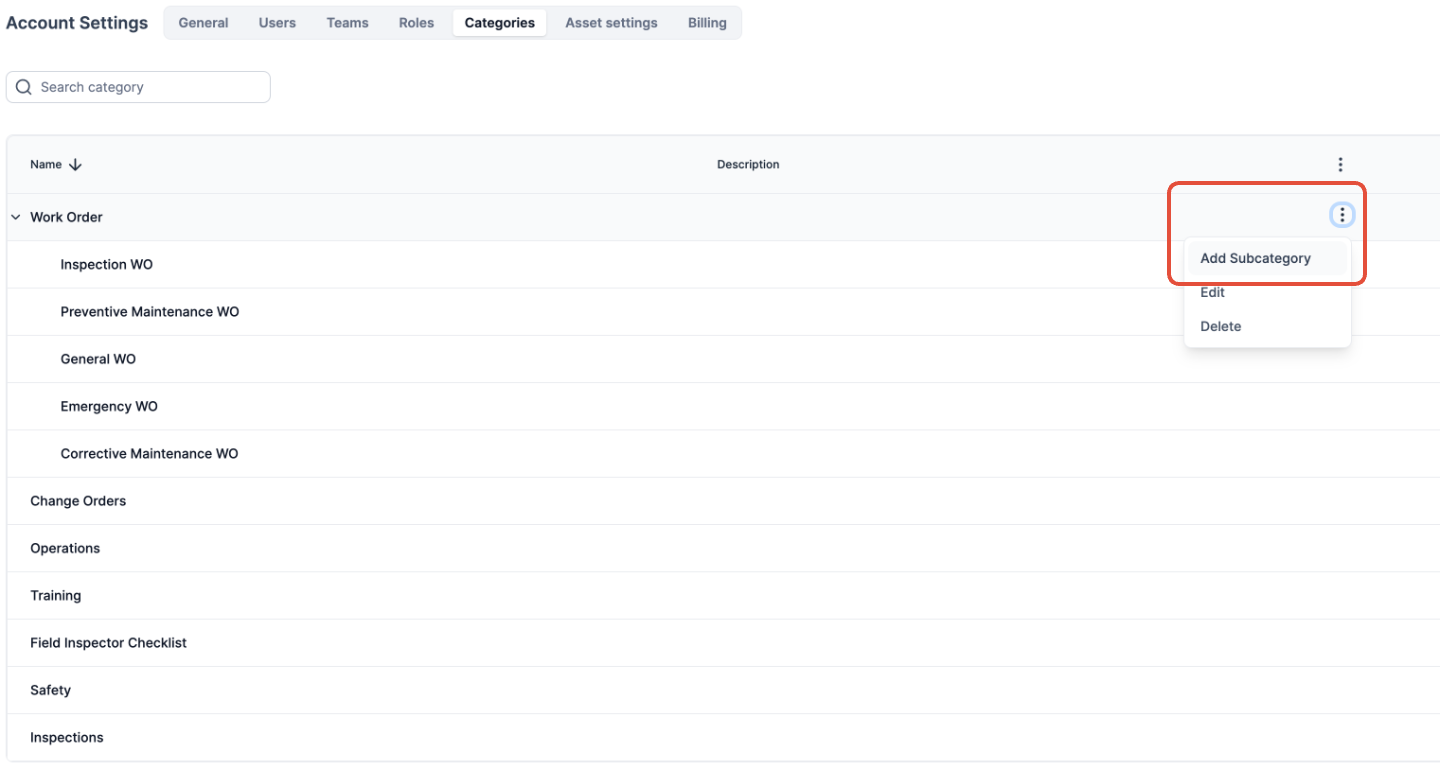
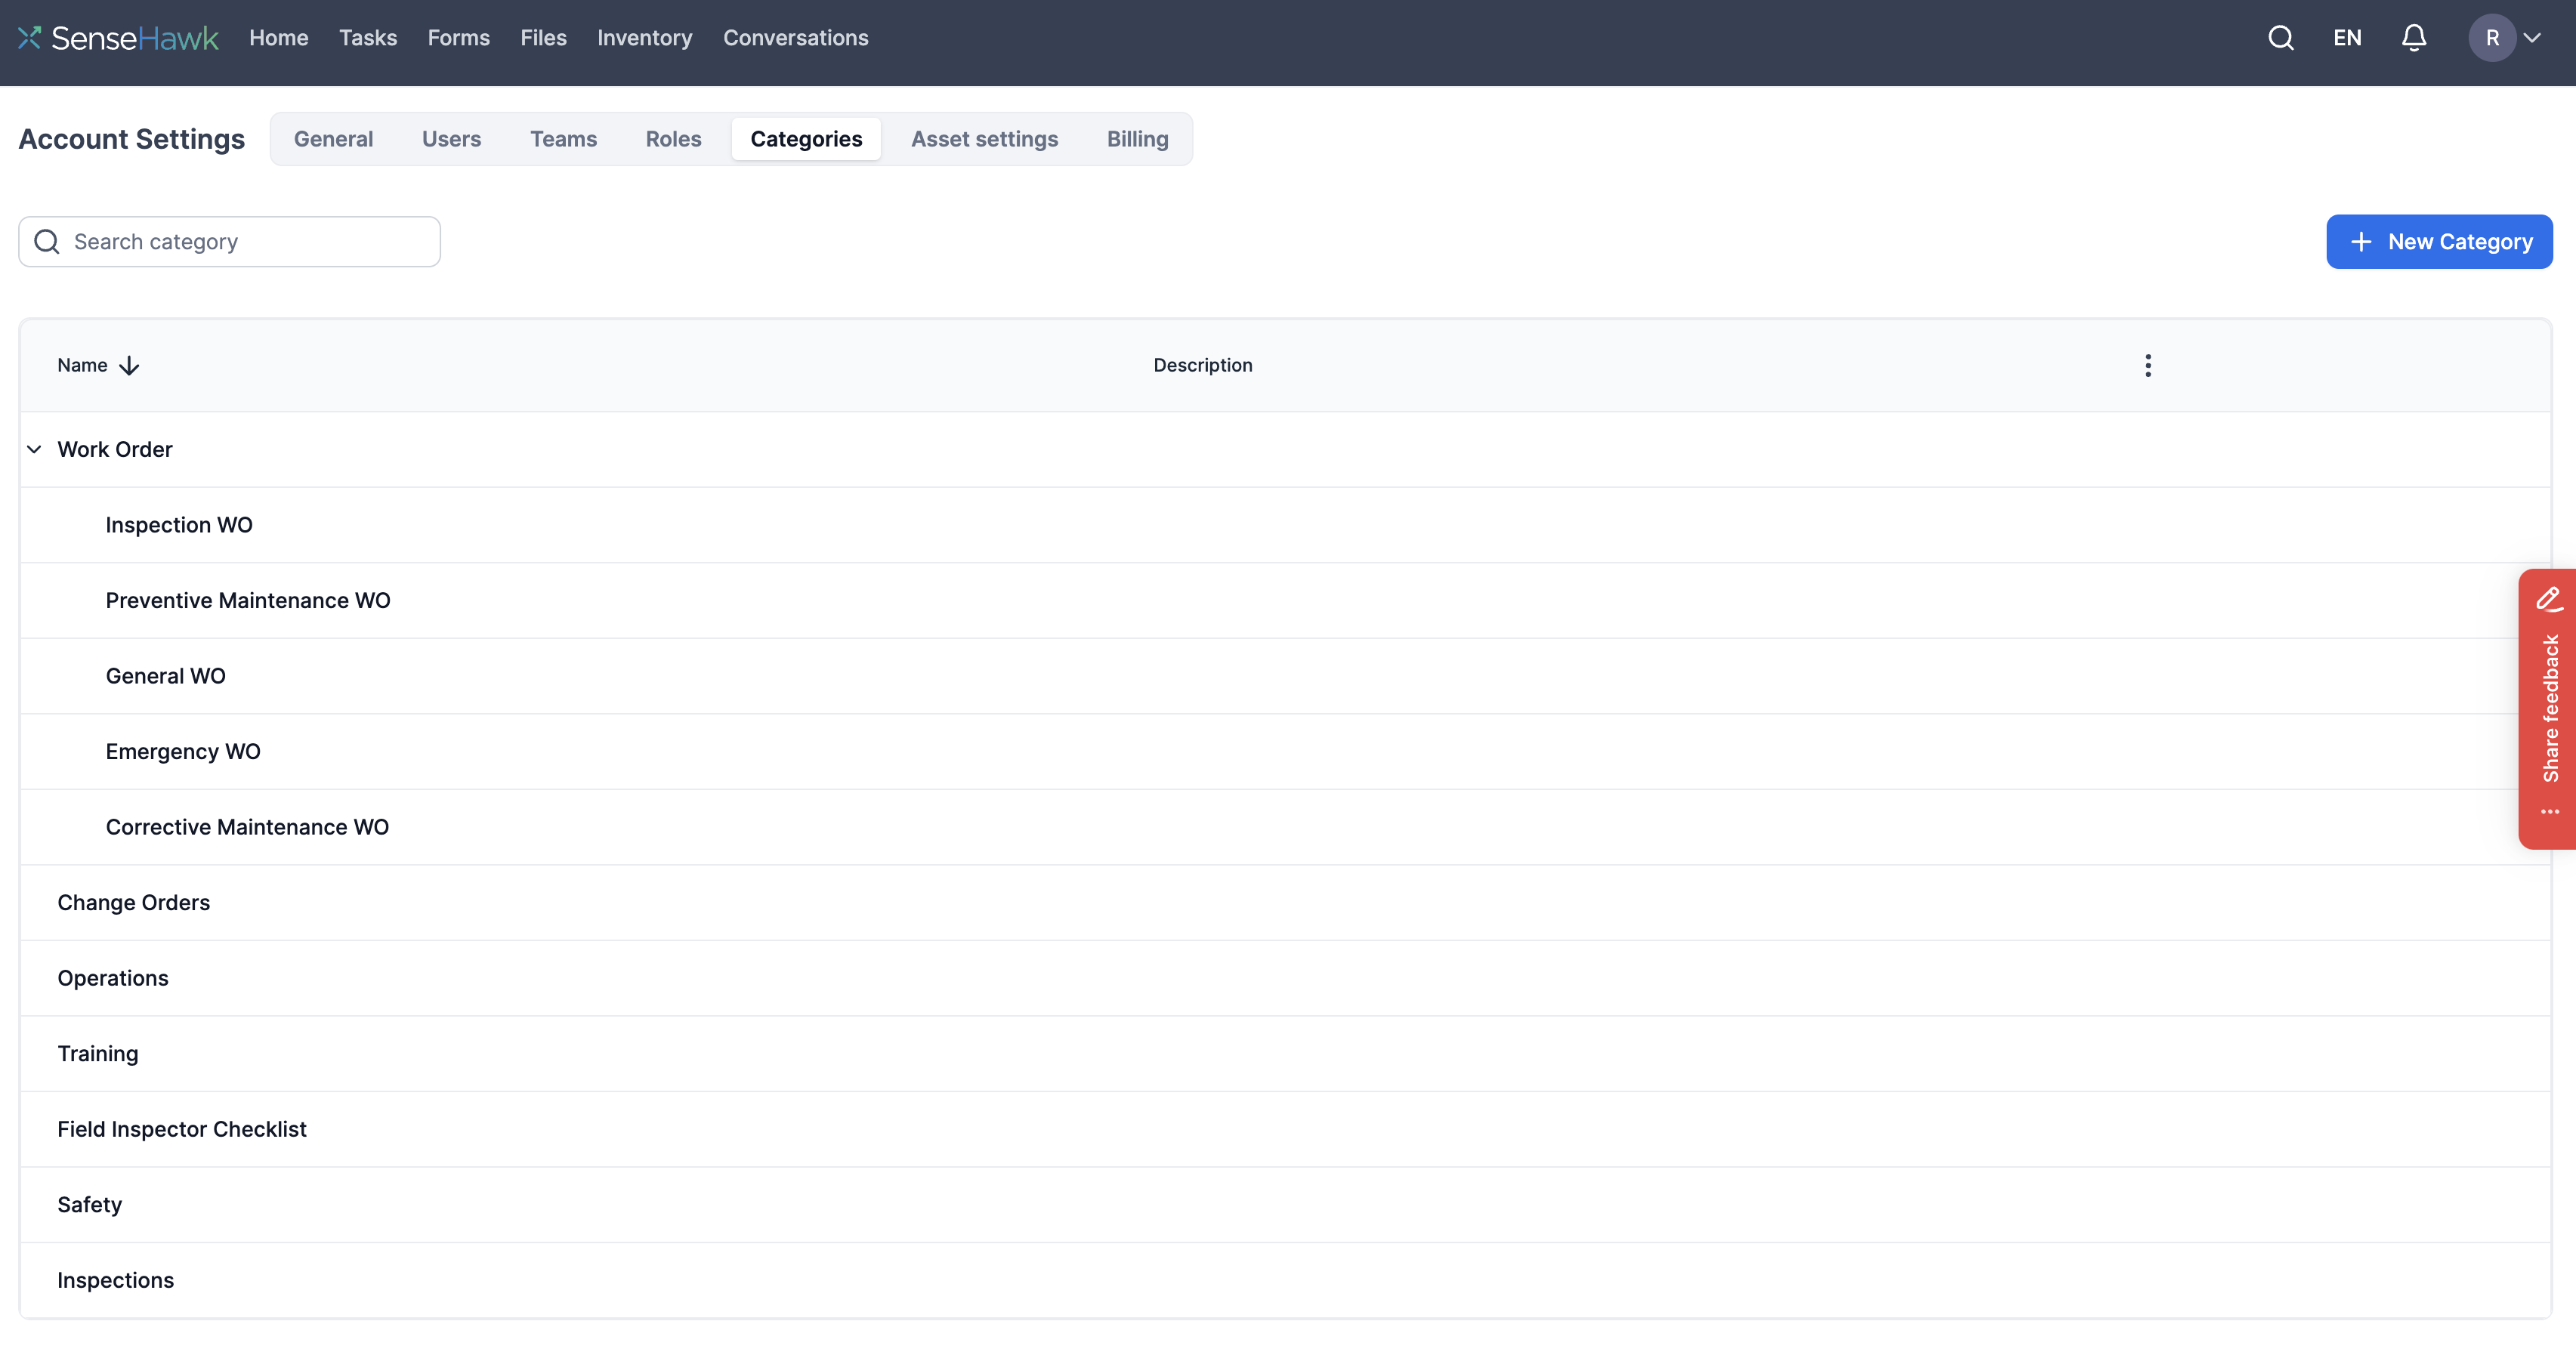
Organizing tasks and forms can be daunting, so categories are so helpful. They allow you to sort your tasks and forms into groups, making it easier to navigate, sort, and find what you need quickly.
Figure 11: Categories
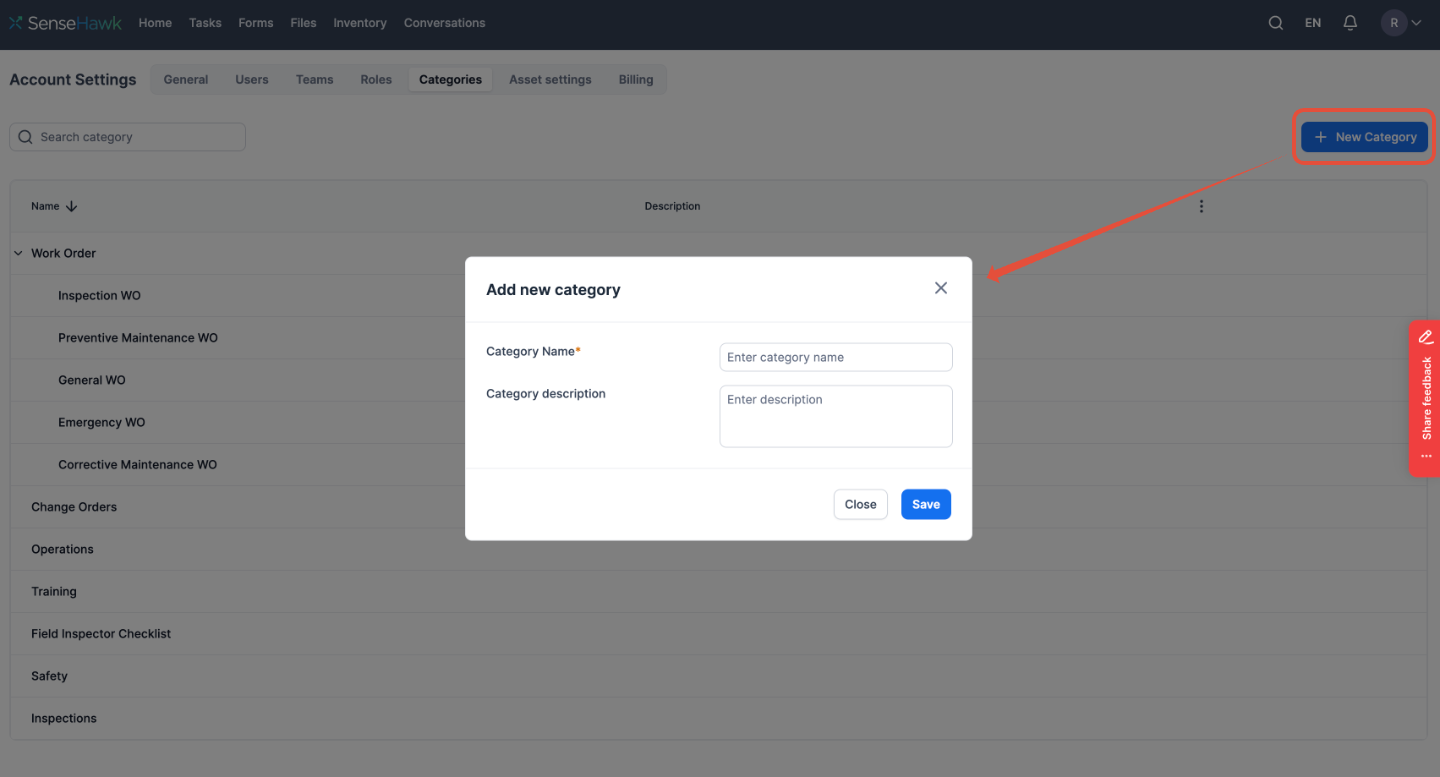
Figure 12: New Category
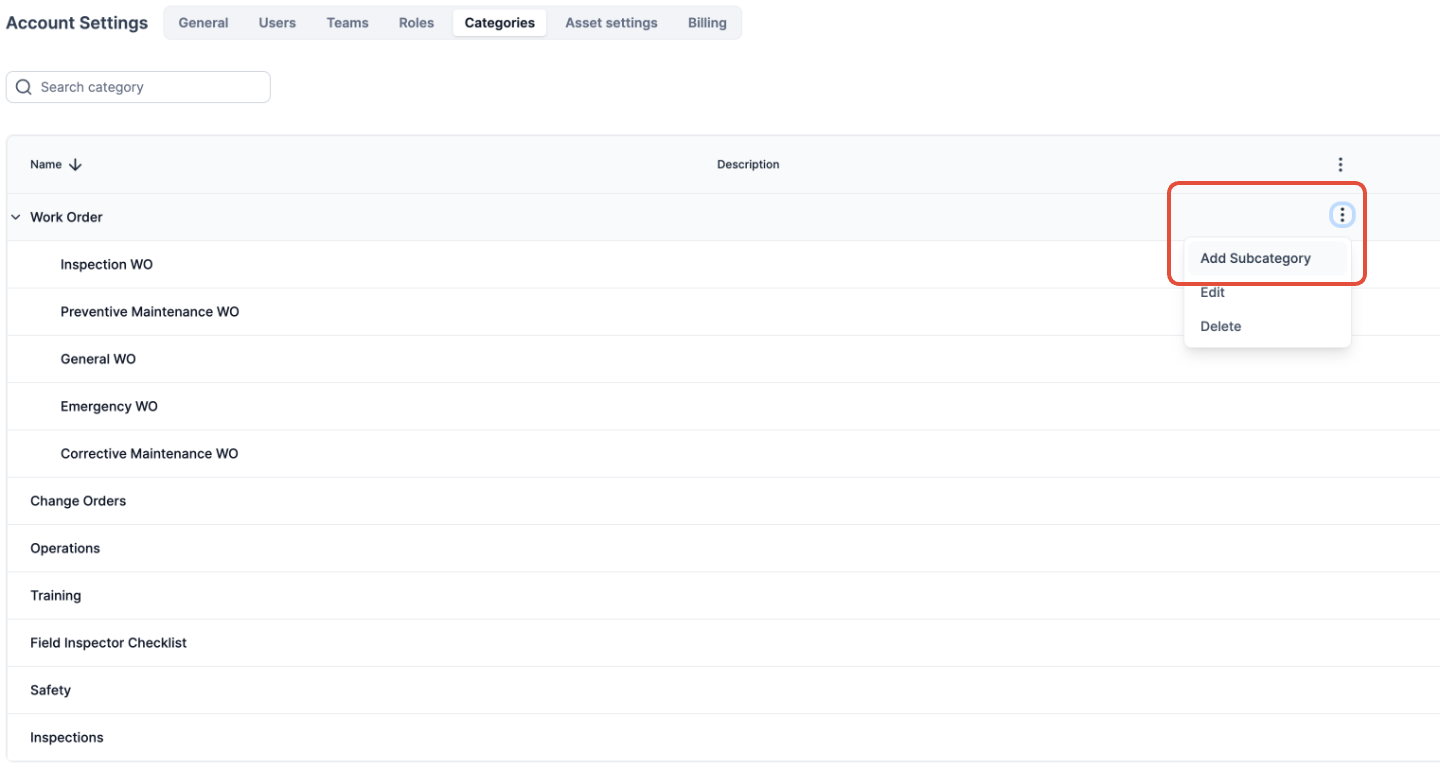
Figure 13: Adding a Sub-Category
Task Templates
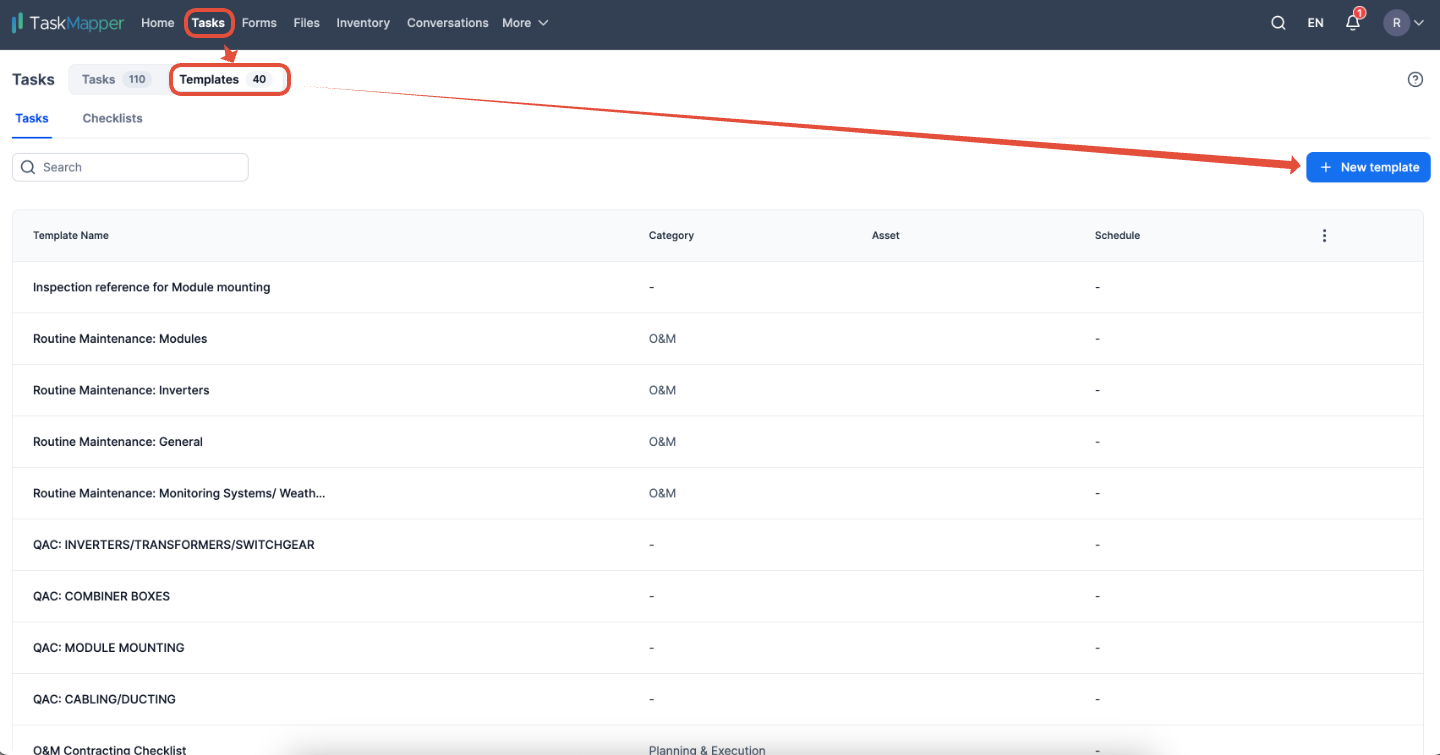
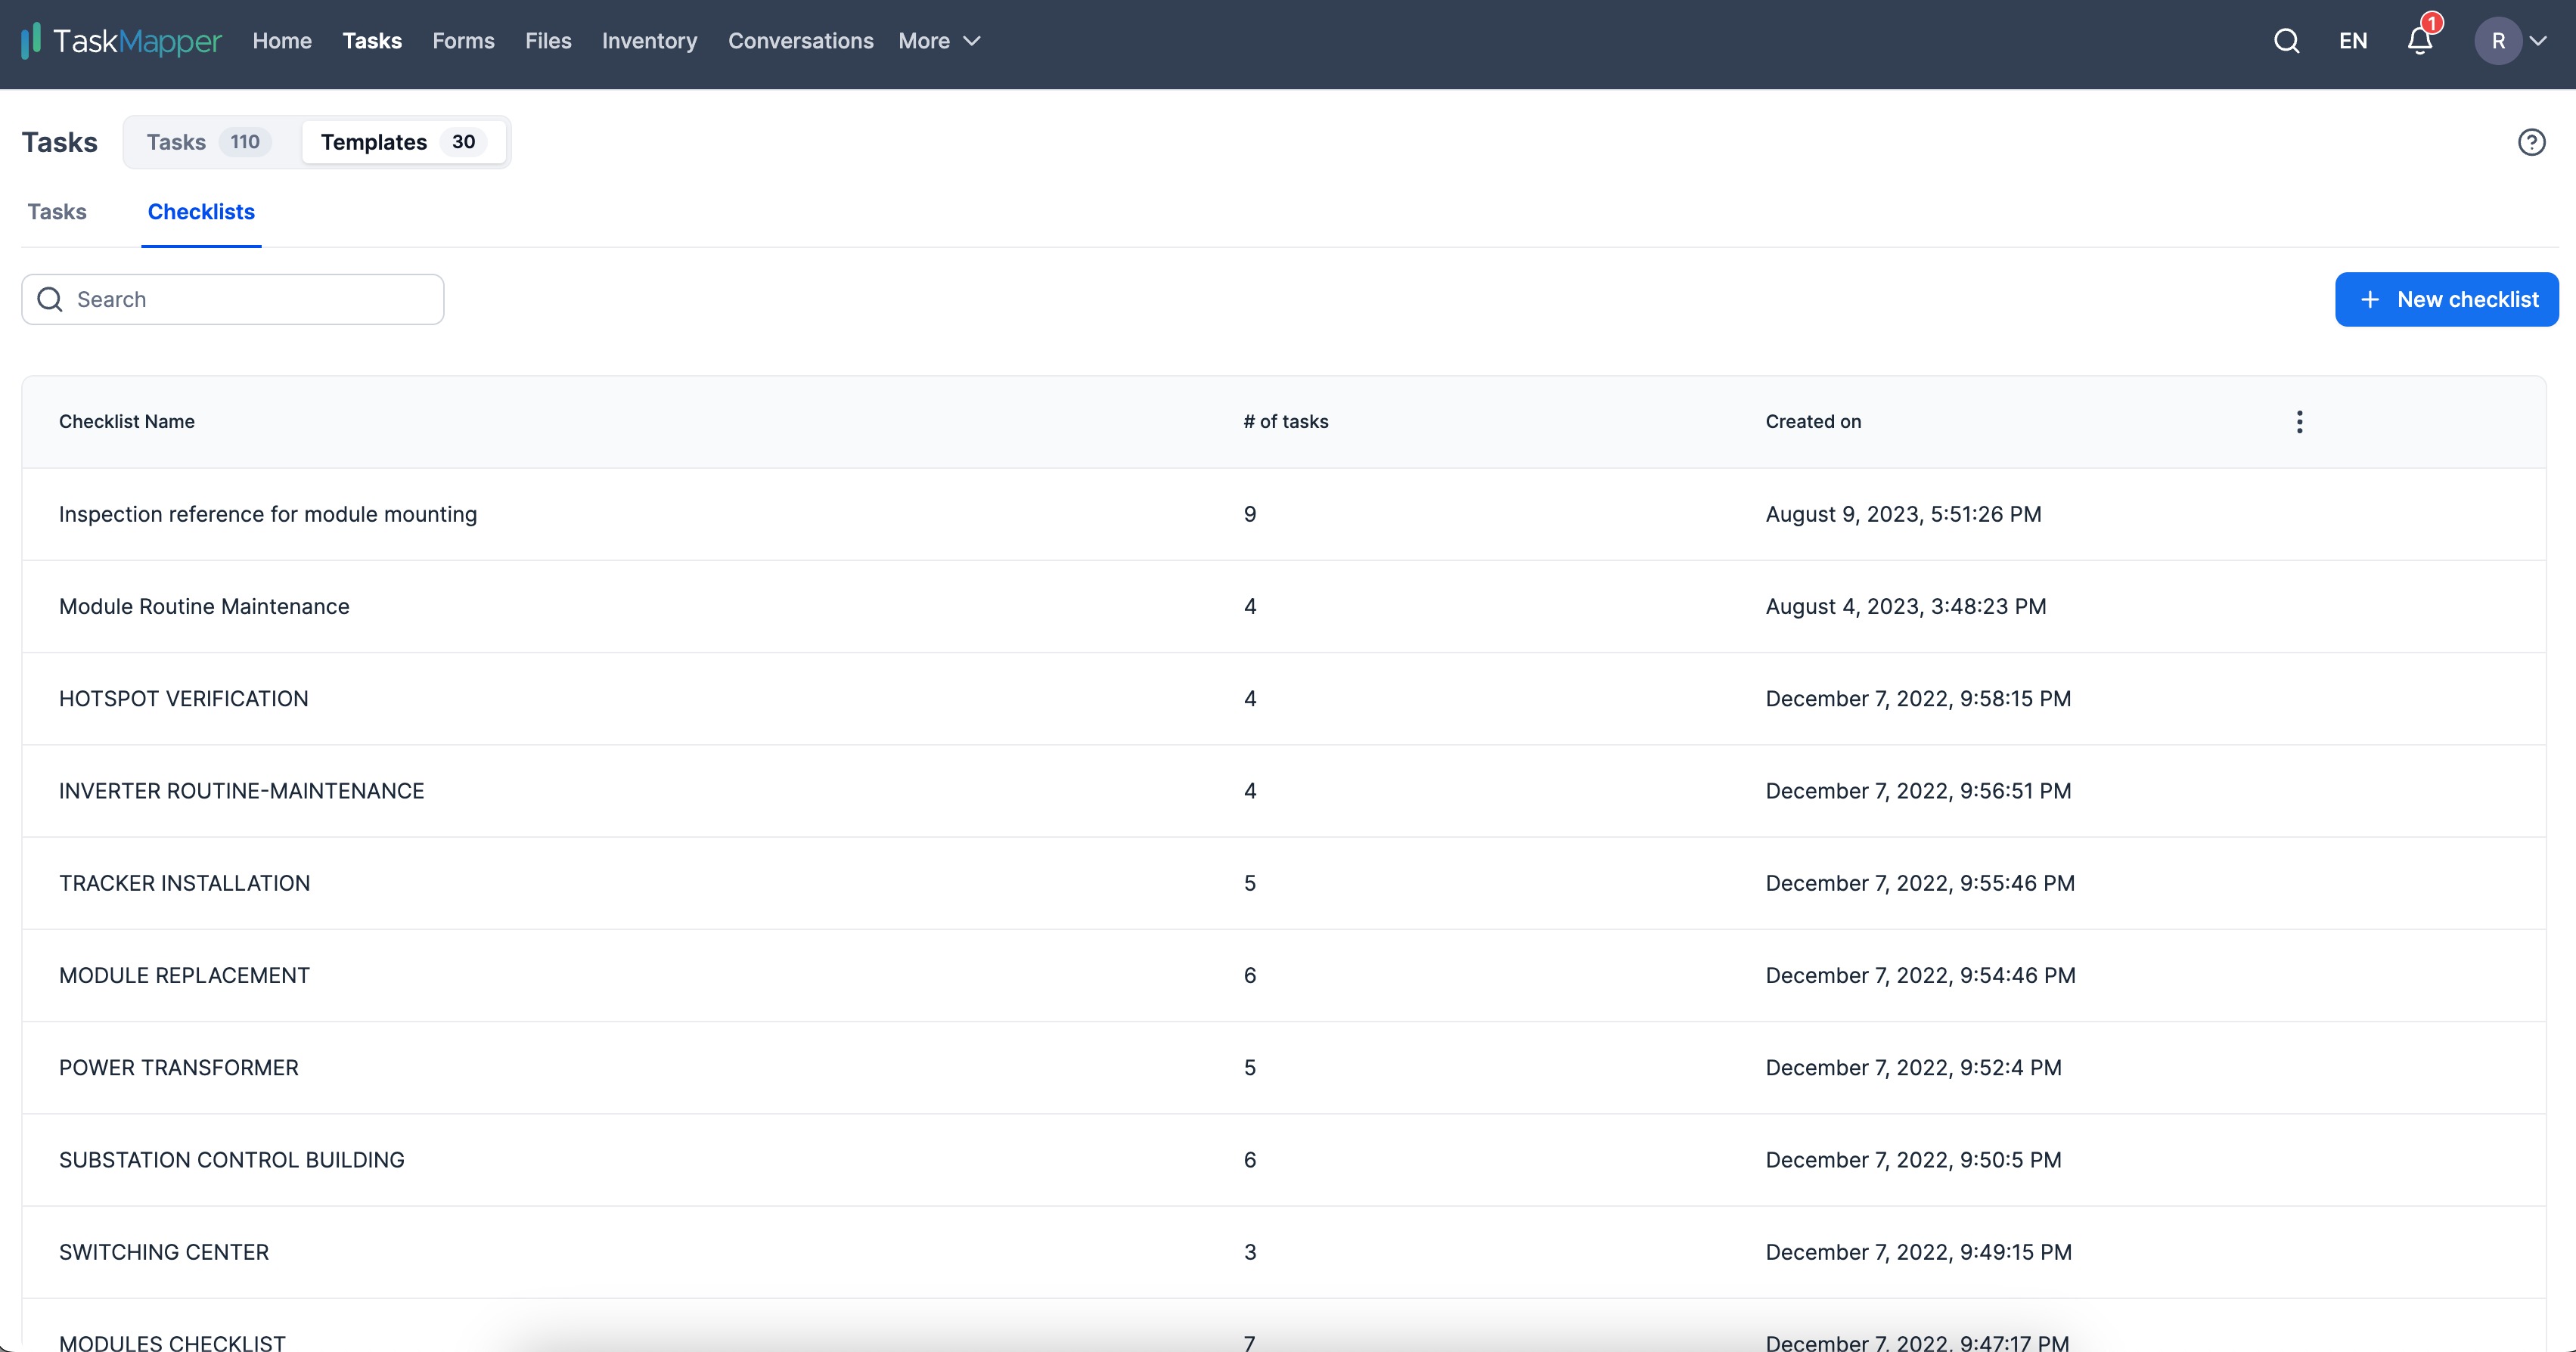
Create your task and checklist templates :
Task templates streamline creating and assigning repetitive activities. Once created, a template can be shared organization-wide or limited to a specific project. Reusing the suitable template accelerates task creation.
Figure 14: Task Template
Figure 15: Checklist Template
What can you do with Task templates?
Scheduling information like assigned teams, reviewers, start and due dates, priority, and frequency for recurring tasks can be stored in Task templates. Users with Manager or Template Manager level permissions can add Task templates, which can be pre-defined at an organization or project level.
All project teams can share task templates created at the organization level.
Click here to learn more about Tasks
Form Templates
Create your form templates:
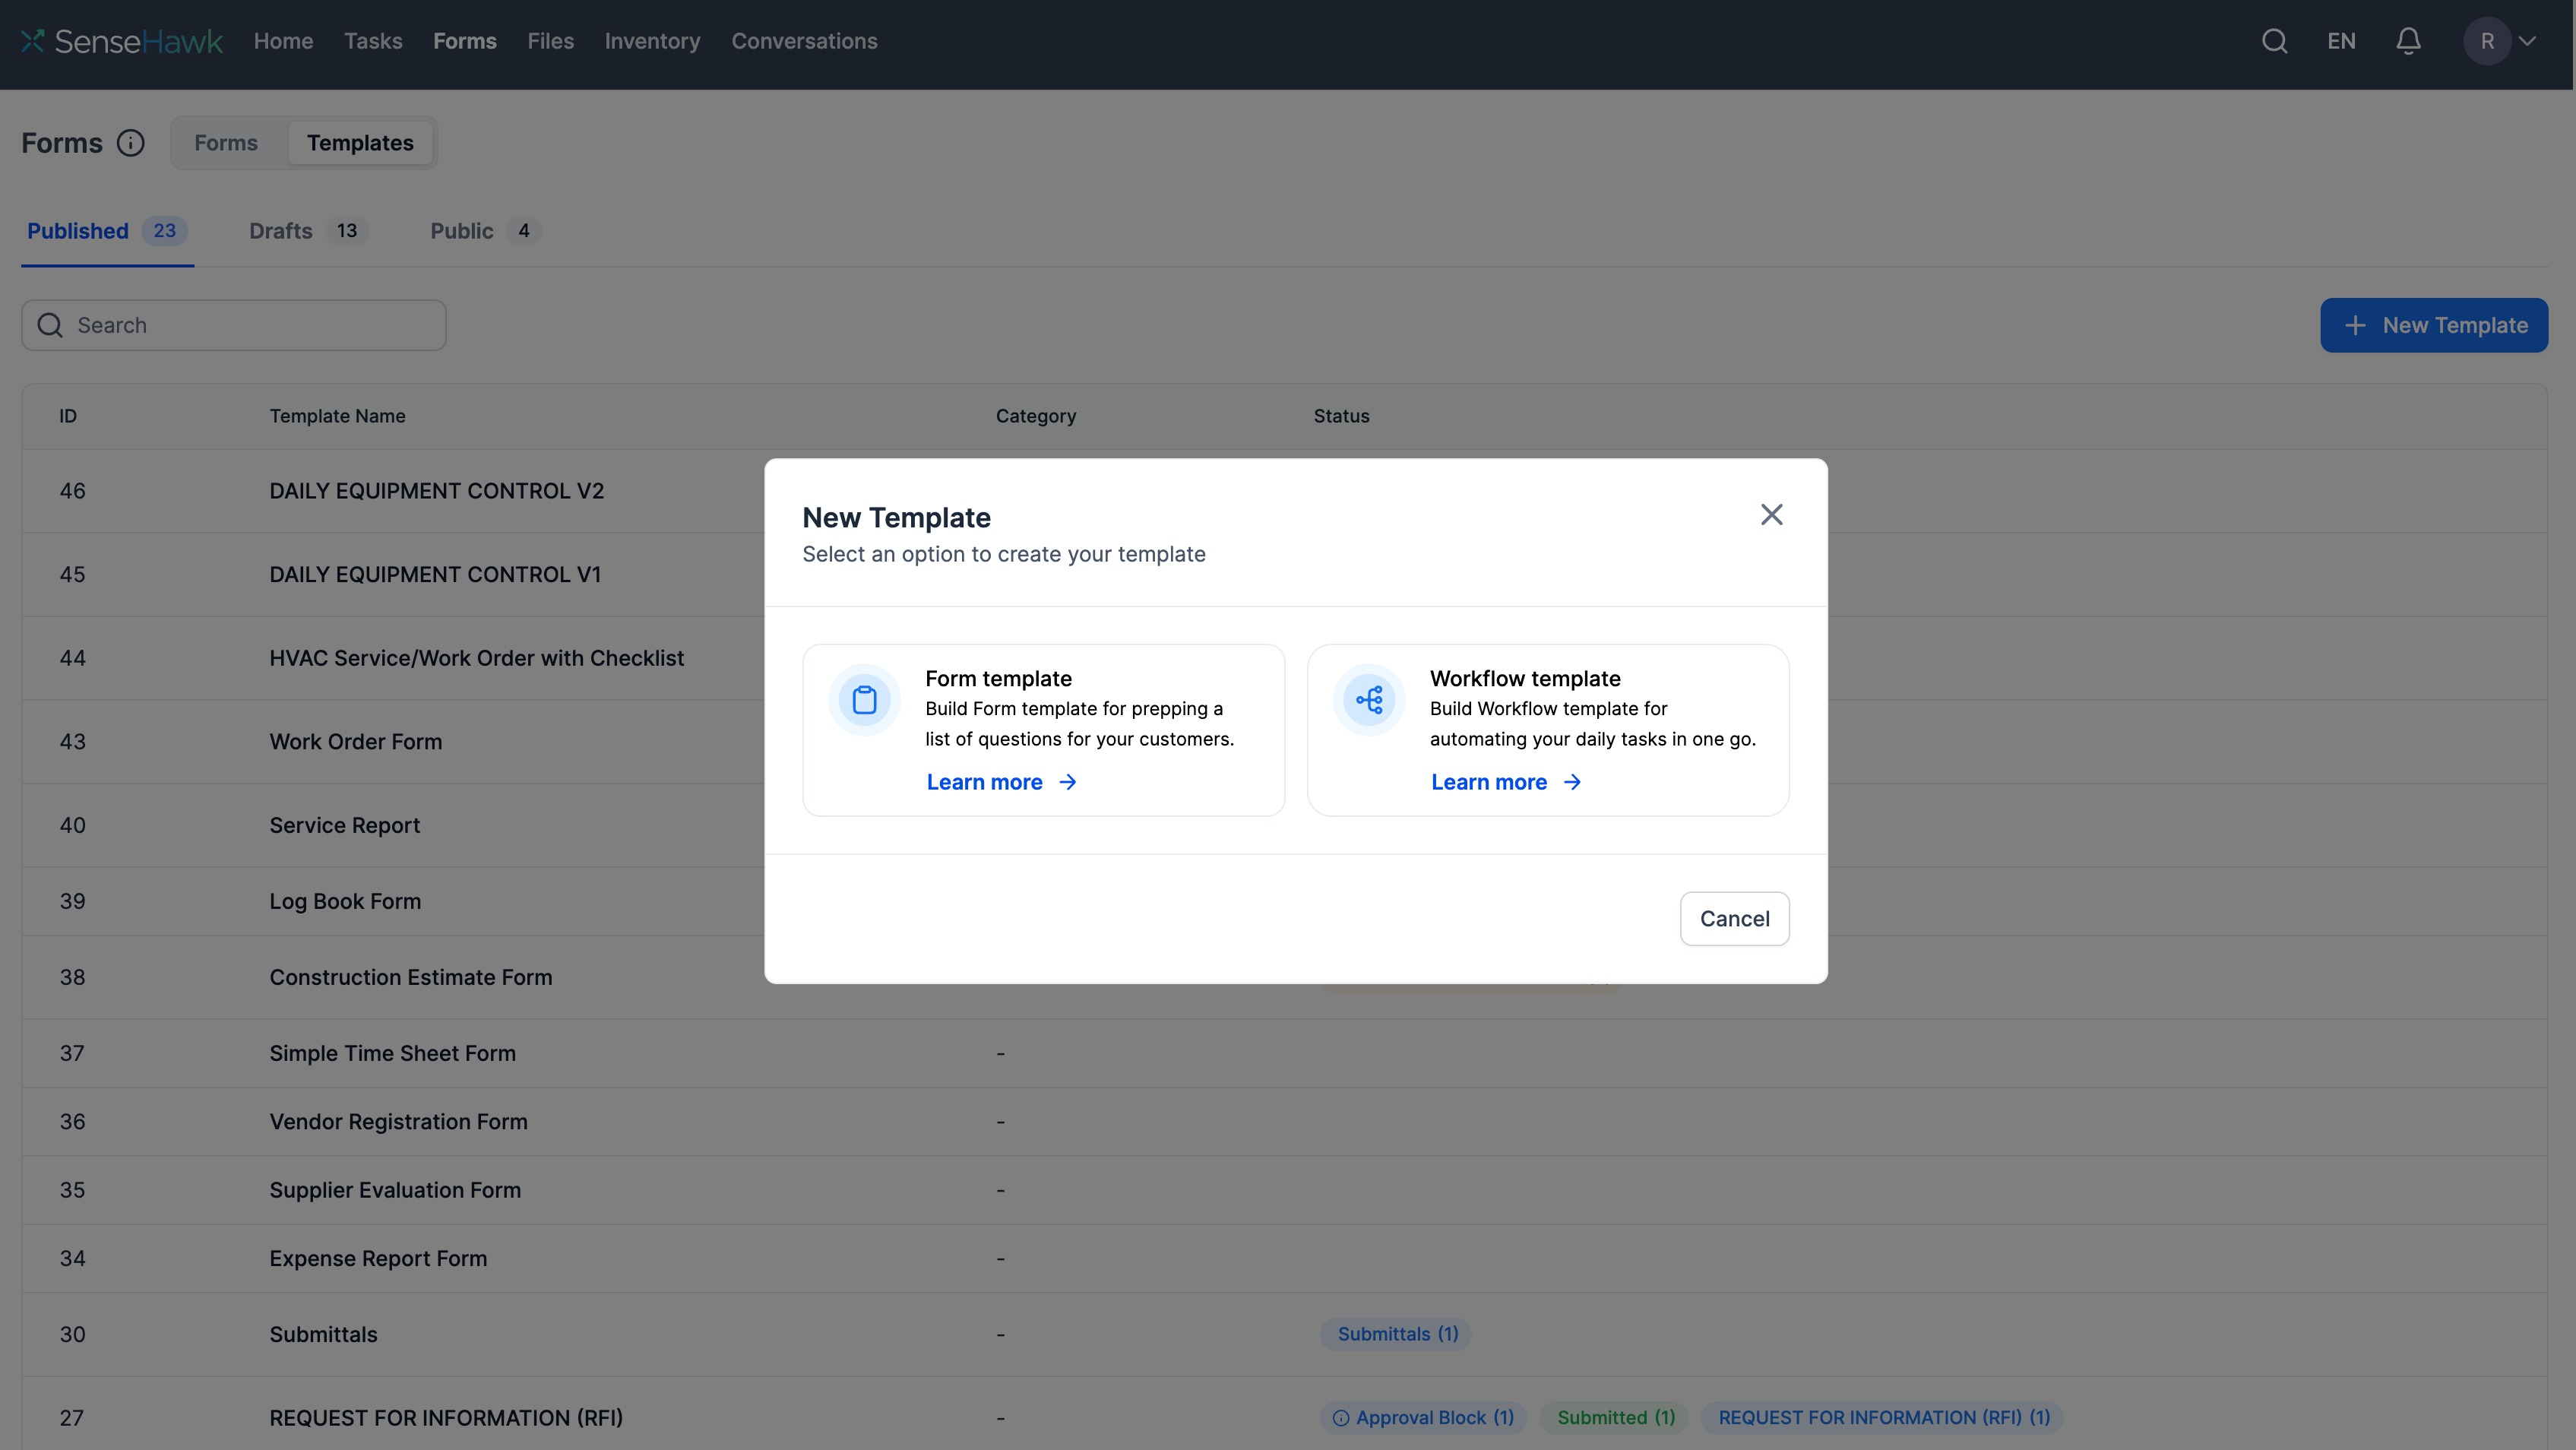
A new template in the Forms UI allows you to choose between creating a stand-alone form or a Workflow.
Figure 16: Stand-alone Form Template or a Workflow Template
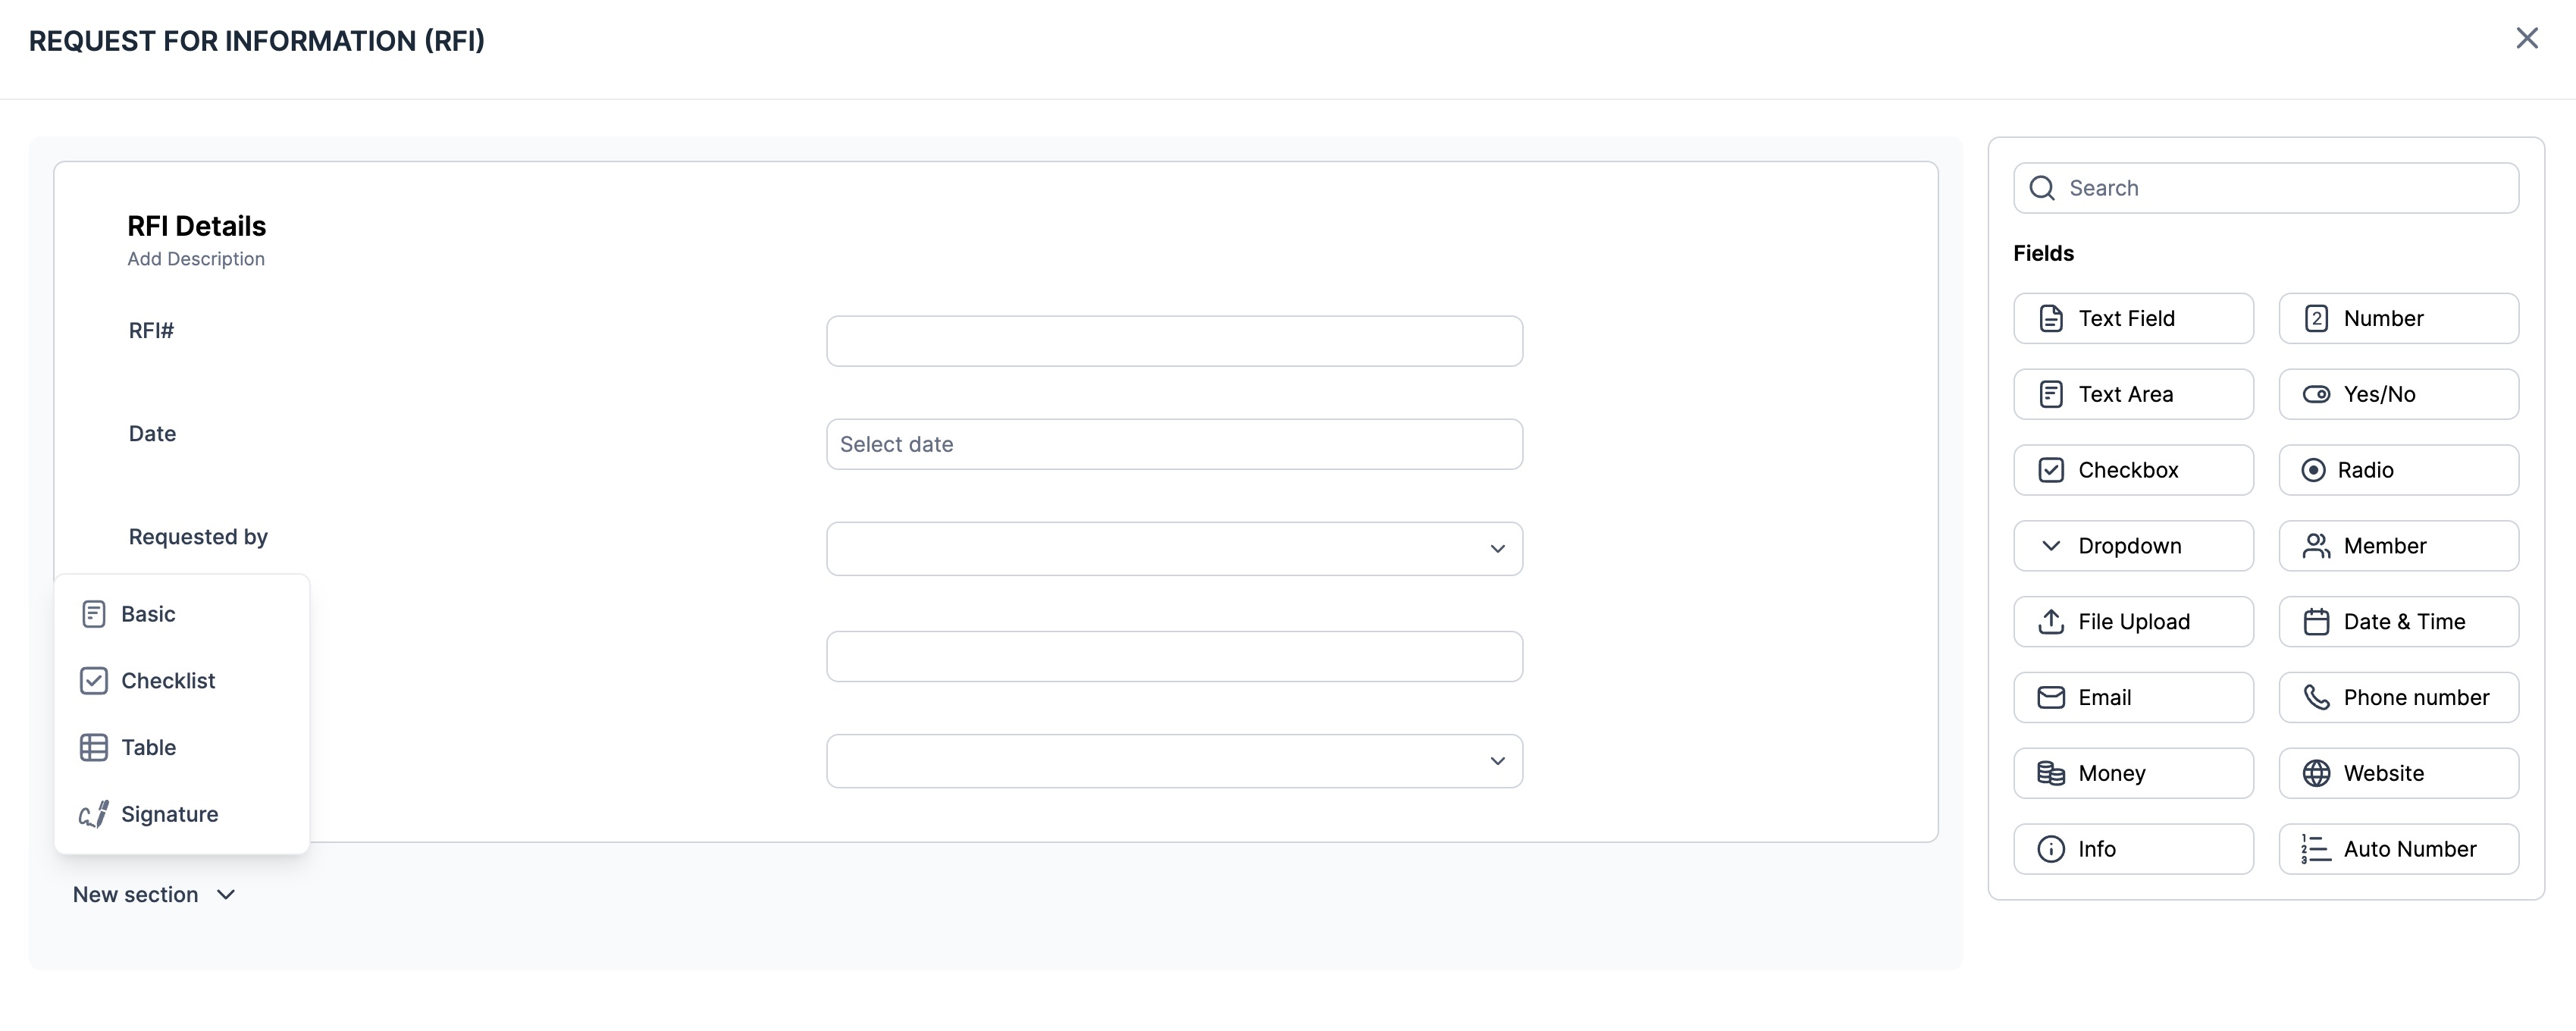
A form template can be defined for any repetitive data capture. It standardizes the data fields to be captured, and specific information can be mandated. Geofencing and time stamps can also ensure auditable records.
Form Builder
The intuitive drag-and-drop builder offers pre-defined formats and fields. Available templates can be previewed, allowing users to customize specific fields in pre-existing form templates for a particular use.
Figure 17: Form Builder
Click here to learn more about Forms.
User Administration
1. User invitation (Organization & Asset)
User invitations can be sent at either the organization level or the asset/project level. If a user is involved in multiple assets or projects, they can be invited at the organizational level, and multiple assets or projects can then be added to the user's profile.
Organization level (Account Settings >> Users)
Assigning multiple assets/projects to a user
Project/Asset level (Asset settings >> Users)
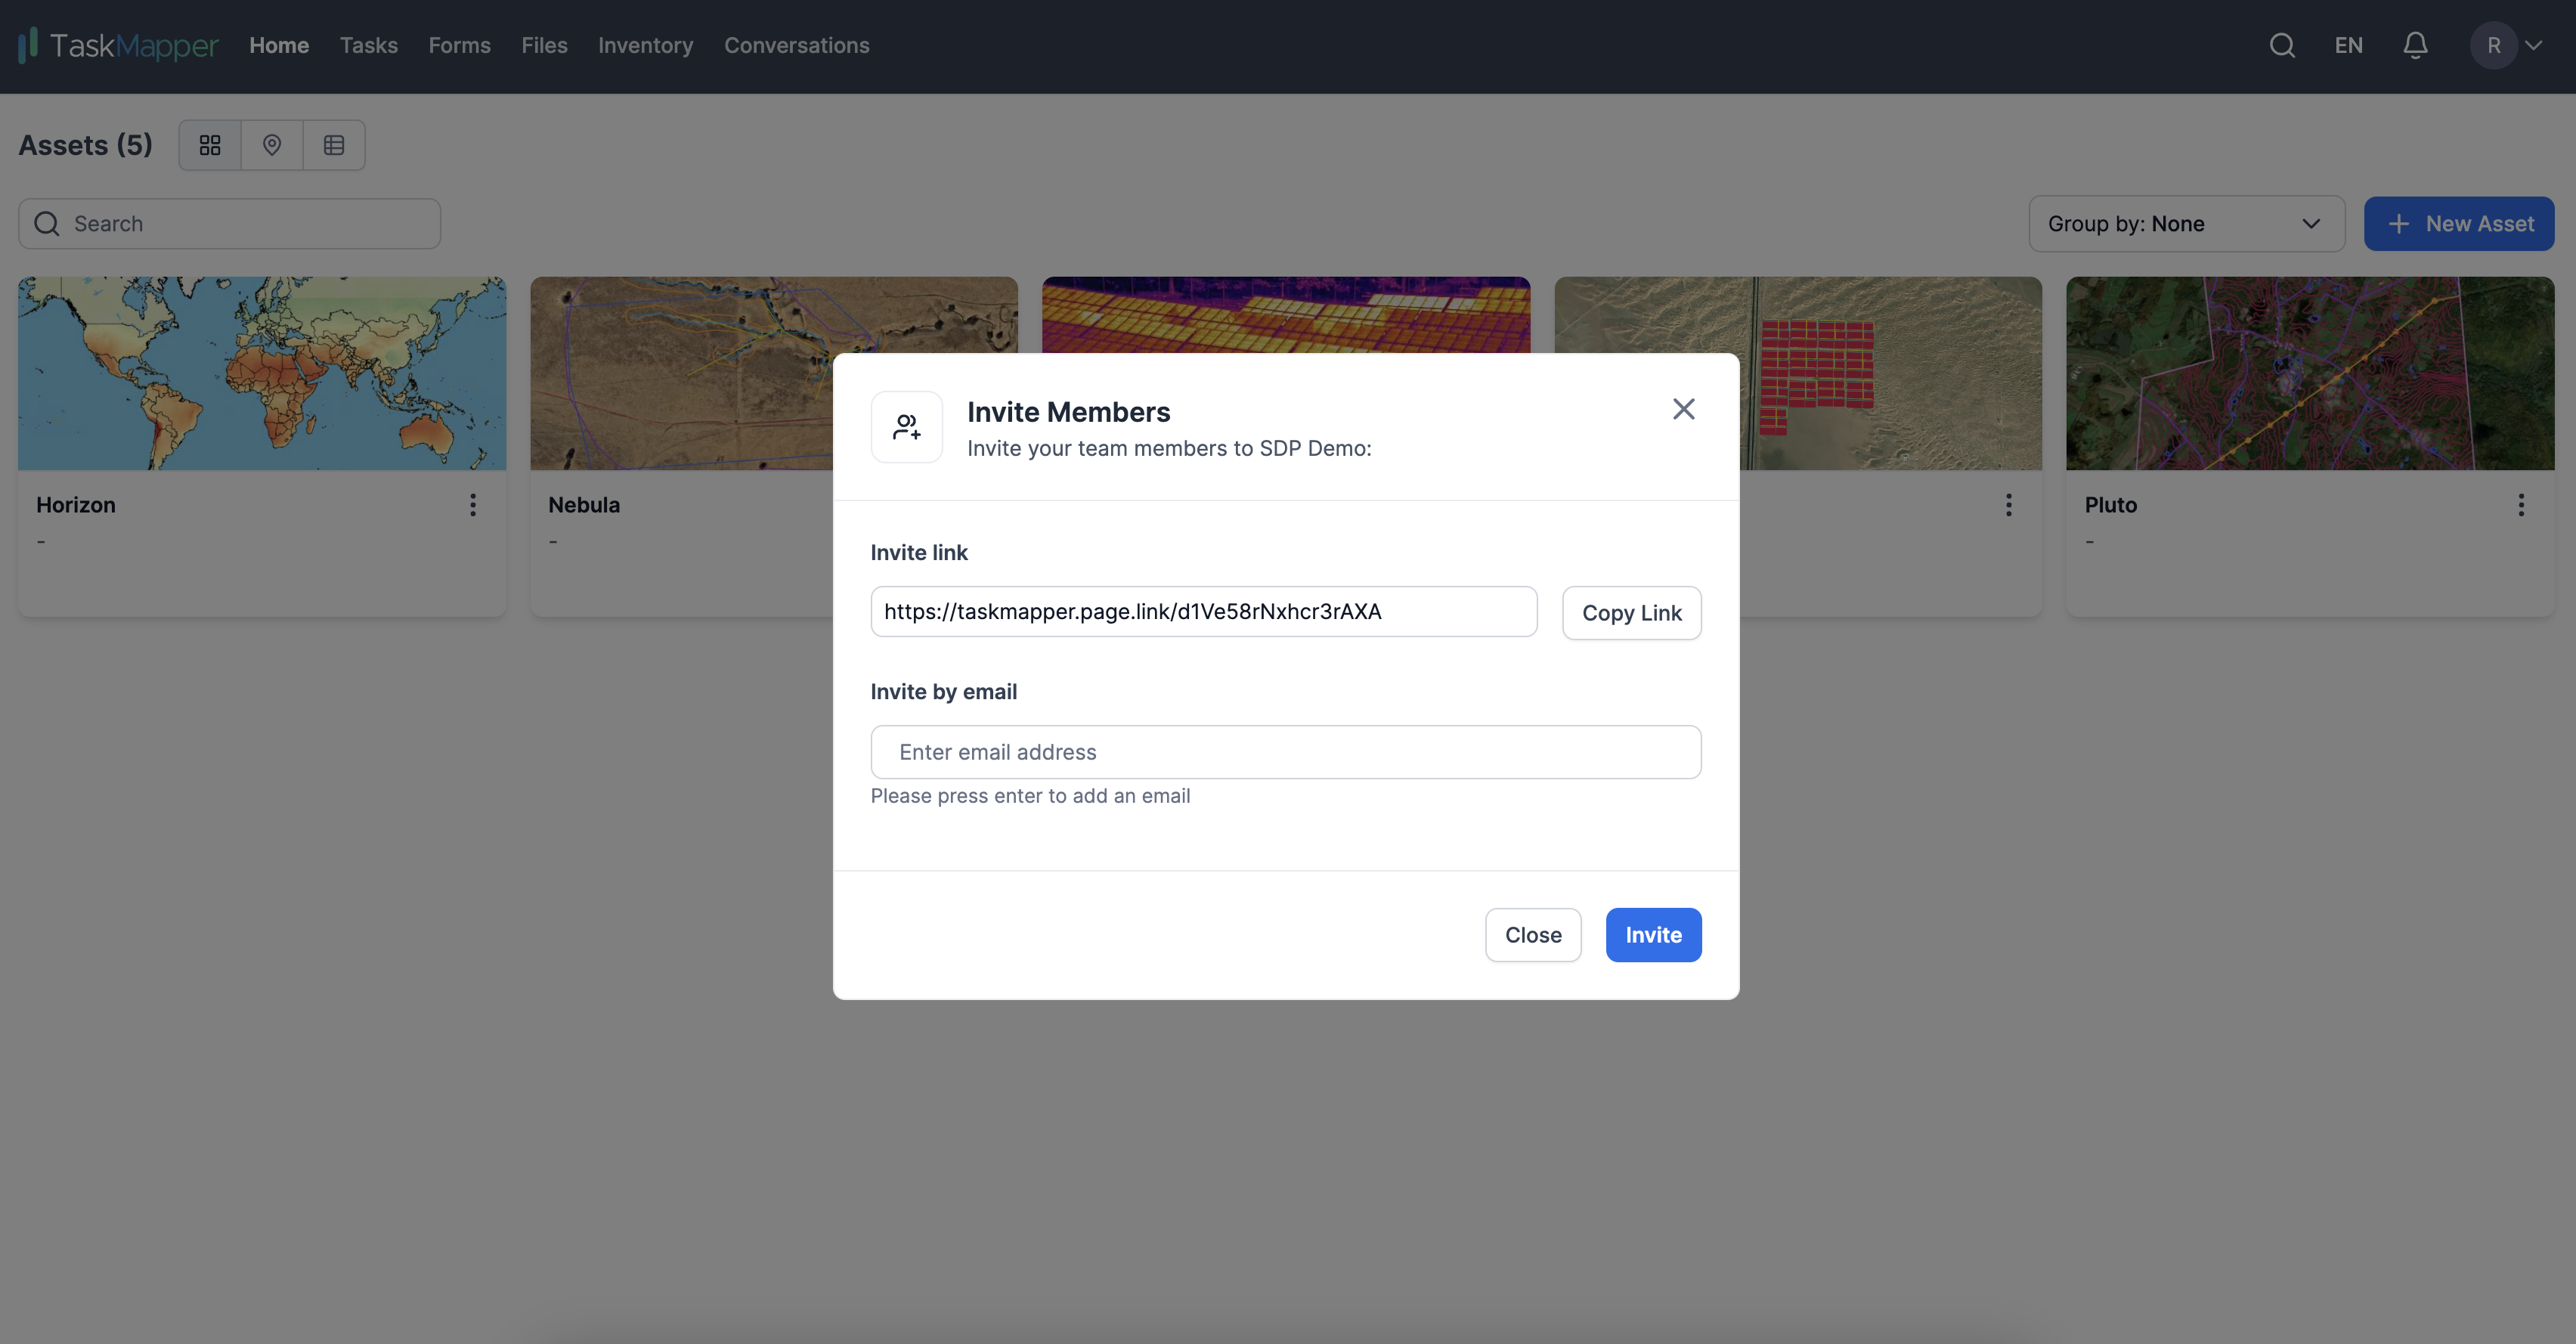
There are a couple of ways to invite the users to your organization.
a) Inviting users via email address.
Figure 18: User Invitation by Email
b) Invite users via a shareable link.
Figure 19: Shareable Link for Multiple Users
2. User list
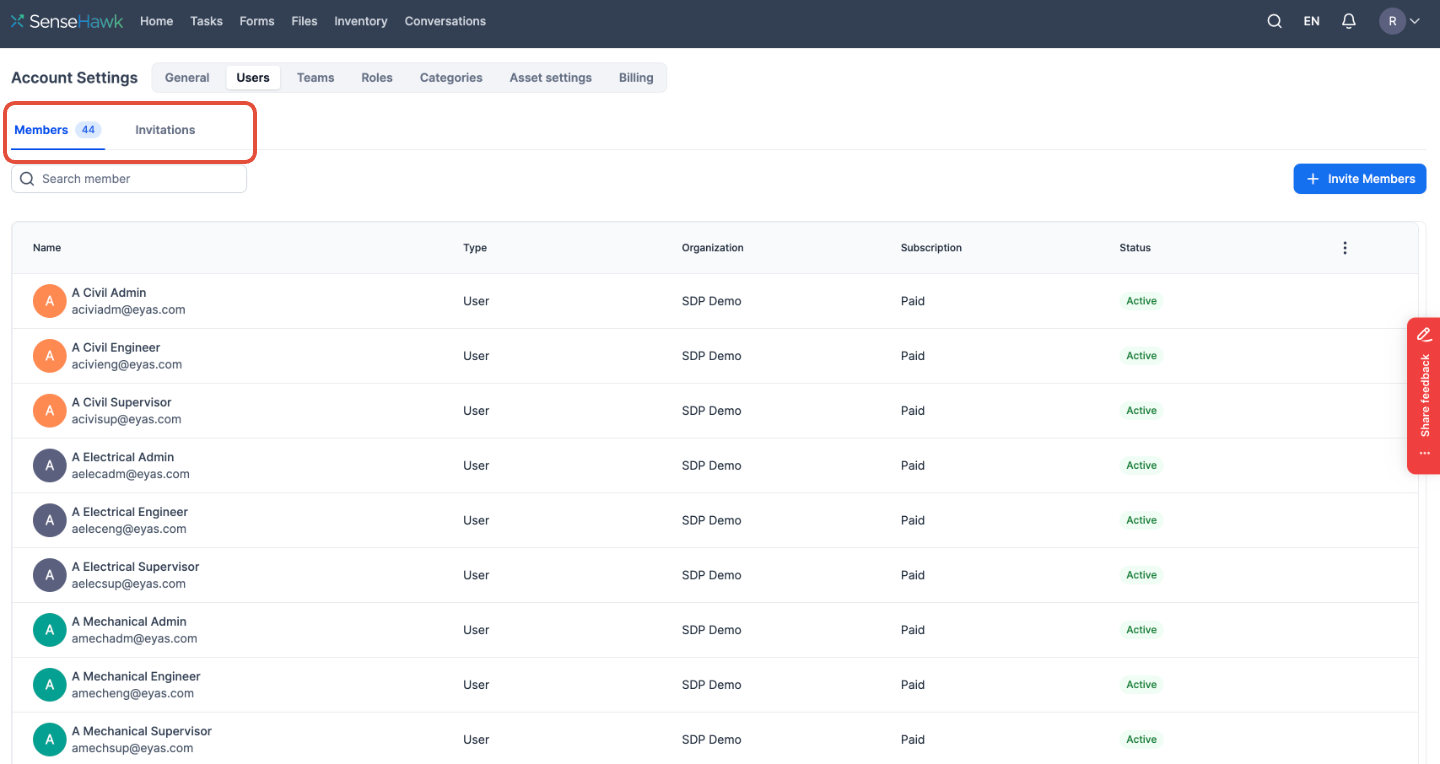
The platform has two lists available: Members and Invitation. The Members list contains the users who have accepted the invitation, while those who have yet to are enlisted under the Invitation List.
Click here to learn about user permissions.
Figure 20: Members and Invitations
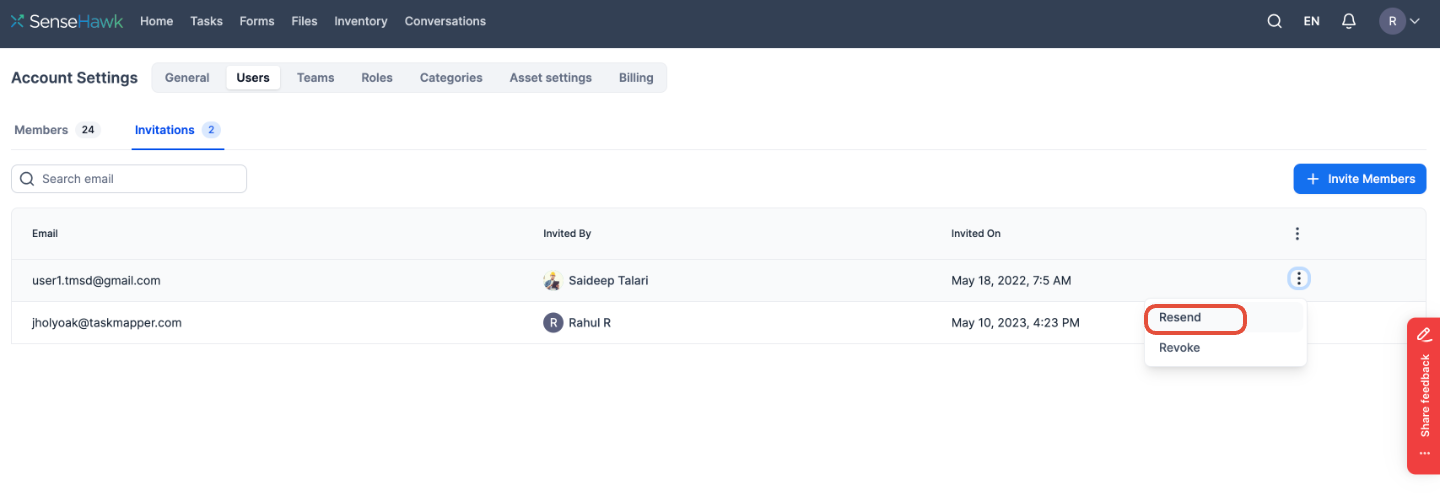
If any users on the invitation list fail to accept the email invitation within 72 hours, a new invitation will be needed. You can easily send the new invitation from the invitation list.
Figure 21: Resend Invitation
NOTE: If you decide to revoke someone's invitation, they will no longer be on the list and will not be able to accept the invitation to link that has already been sent.
Teams & Roles
1. Teams
(Account Settings >> Teams)
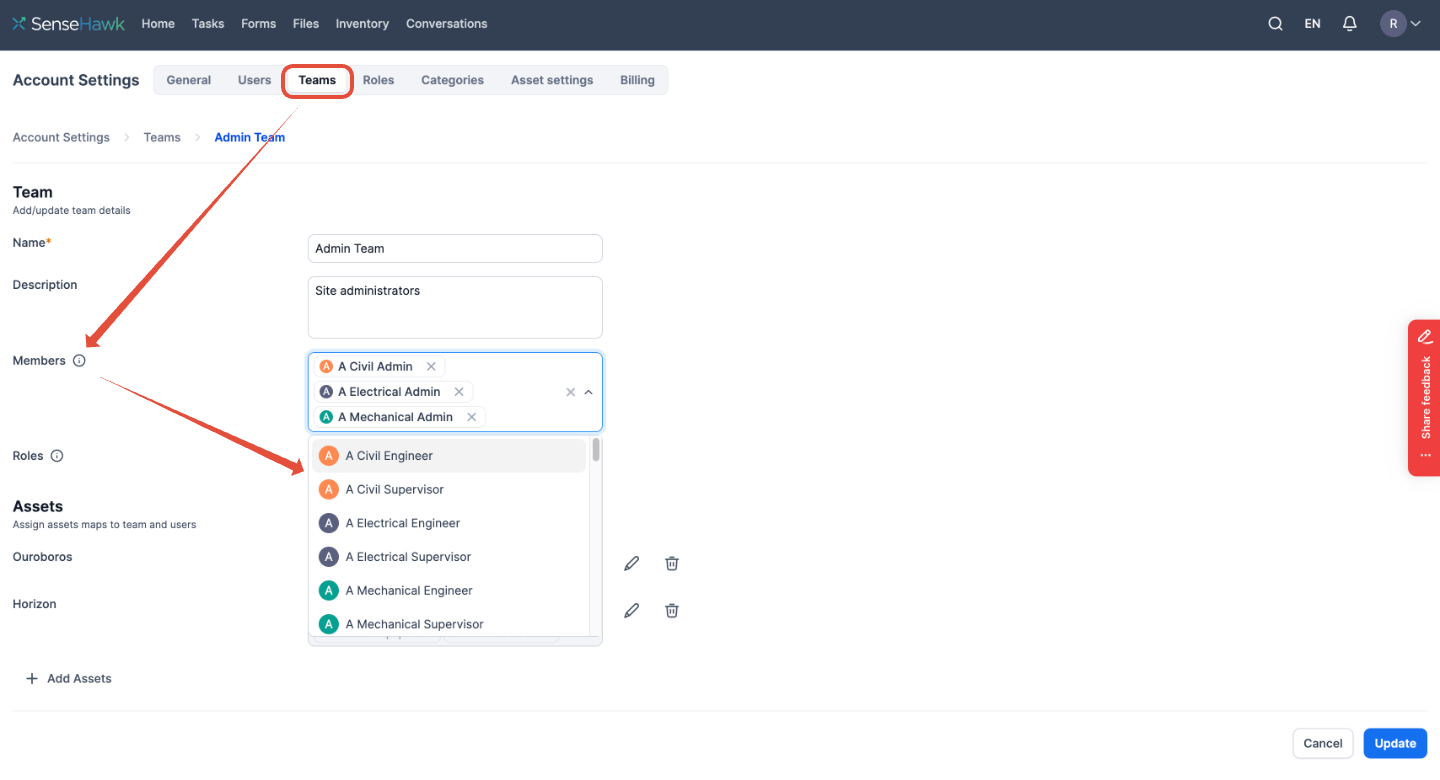
Teams are a great way to organize people working on the same project. Managers can easily assign tasks and share information, making the process efficient and ensuring everyone is on the same page. Consider using teams to keep everything organized.
Add users to a team
Figure 22: Adding Users to a Team
Application of Teams
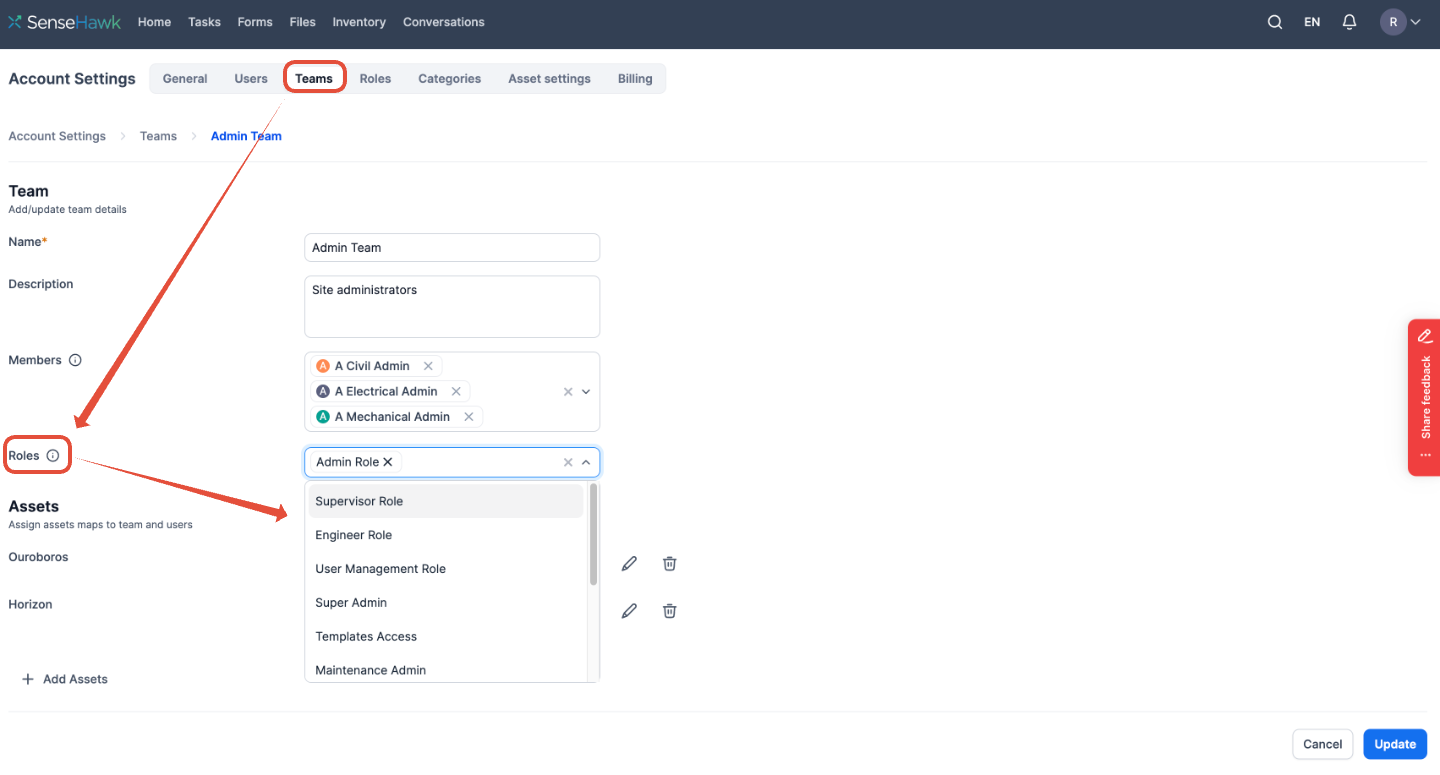
Add roles to a team
Figure 23: Adding roles to a team
2. Roles
(Account Settings >> Roles)
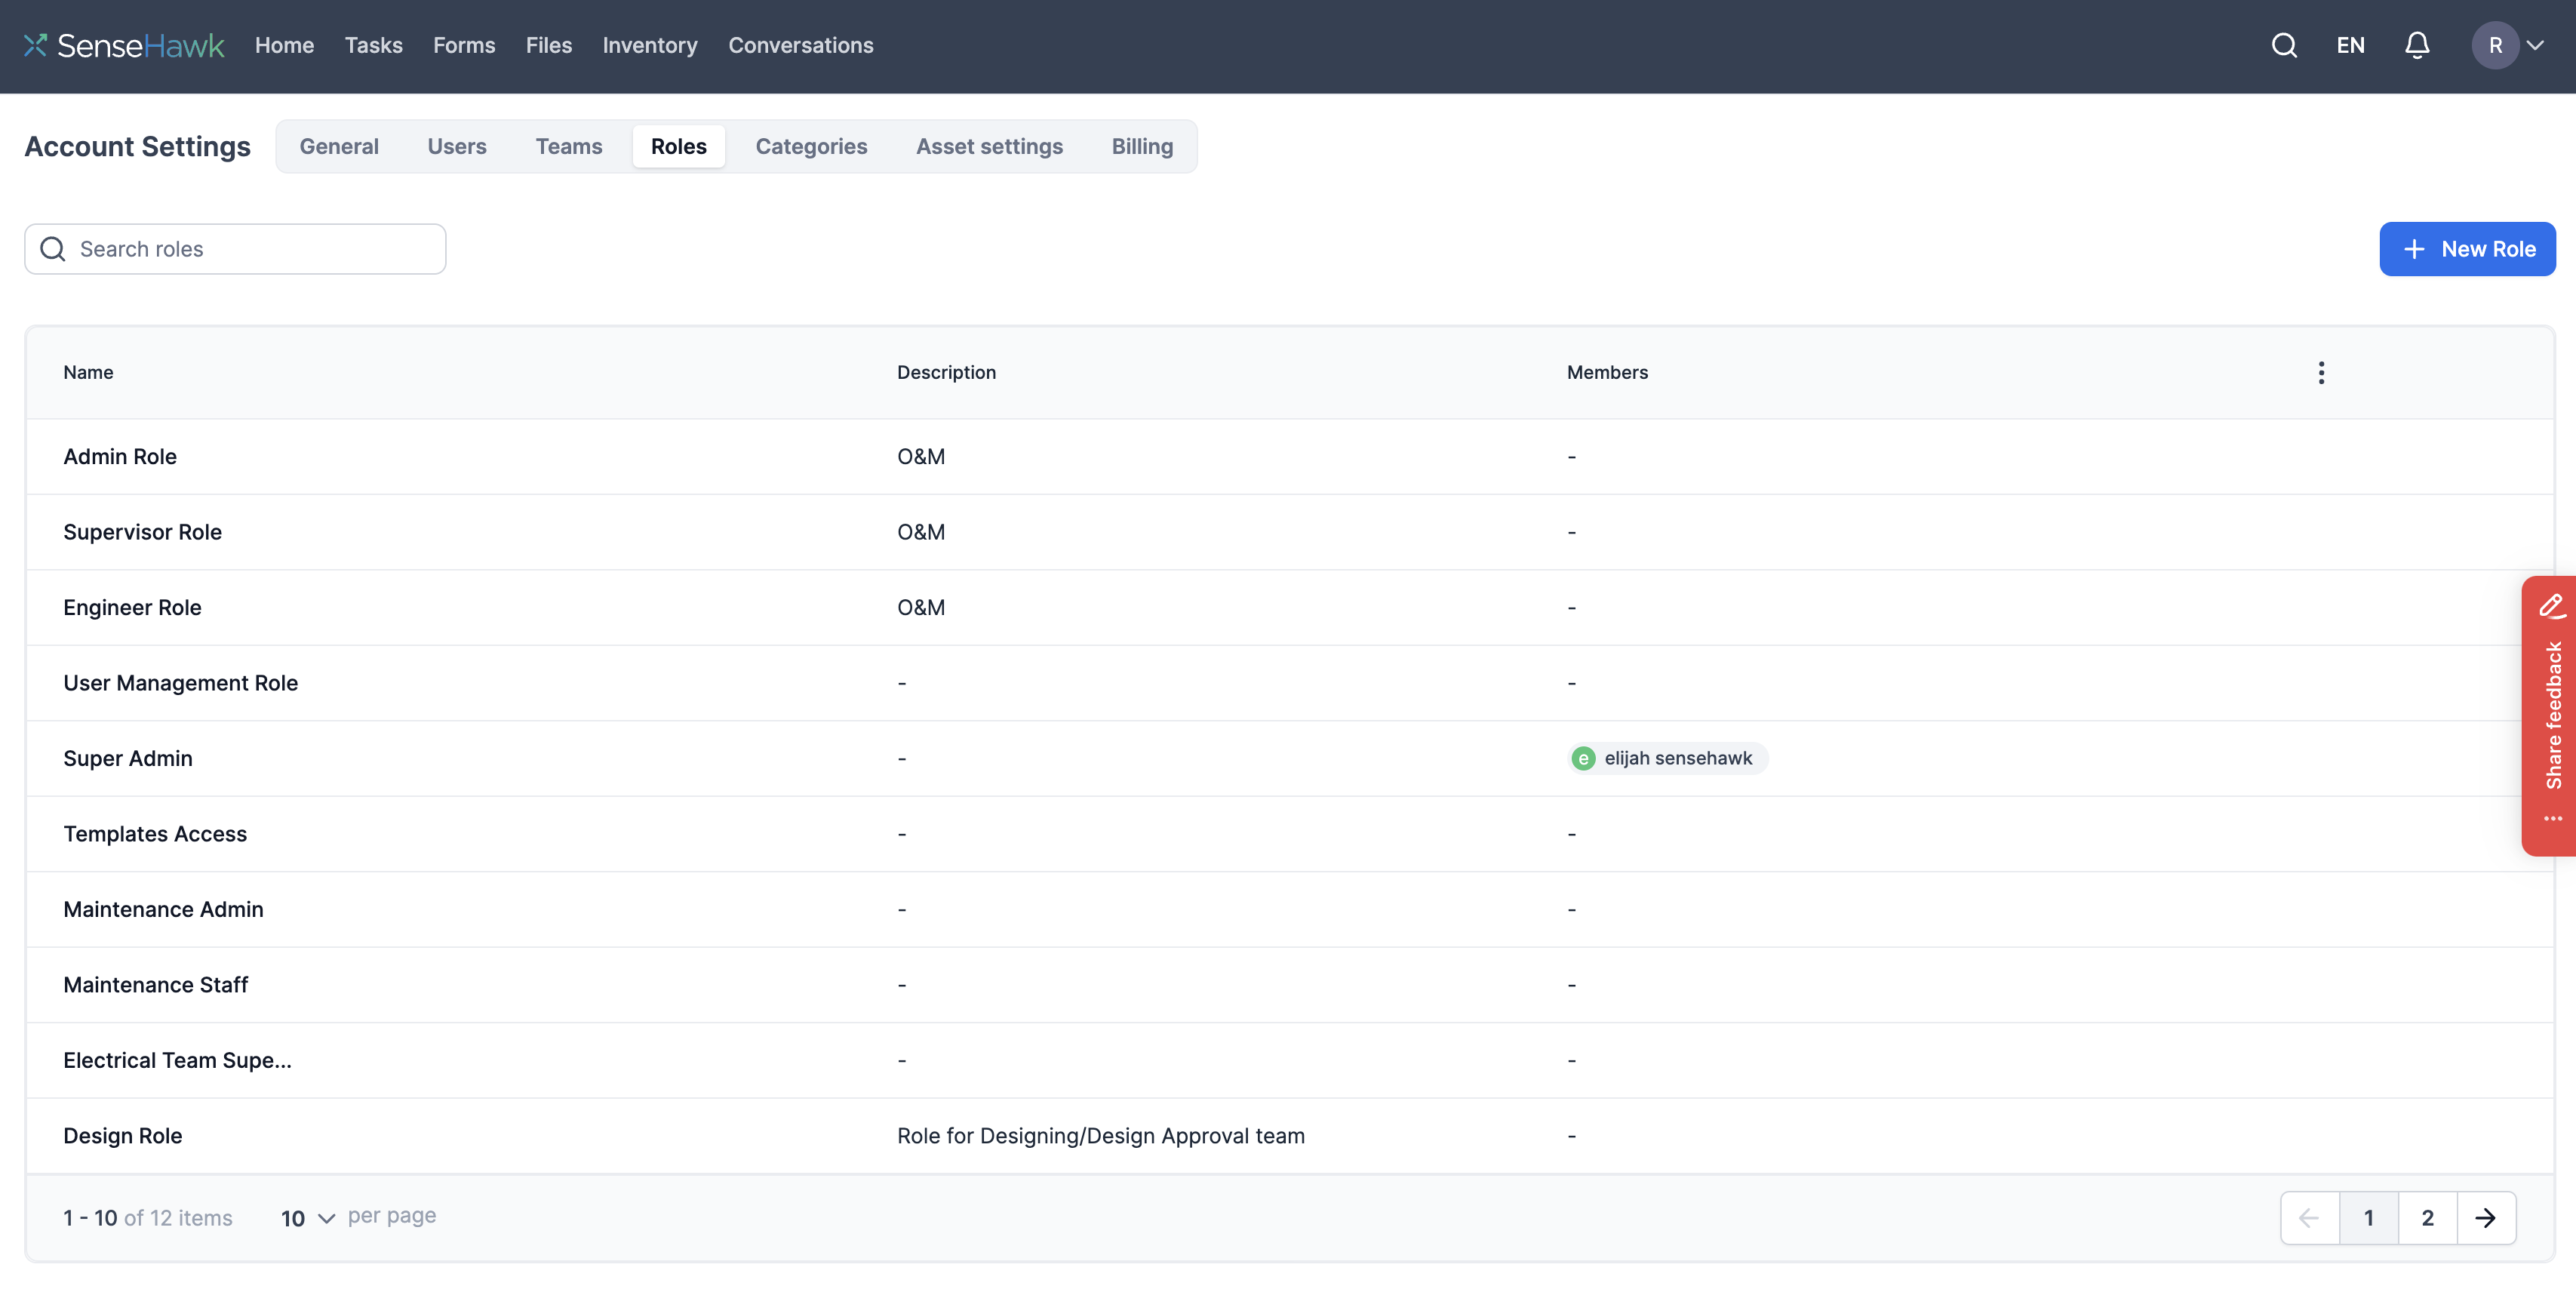
Creating permission sets and assigning them to teams, users, and multiple users via roles is an effective way to manage and organize permissions . This method helps streamline workflows, increase productivity, and maintain a secure and efficient system.
Figure 24: Roles
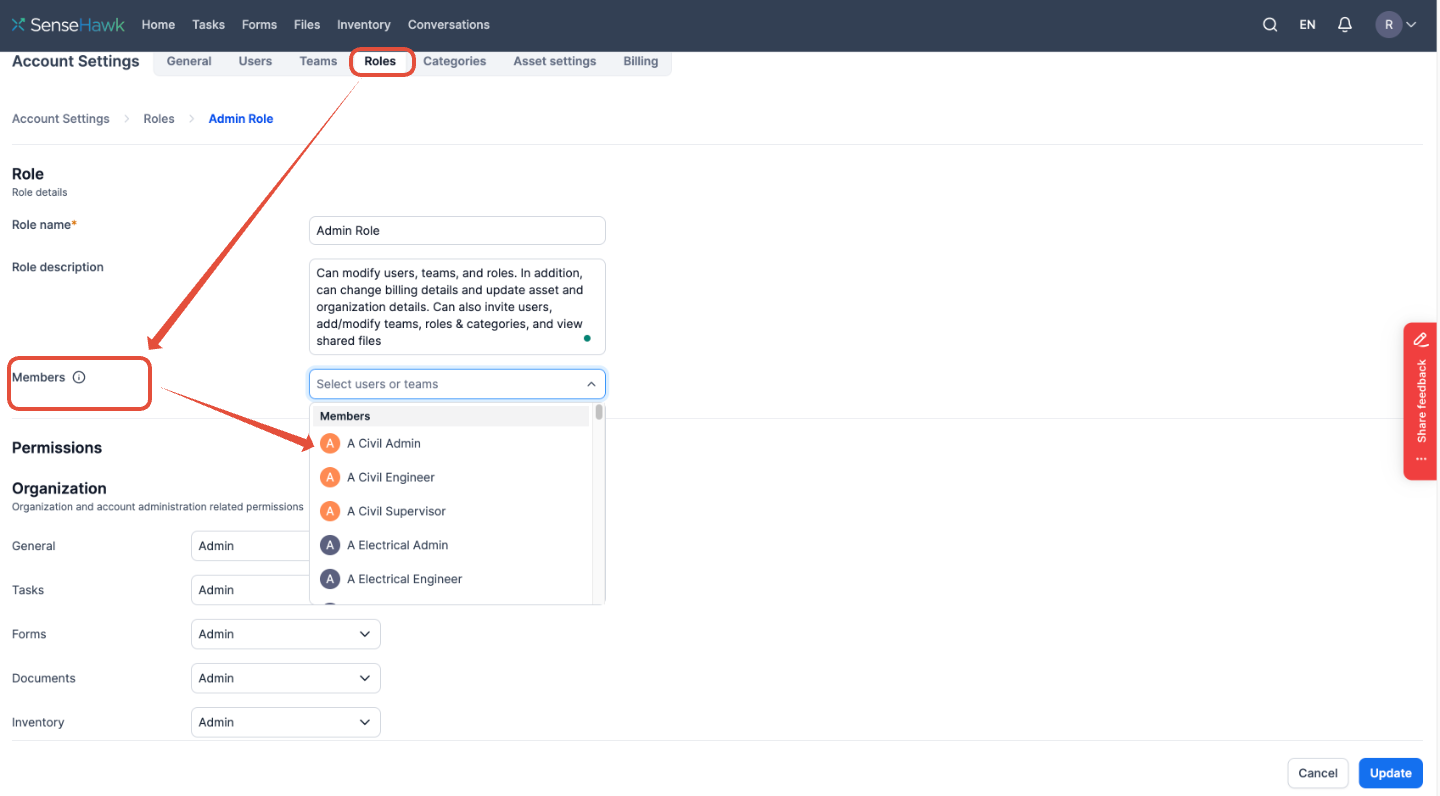
Assigning a role to users
Figure 25: User Role Assignment
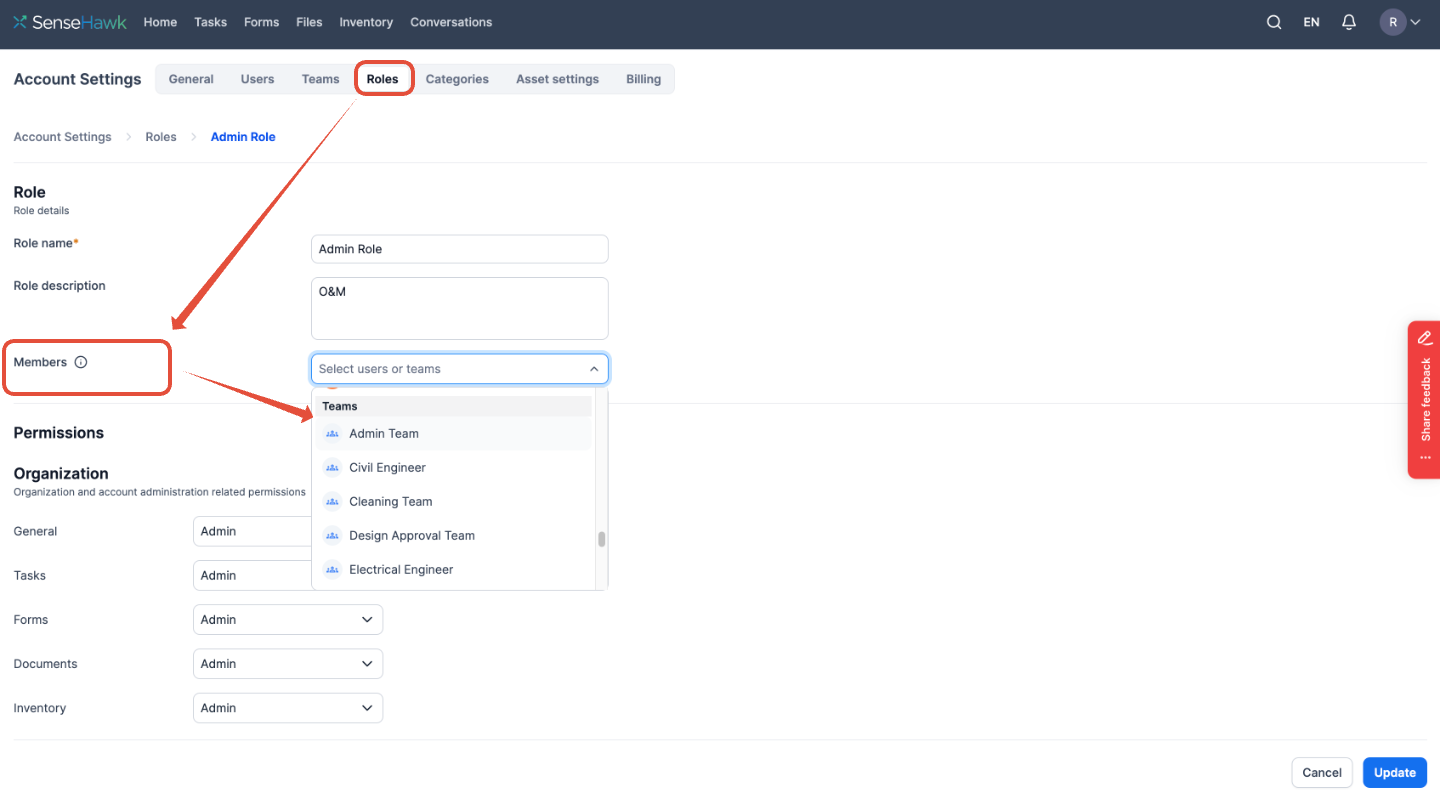
Assign a role to a team
Figure 26: Teams Role Assignment
FAQs
How to log in?
Web-version:
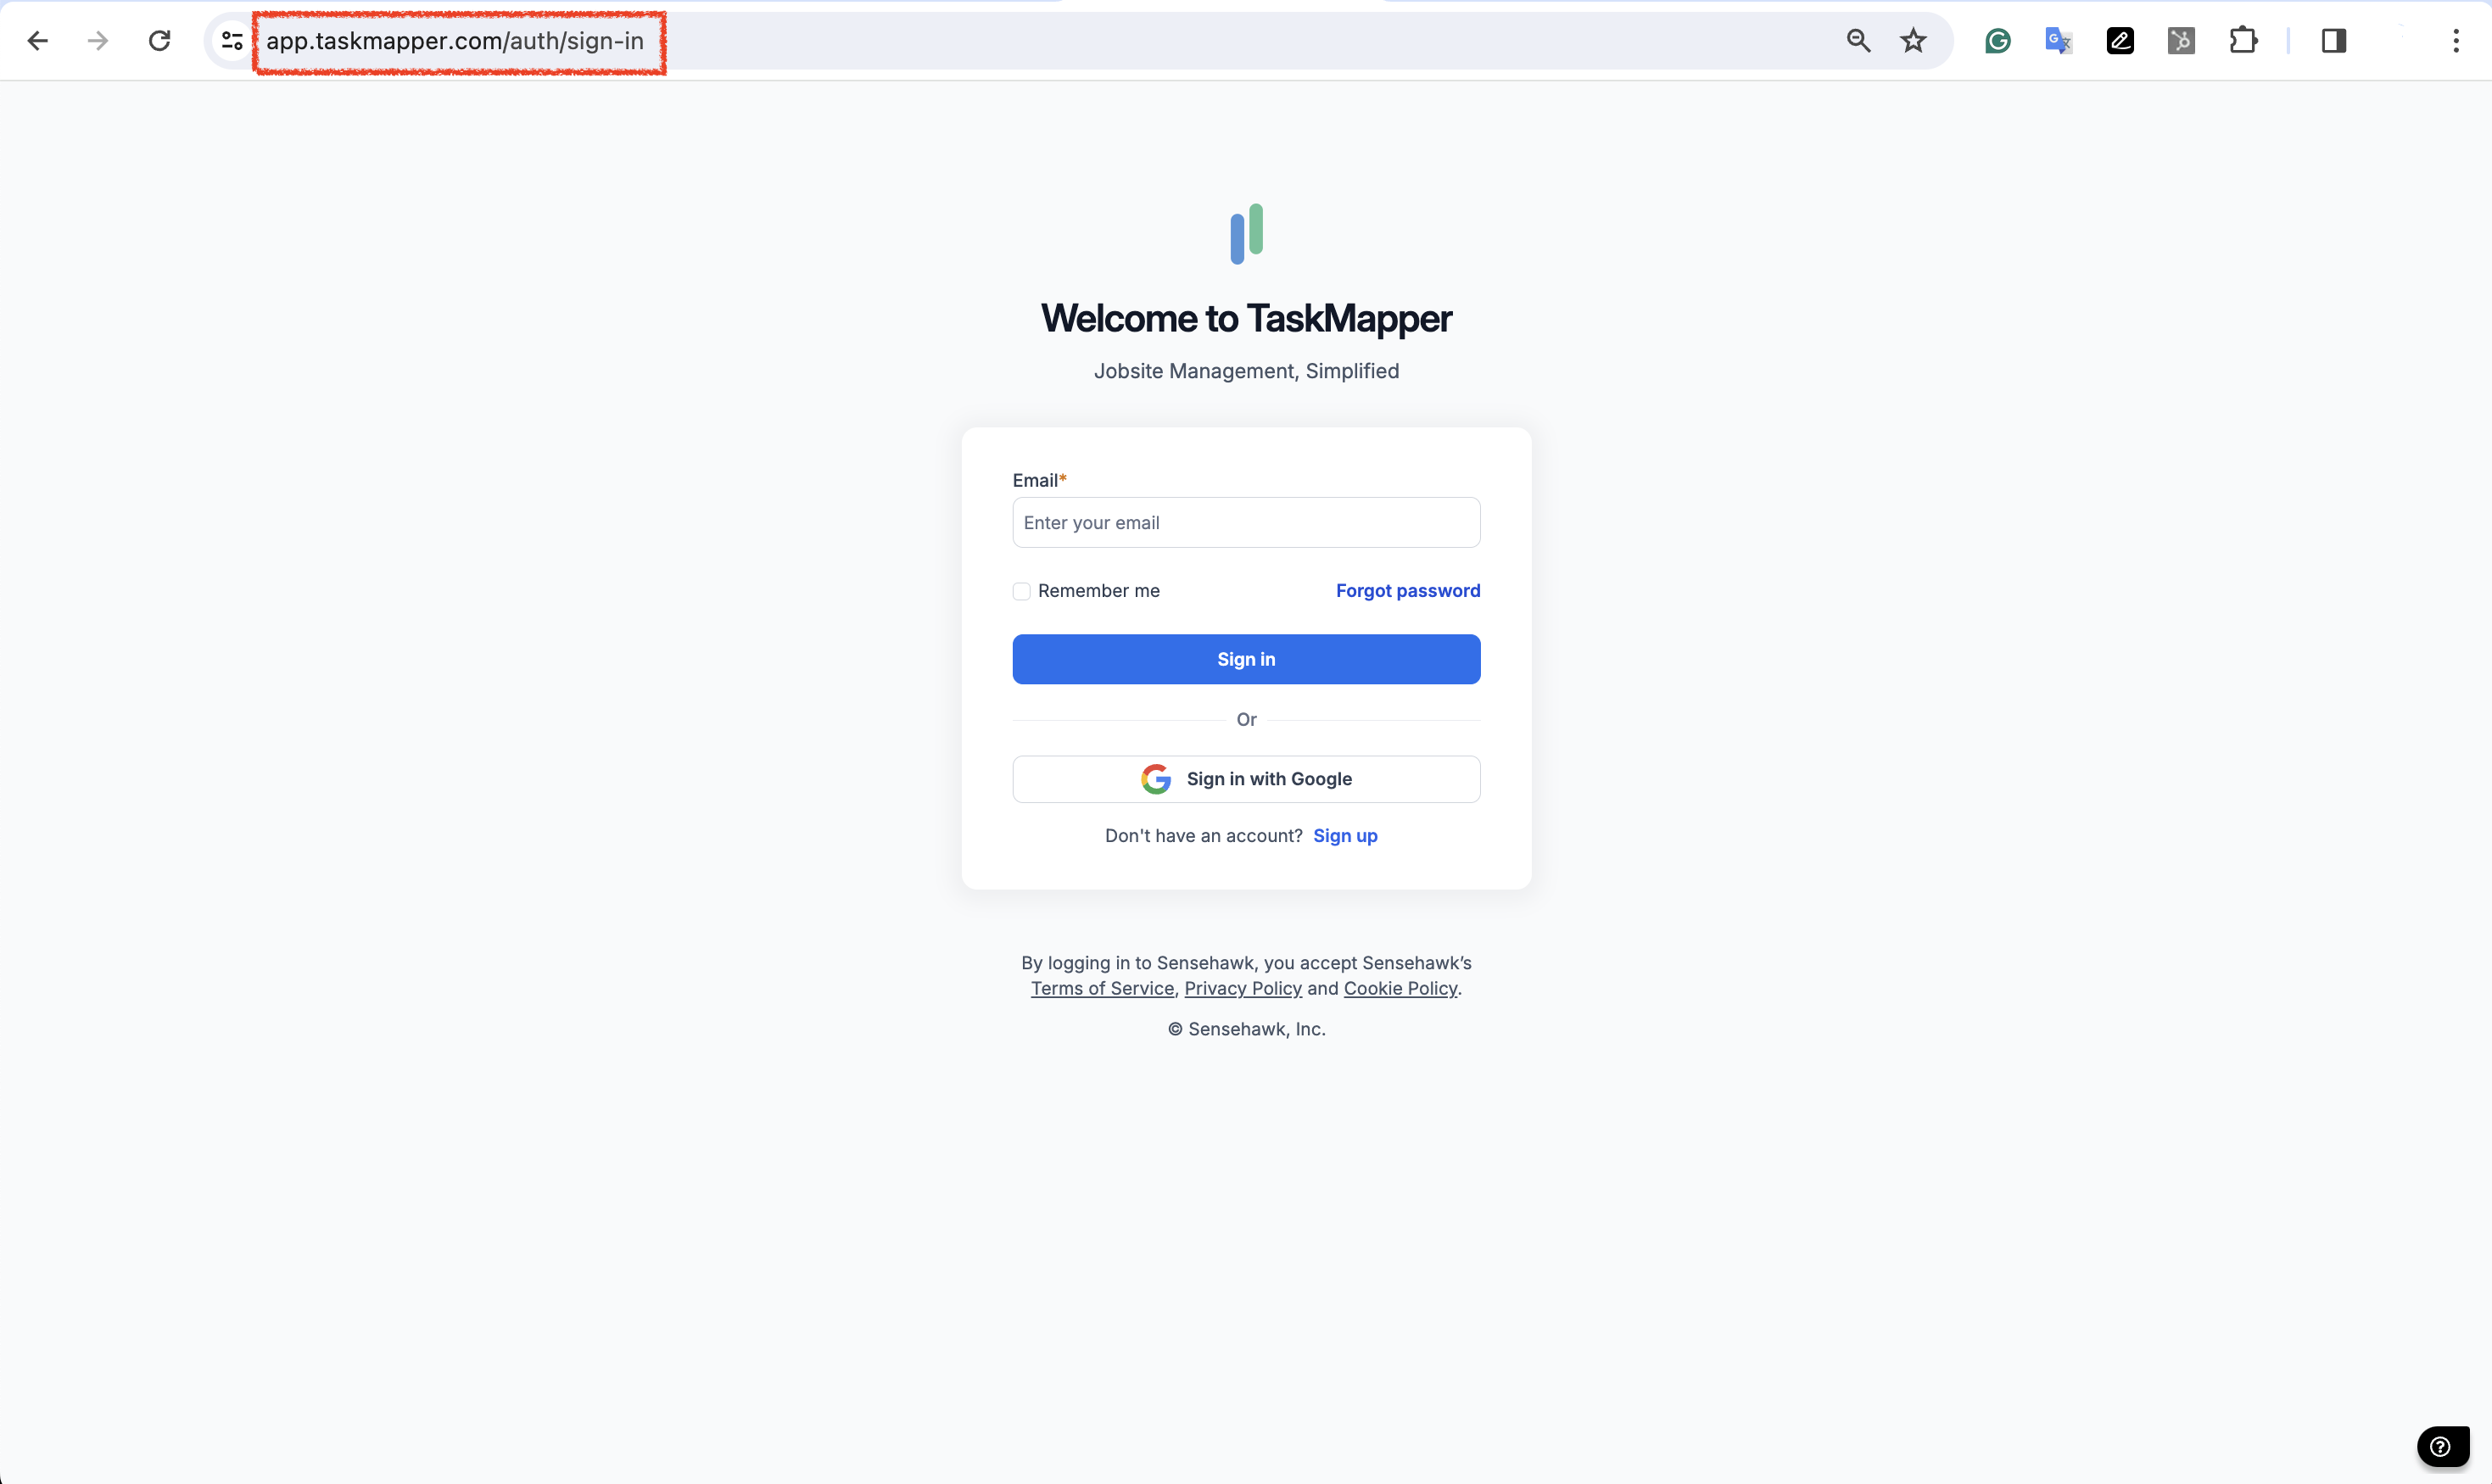
Enter the URL https://app.taskmapper.com/ and enter your login name (Email address) and password to log in.
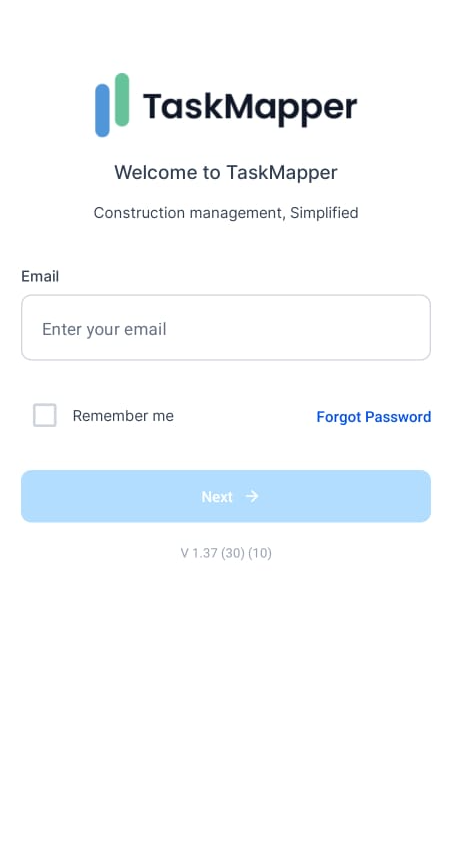
Mobile App:
Click on the icons below to install the app on your mobile device.
Enter the username and password to log in.
How to invite members?
There are multiple ways to invite members to your organization and assets.
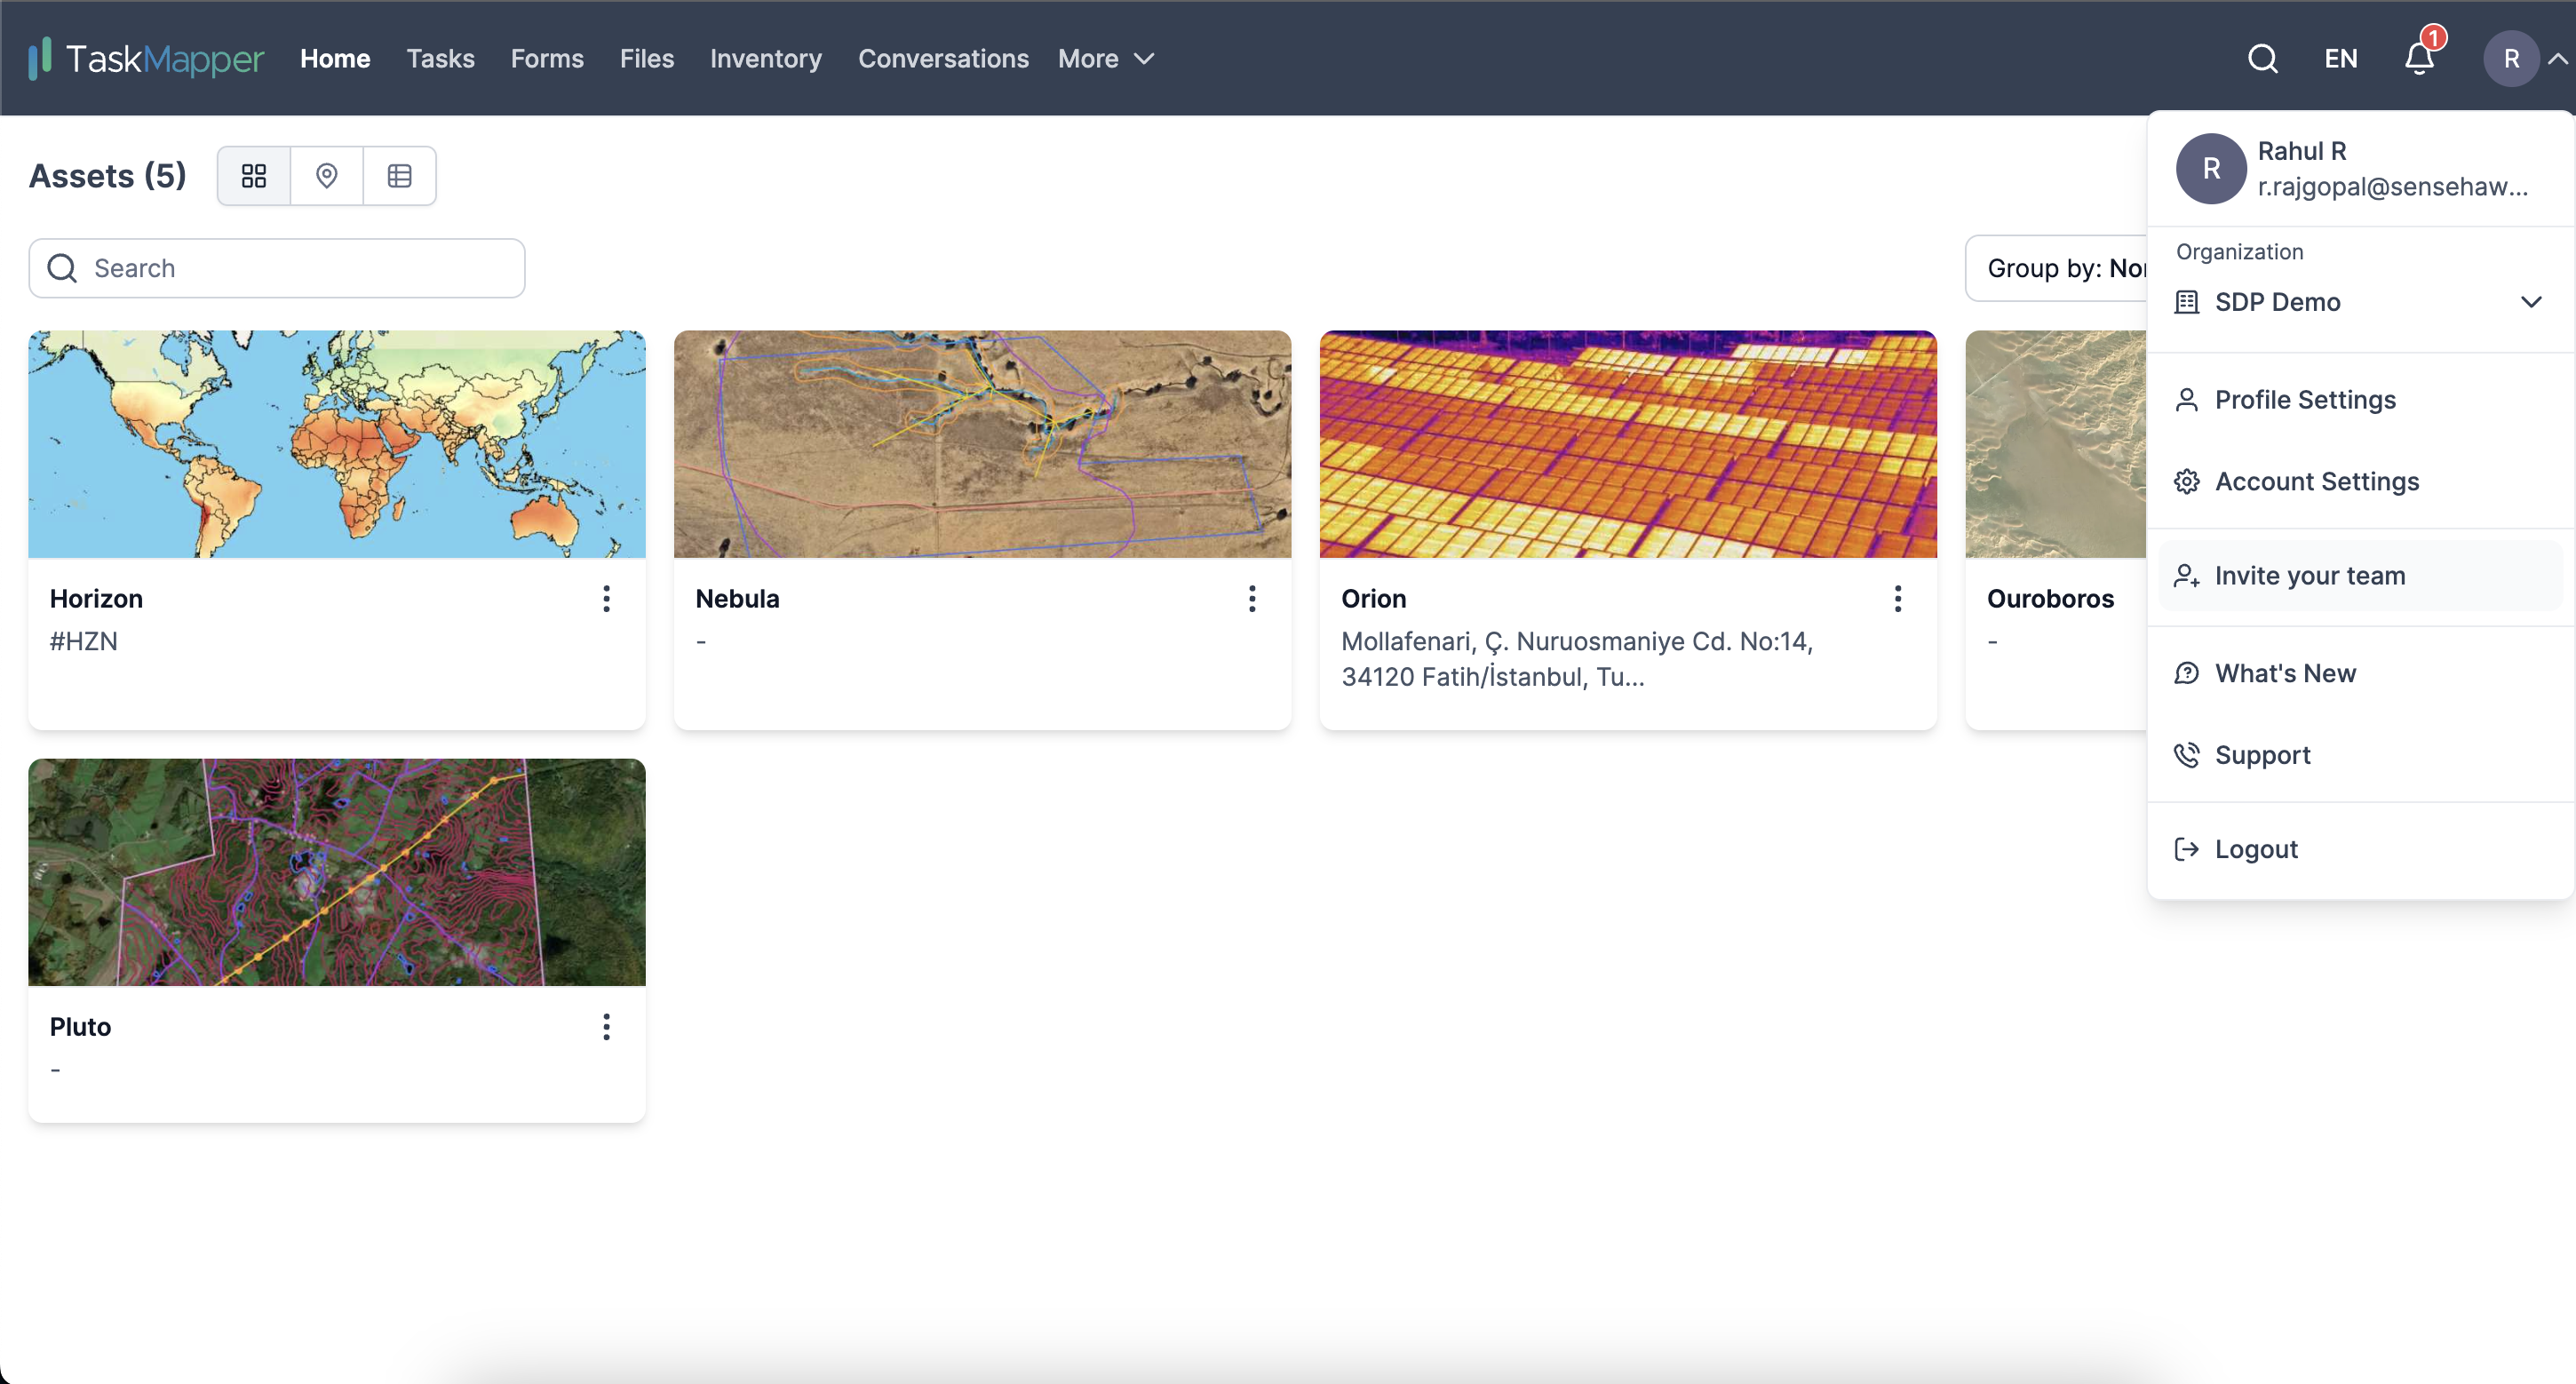
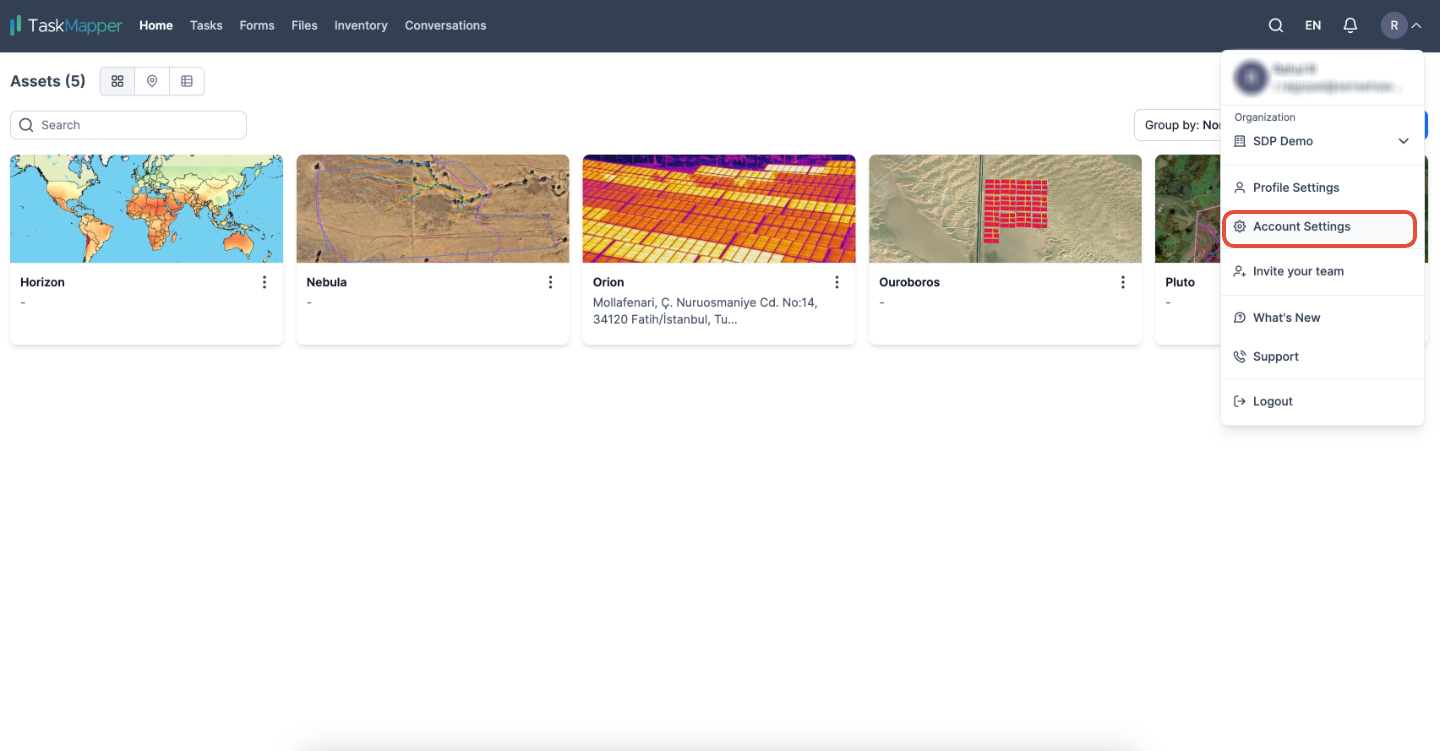
Method 1: Invite your team
To invite users, you can enter their email addresses individually or share the invite link through email to invite multiple users.
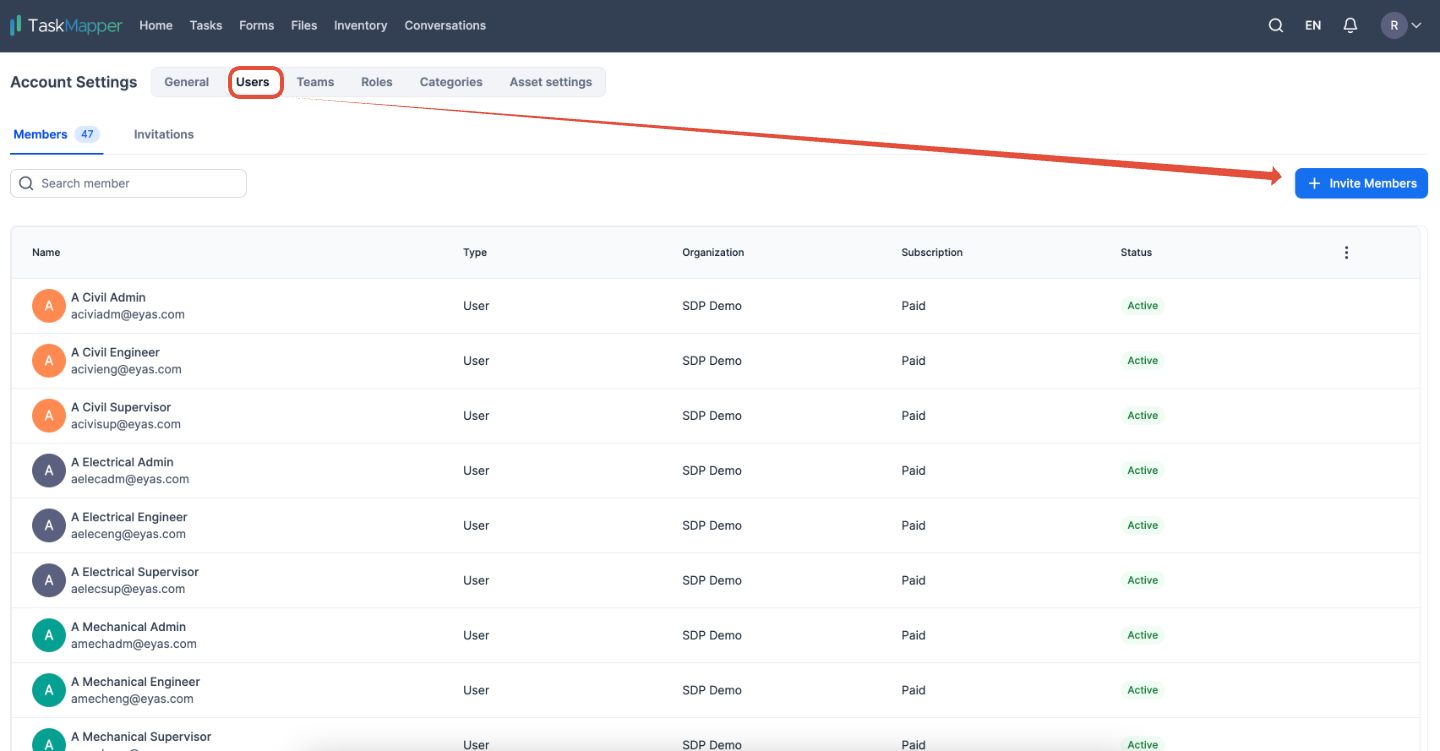
Method 2: Invite members
(Account Settings >> Users >> Invite members)
How to reset your password?
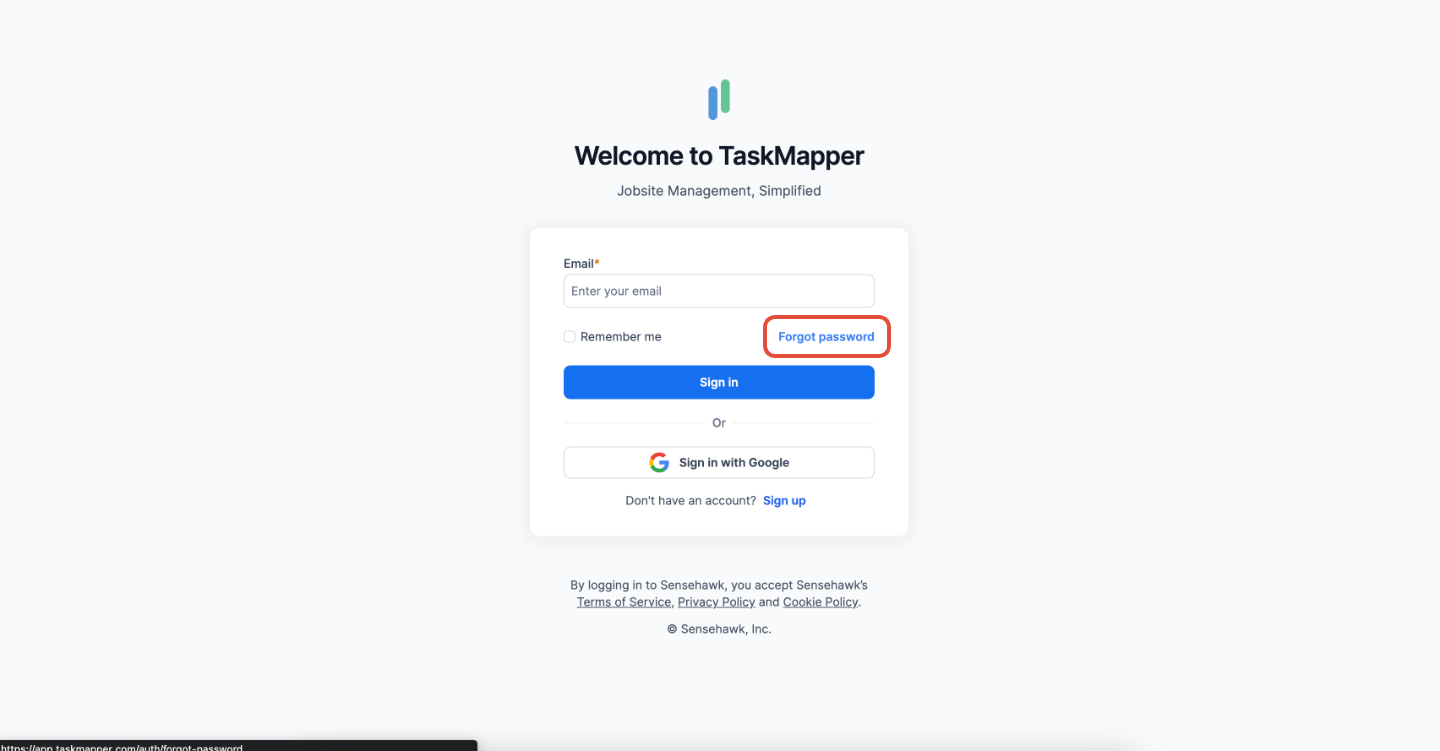
If you cannot access your account with your current password or have forgotten it, click the 'Forgot Password' link. You will be prompted to enter your email address and receive a password reset link.
How to enable/disable notifications?
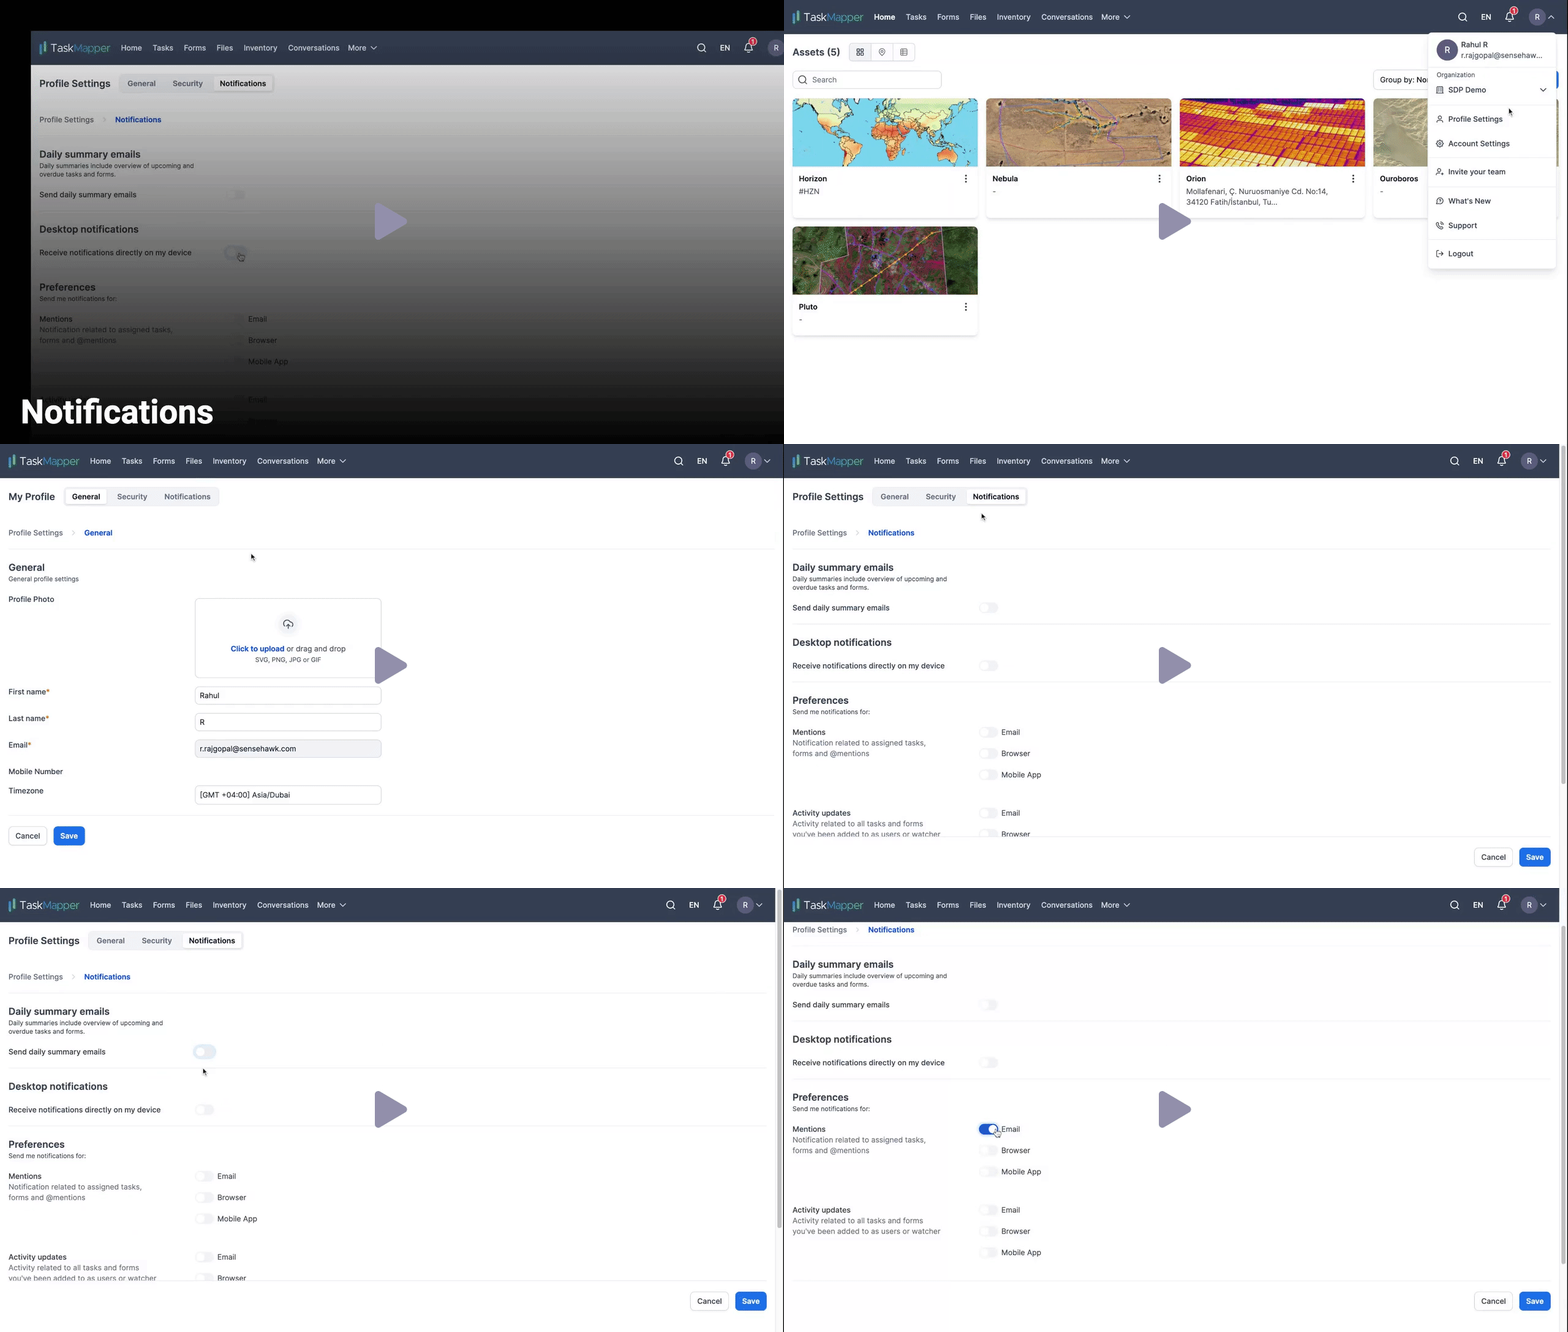
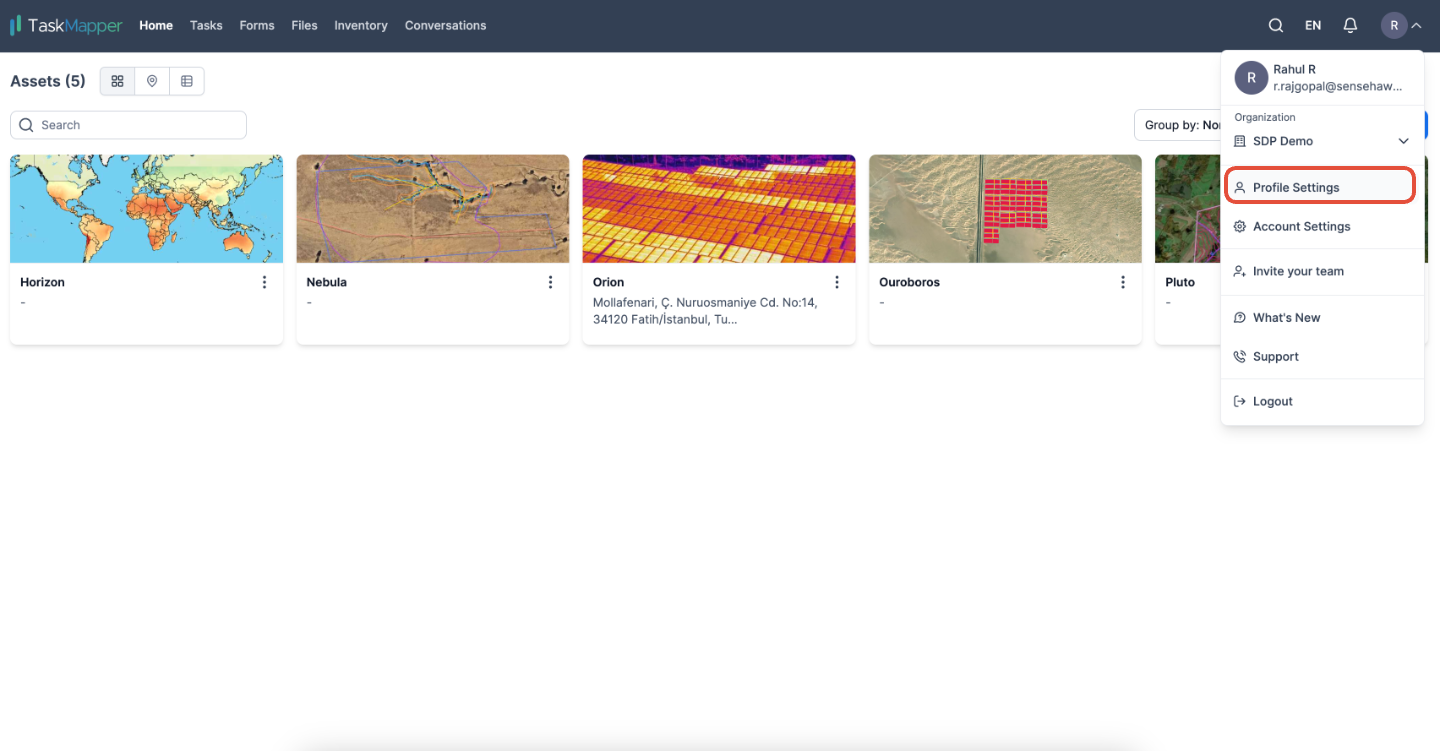
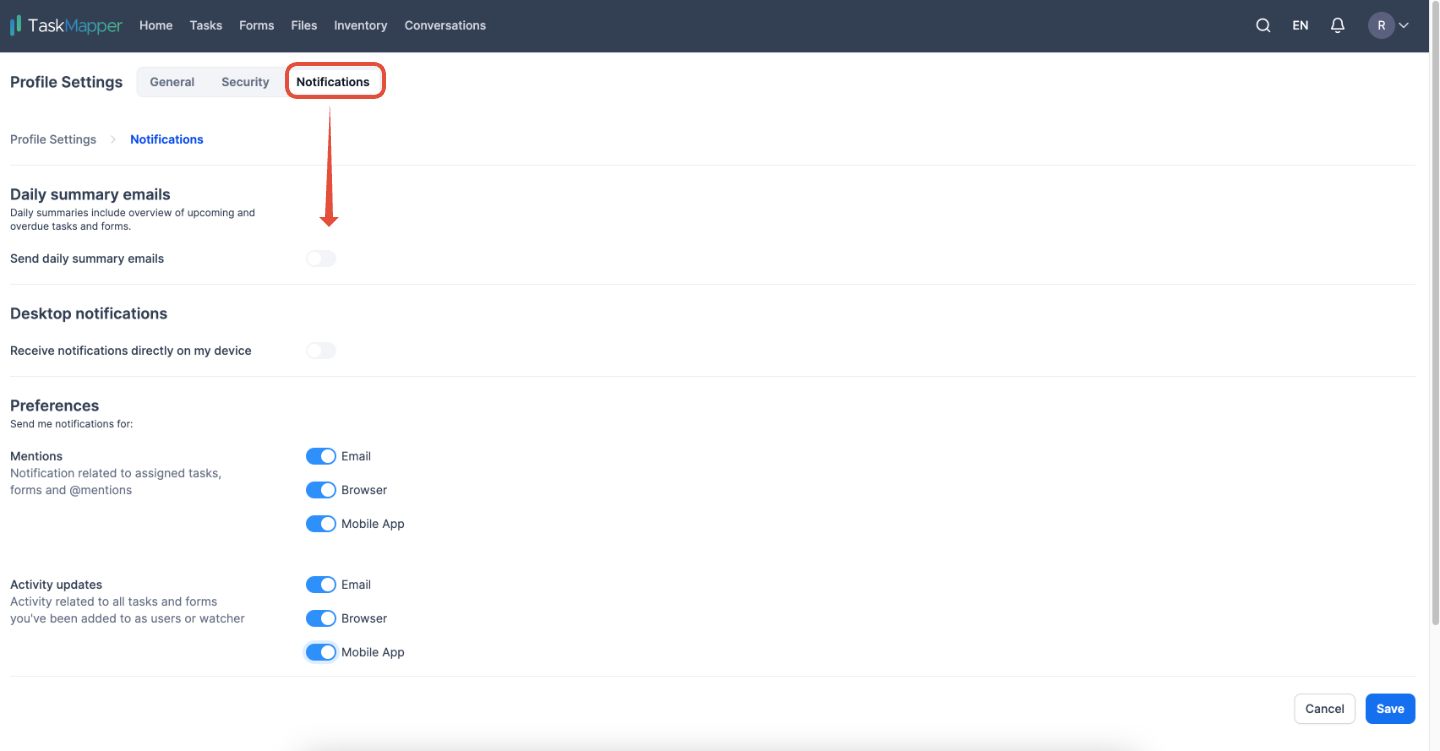
Notifications can be enabled or disabled from the profile settings. Please find the steps below to access notification settings. Profile Settings >> Notifications
How to change a password?
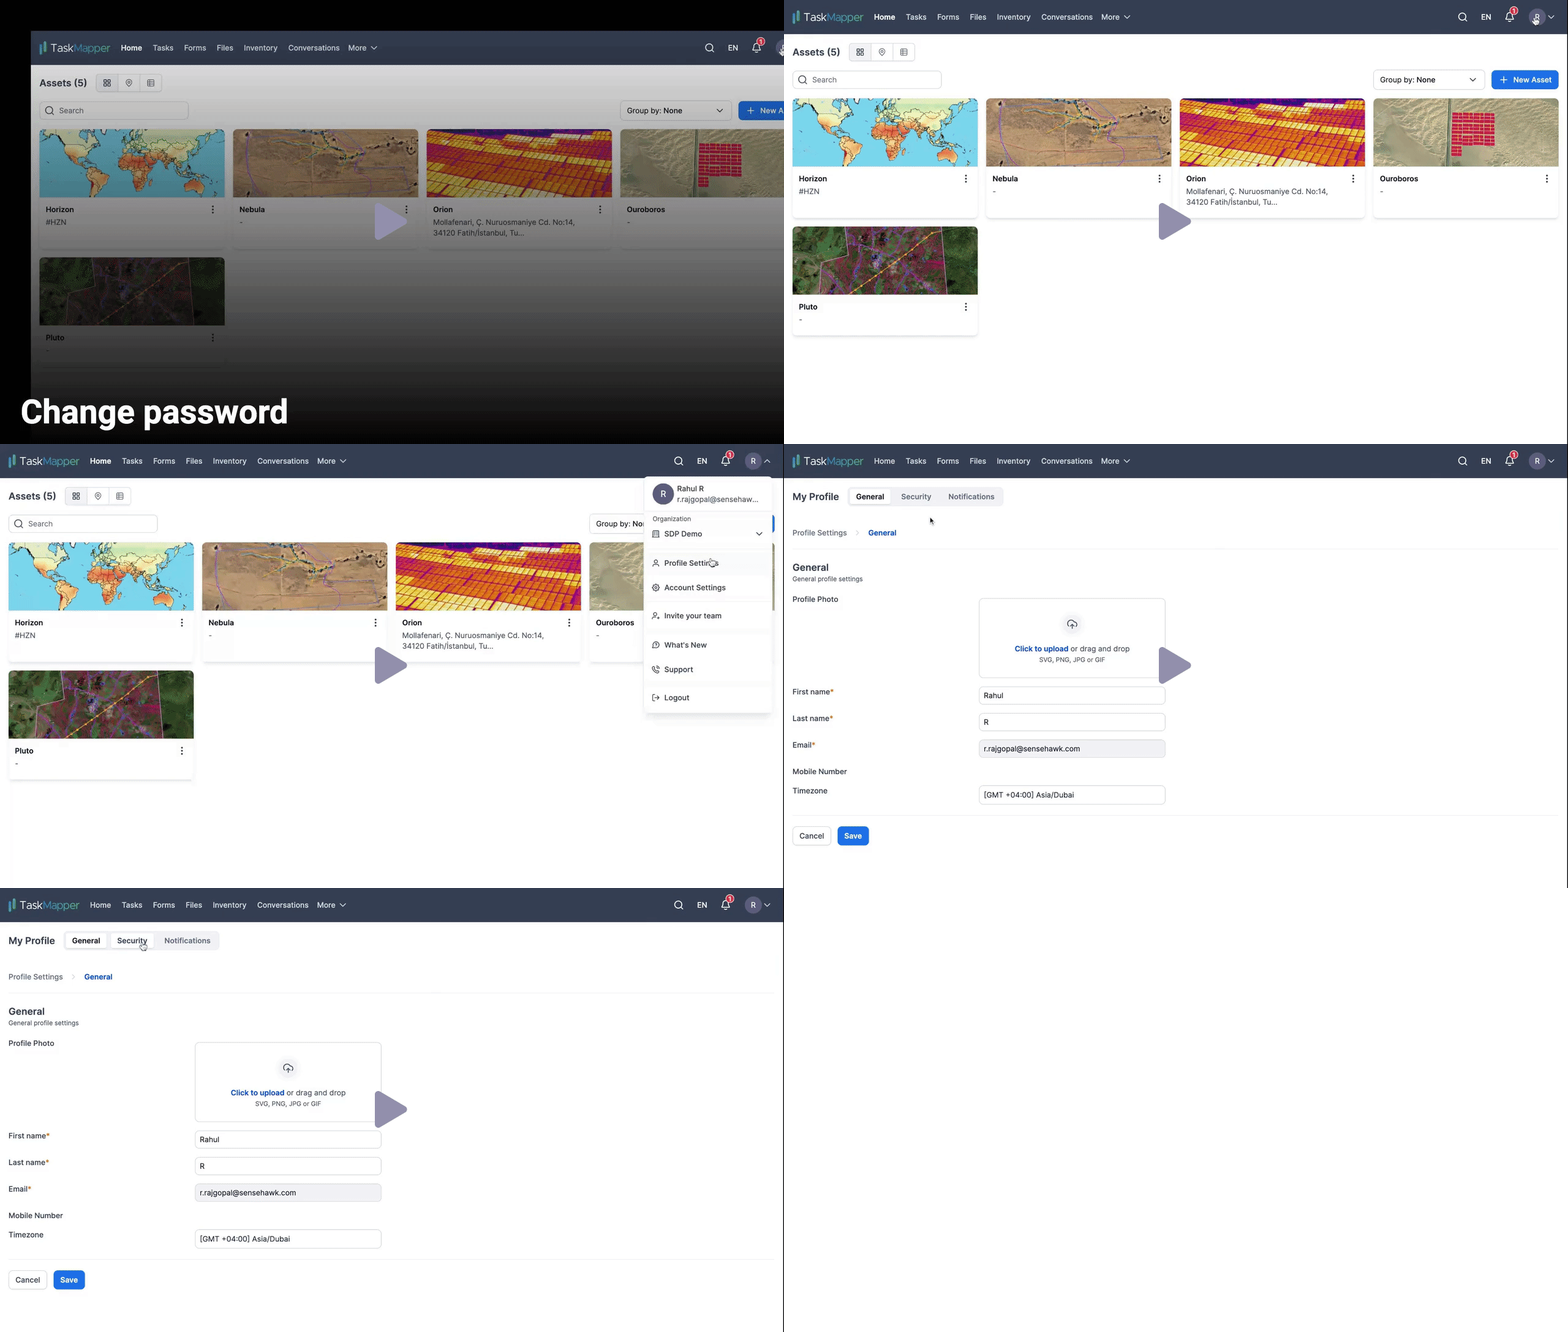
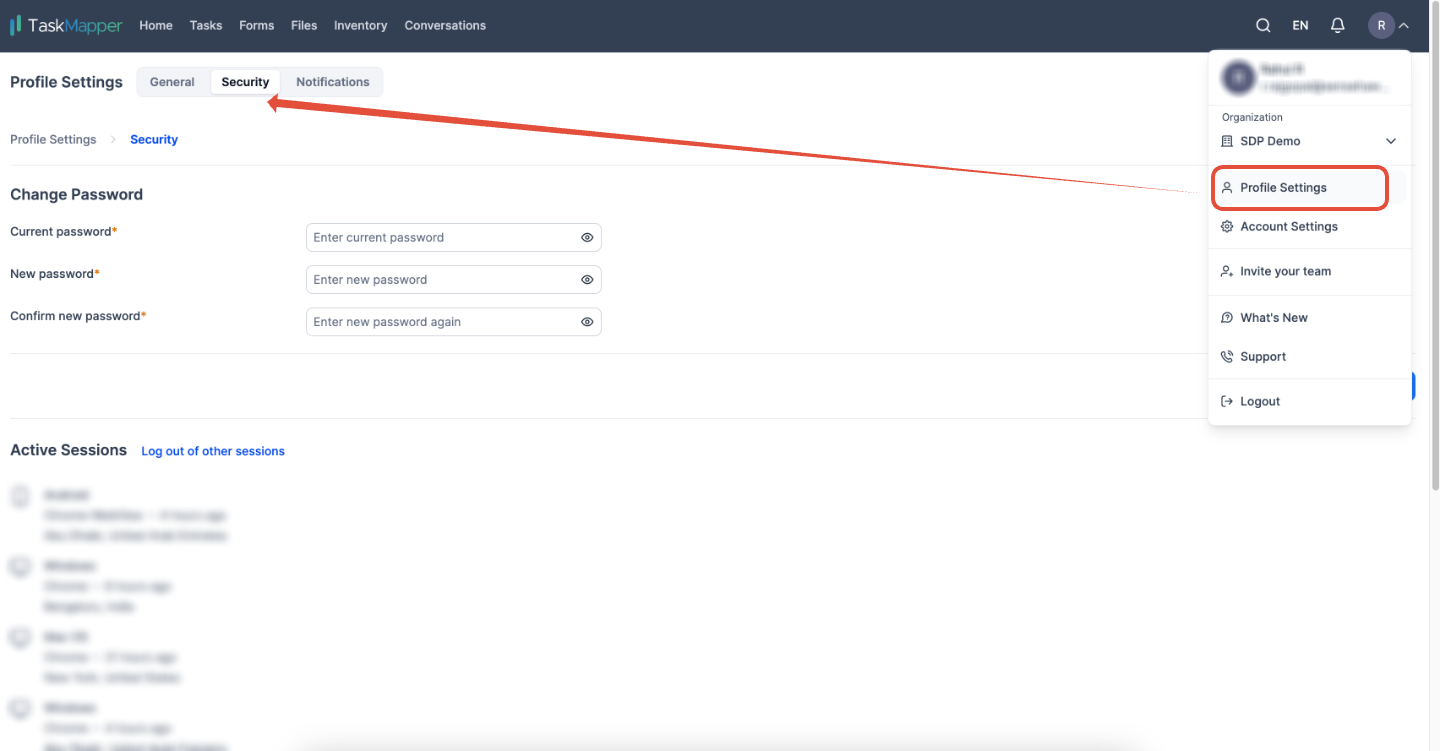
It's advisable to change your password regularly for better security. You can easily change it by accessing your profile settings and selecting the security option. Profile Settings >> Security
How to update your profile?
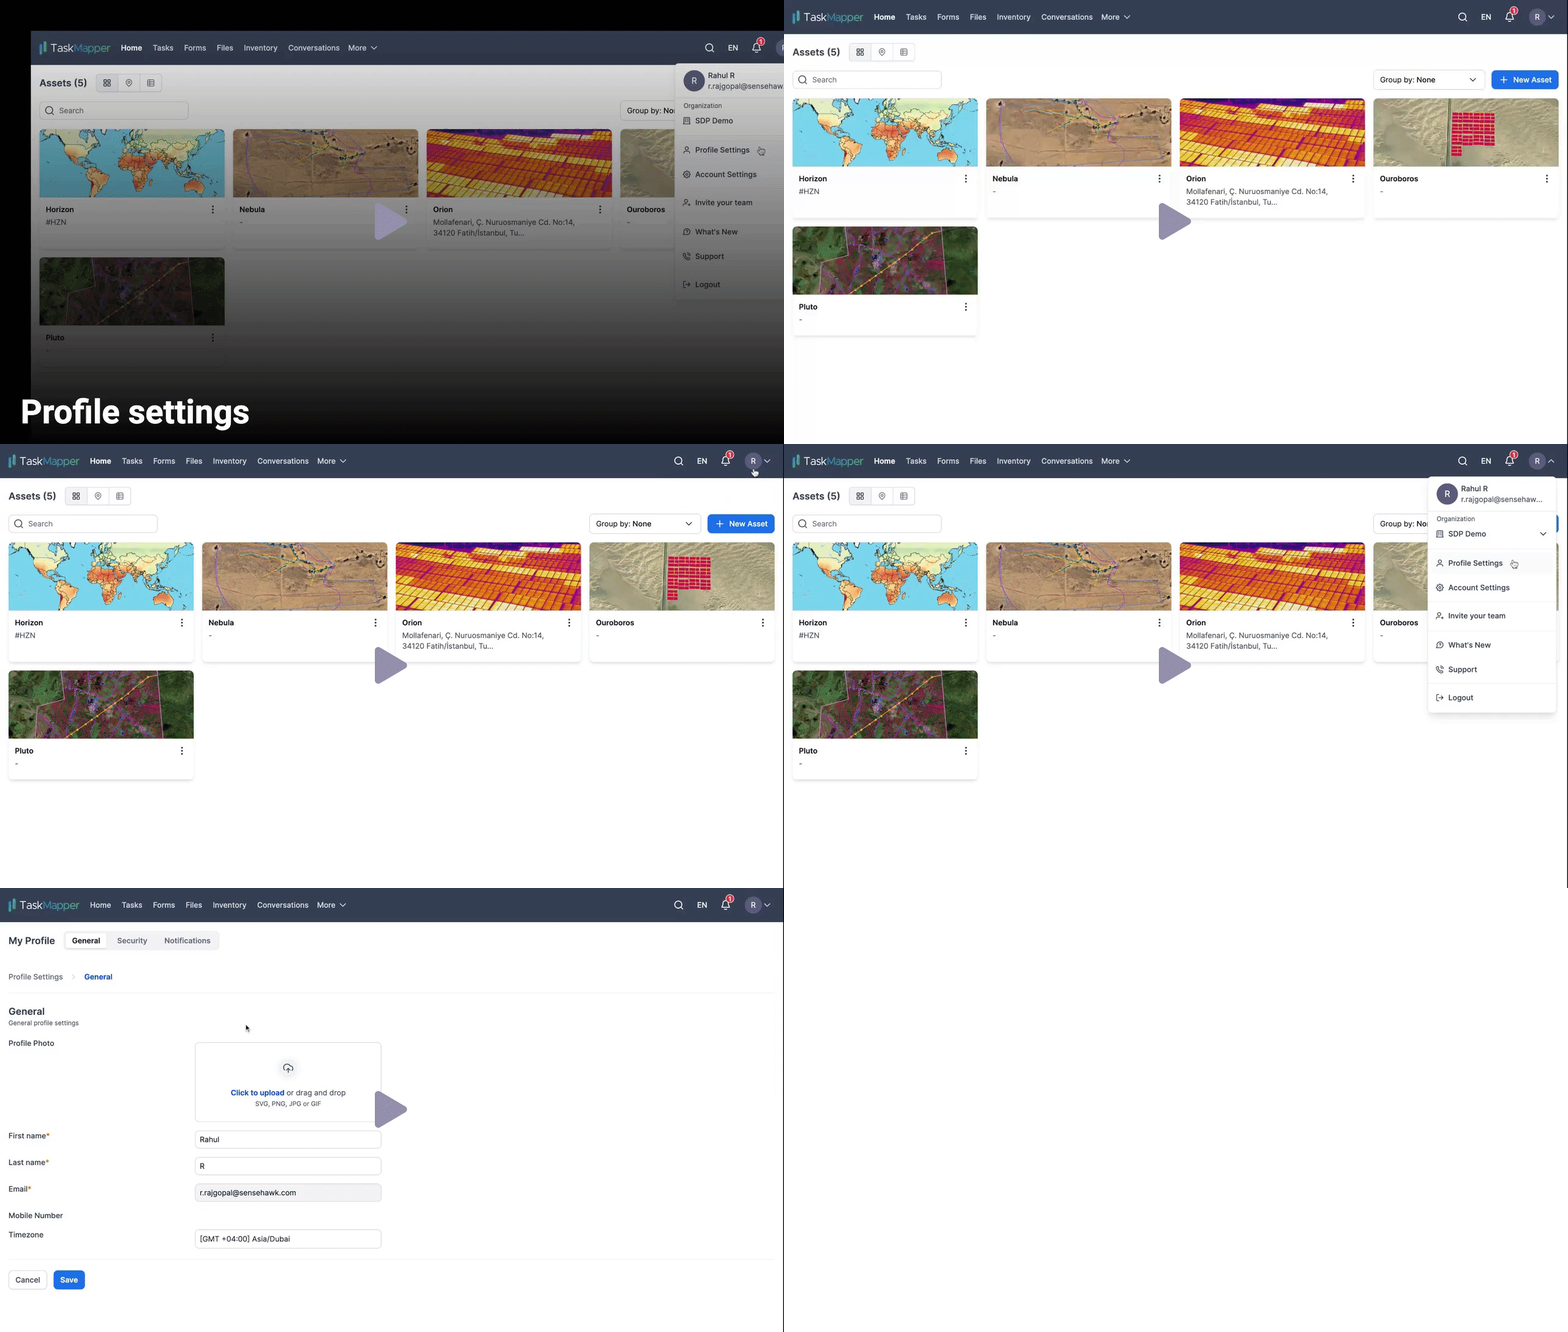
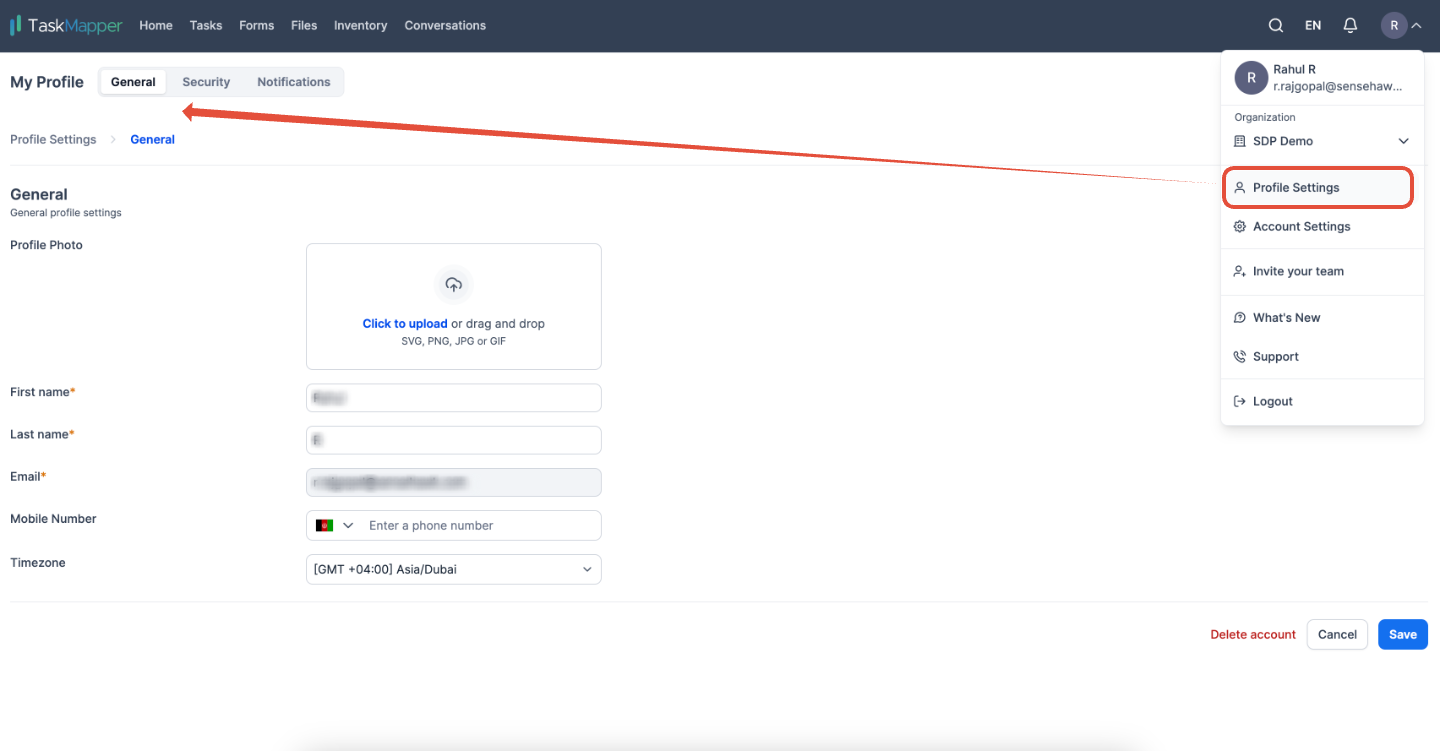
Users can update their profile in the profile settings. Information such as profile photo, first name, last name, email, mobile number and time zone can be updated in Profile settings >> General.
How to update organization details?
Organization details such as organization name, logo and address can be updated in the accounts settings. Account Settings >> General.
How to add and update asset information?
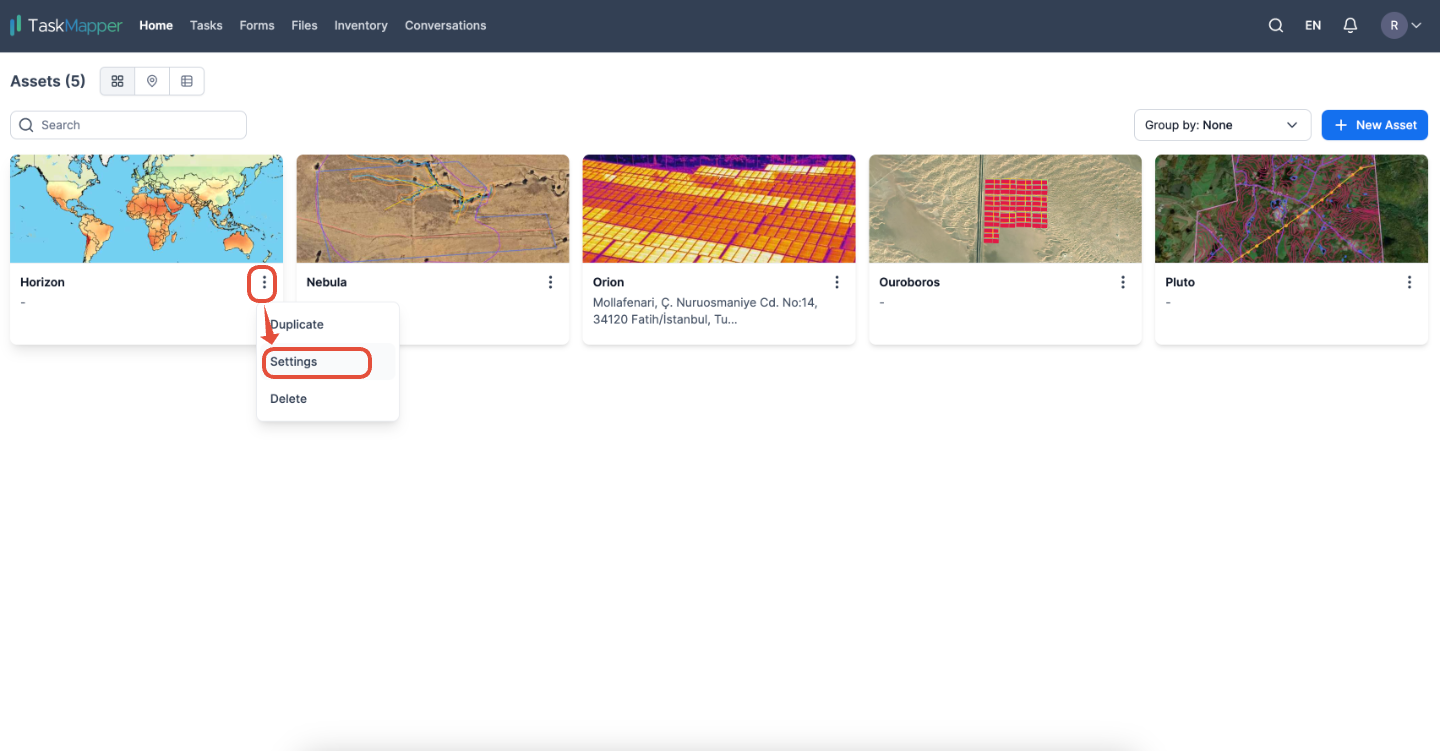
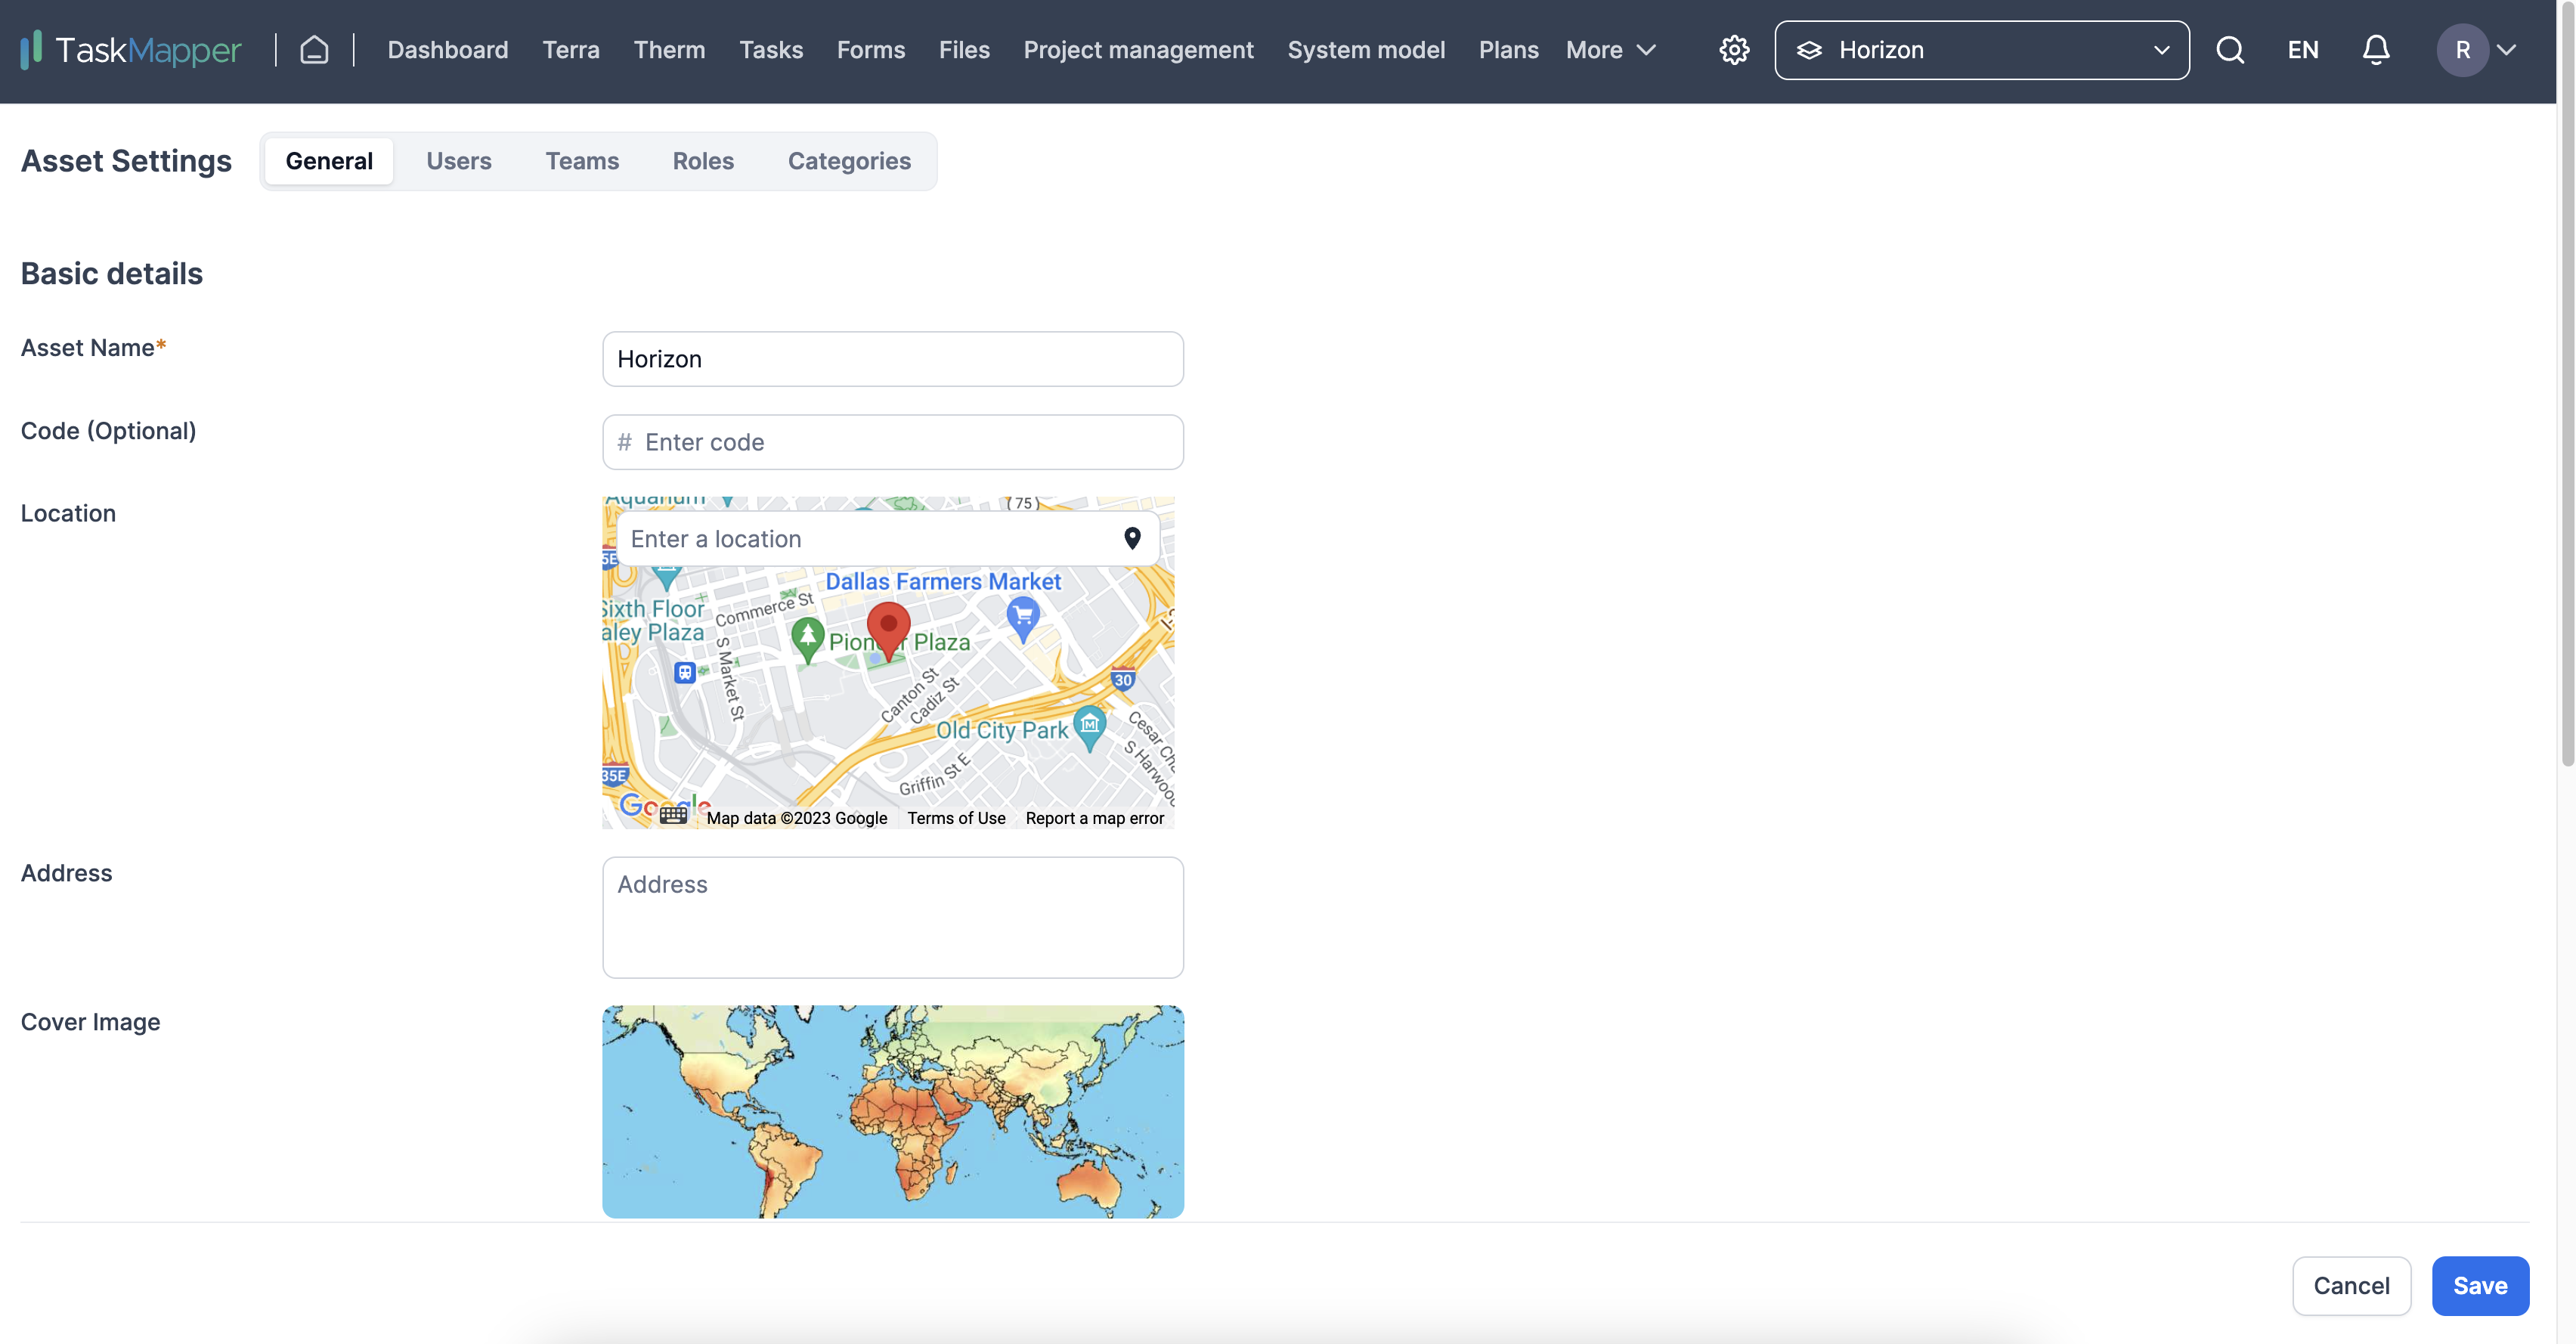
Asset information includes general details and metadata or additional asset details. Below are the steps to update general asset information such as the Asset name, asset cover image, address, and location.
Metadata fields are used to provide additional information about assets. These fields are really helpful because they provide additional information about assets. They're common for all the assets added under an organization, and they're used to describe asset-specific information such as AC & DC capacity, asset area, and asset type (construction, solar, wind, etc.).
NOTE: Asset Metadata fields are also visible in the Asset Dashboard. That's really helpful for keeping track of important information about each asset.
There are several options for fields to include. You can add text fields to input information which also supports alphanumeric values, checkboxes for multiple options, or radio buttons for single selections. You can also include fields for email addresses and mobile numbers. You can add a money field if you need to input monetary values. Dropdown menus can be useful for presenting a list of options, and you can include a URL field to input website addresses. Finally, you can add a date field to collect dates.
How to add categories?
Organizing tasks and Forms can be a daunting task in itself. That's why categories are so helpful. They allow you to sort your tasks and forms into groups, making it easier to navigate, sort and find what you need quickly. You can also create a hierarchy of parent and child categories to improve the structure further.
How to view app notifications?
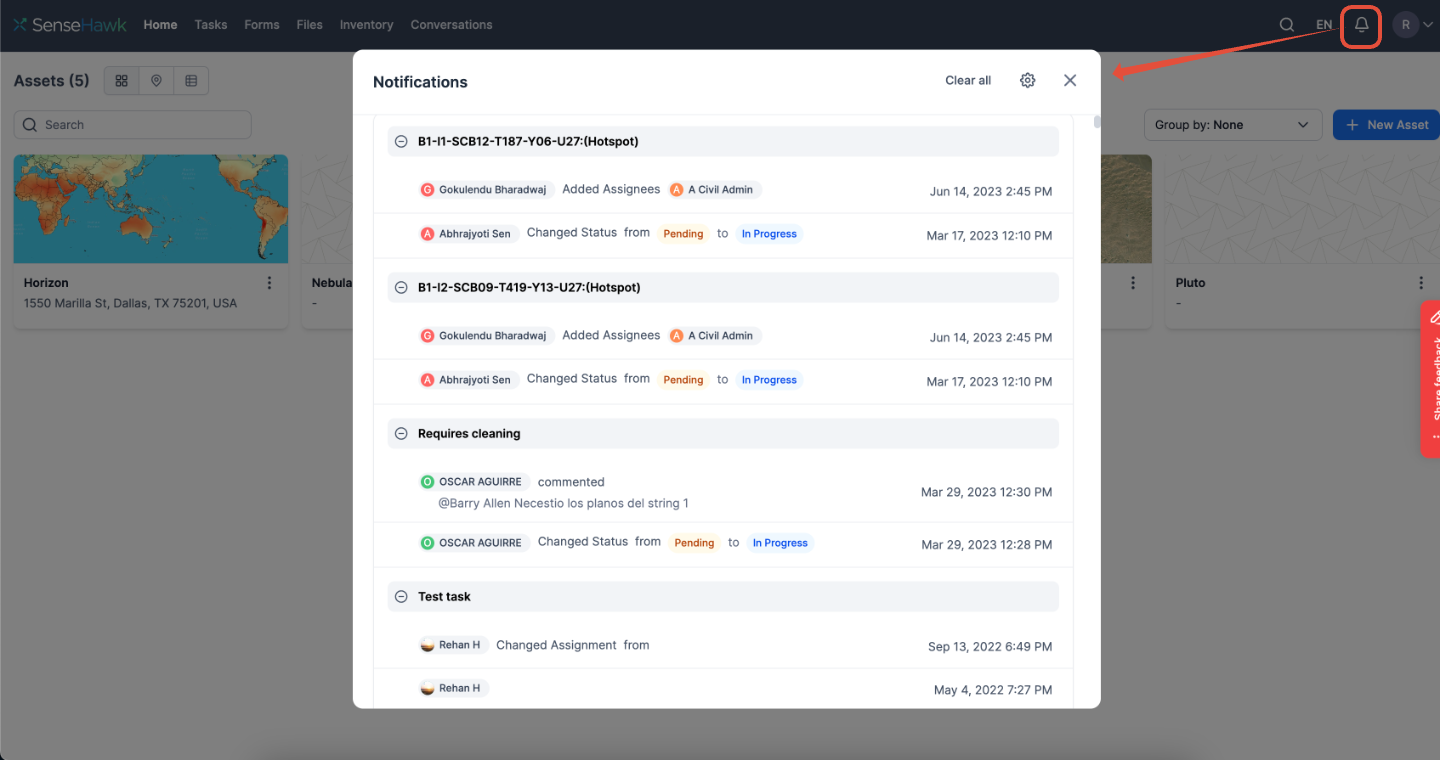
To manage your notification preferences, head to your profile section. From there, you can select the type of notifications you want to receive, which include desktop, email, browser, and mobile app notifications. If you want to check your notifications later on, you can easily access them by clicking on the bell icon next to the search button on your login page.
How to change the default language?
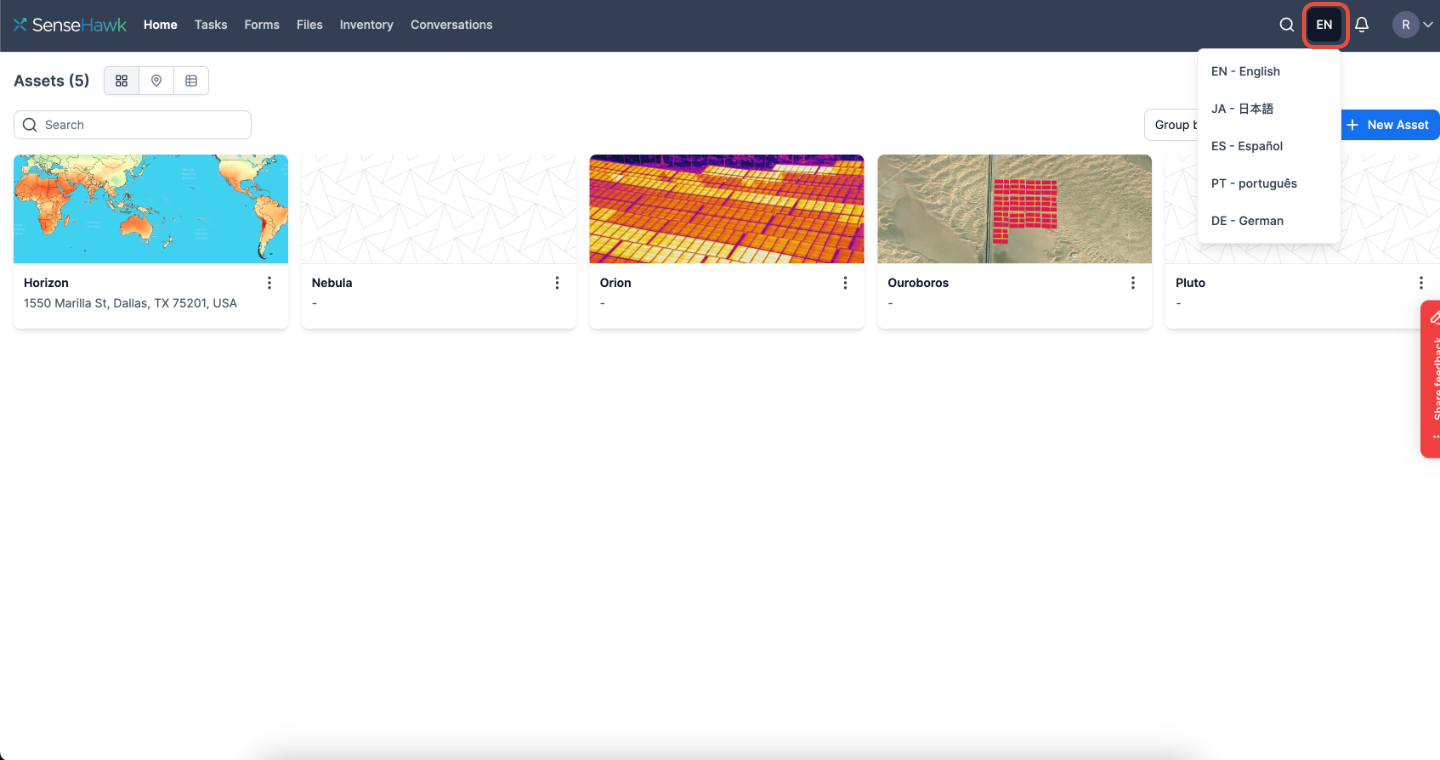
Click the language icon next to the search bar to set your preferred language. You can choose the language you feel most comfortable communicating in from the drop-down menu. It's important to note that TaskMapper supports many languages, including English, Japanese, Spanish, Portuguese, and German. However, TaskMapper can process any text or language you input, regardless of your chosen language.


